
images, printing, and so on. You can complete various operations of the software through the menu.
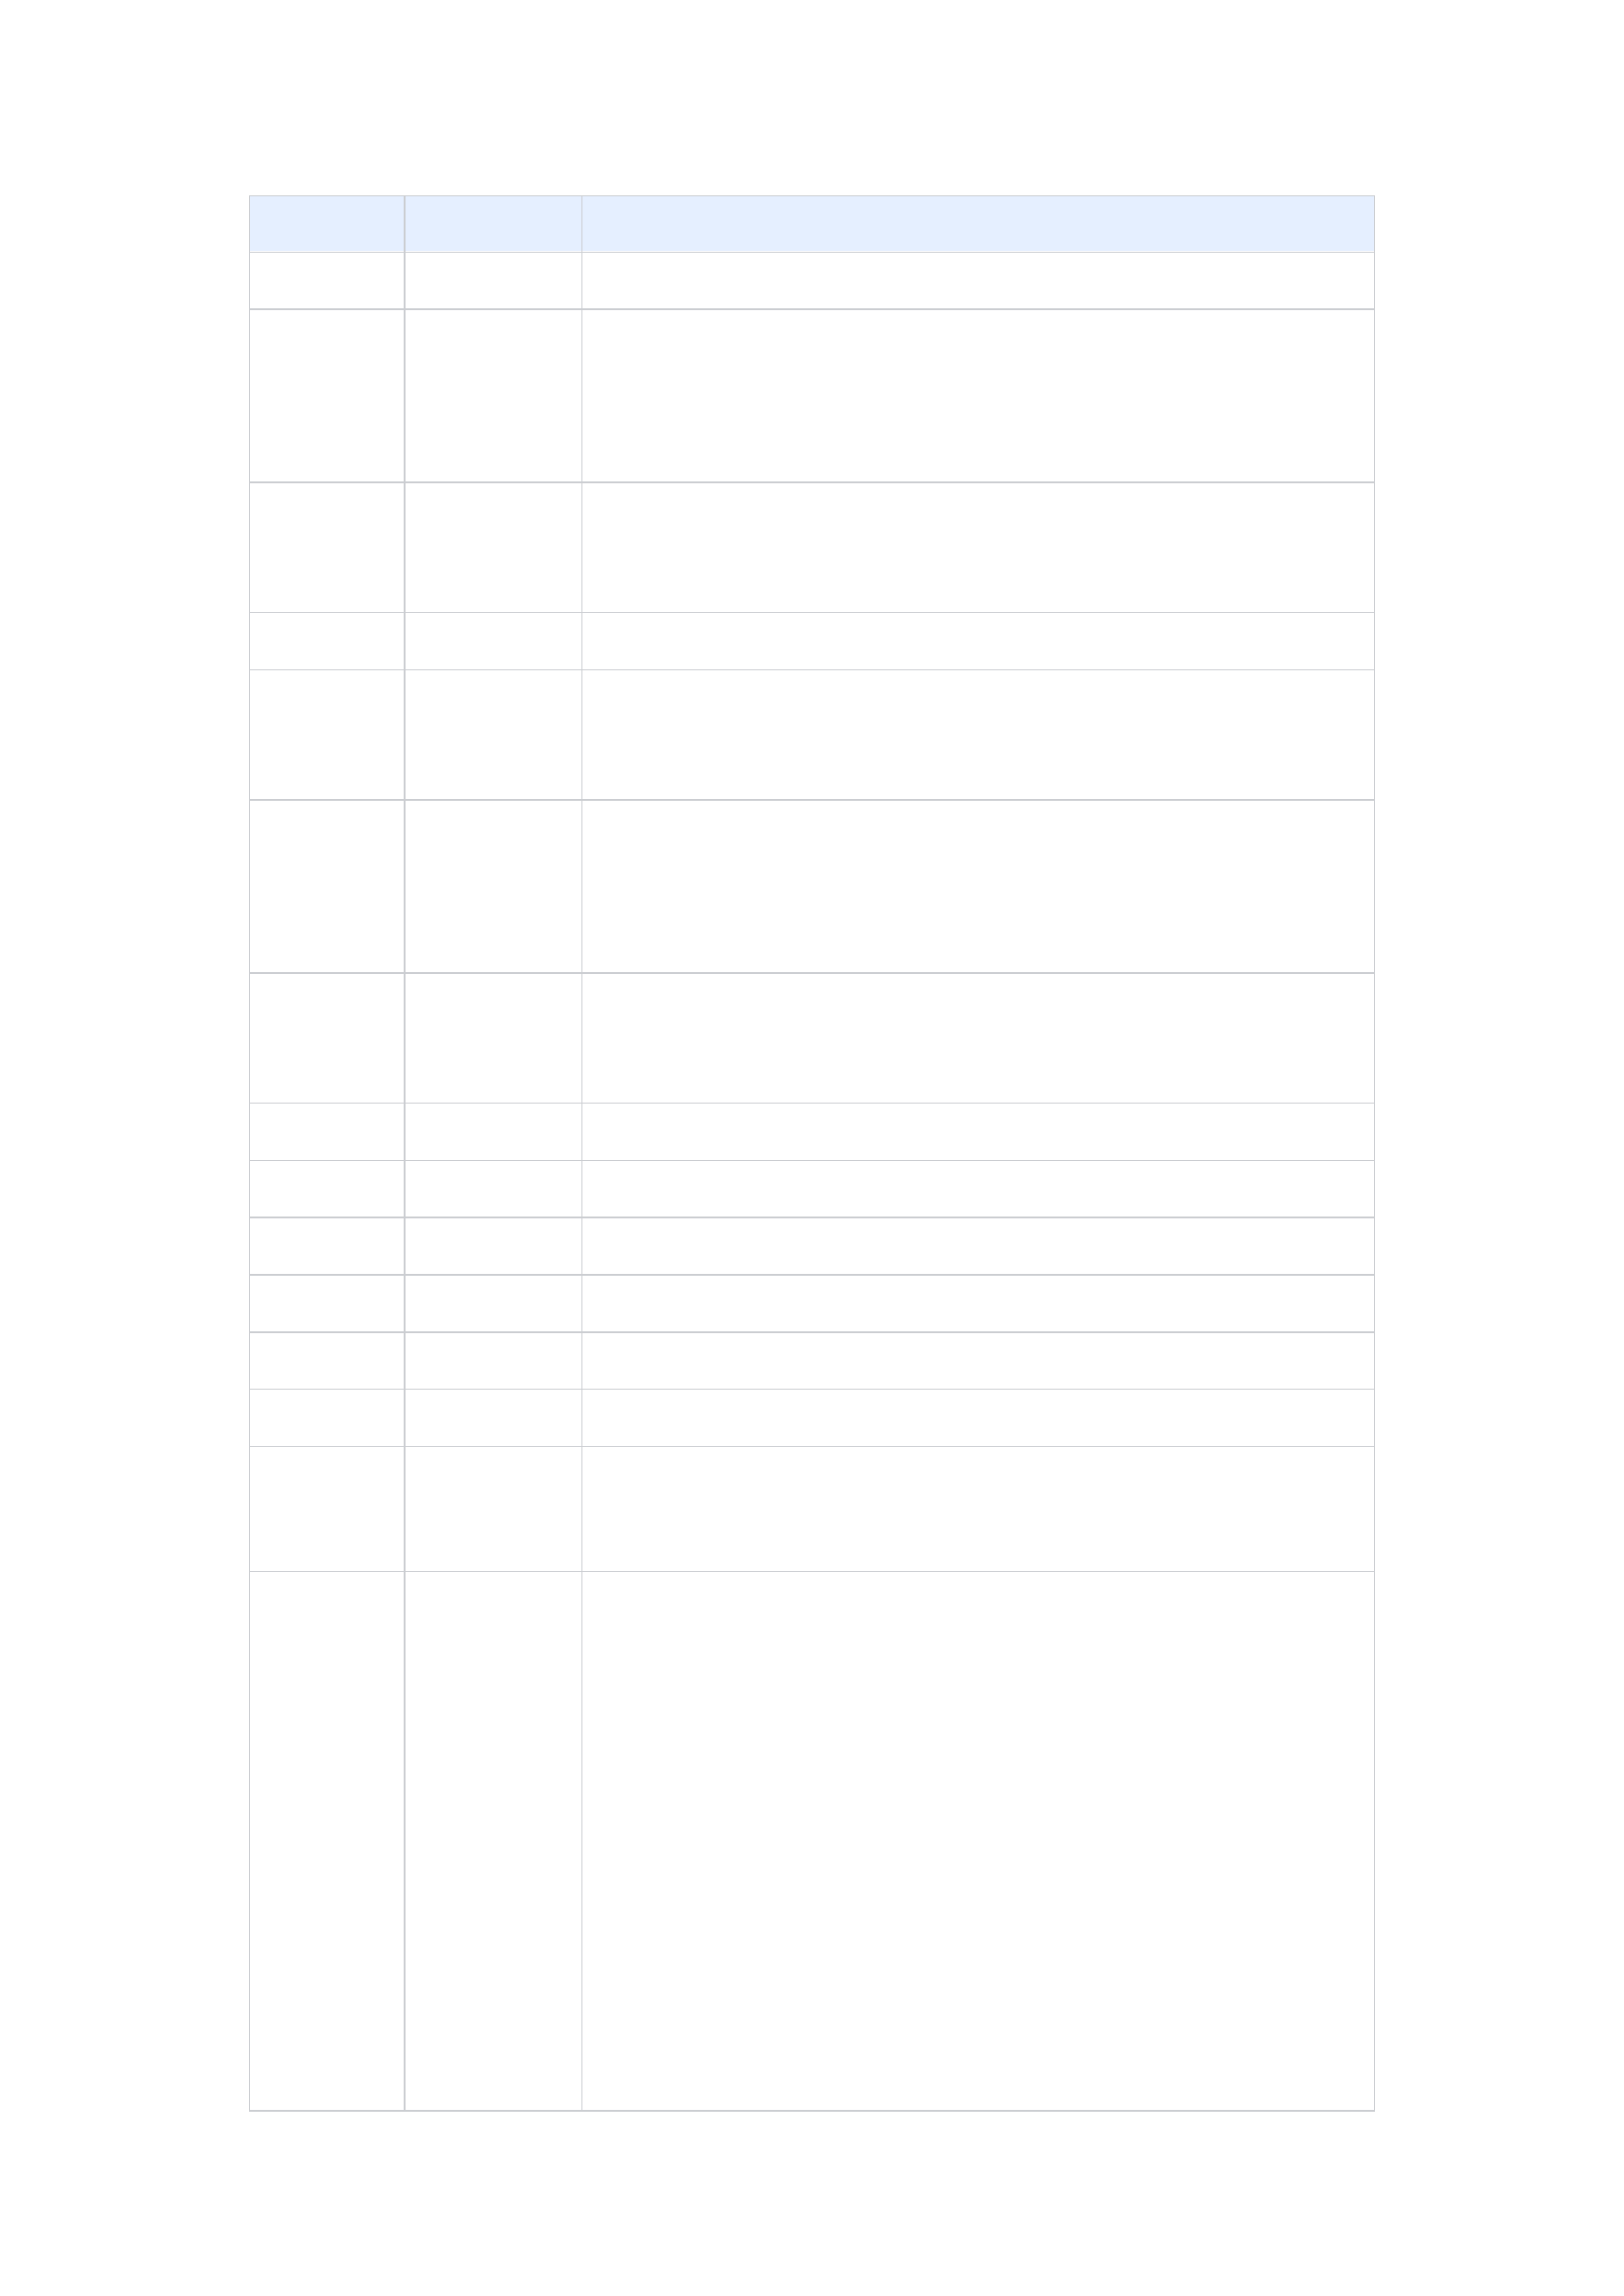
Function
Shortcut Keys
Function Details
New
Save
Print
Import
Undo
Redo
Copy
Paste
Ctrl + N
Ctrl + S
Ctrl + P
Ctrl + O
Ctrl + Z
Ctrl + Y
Ctrl + C
Ctrl+move the
mouse
Ctrl + V
Using this command, you can create a new canvas.
Save the current canvas project with the current name and directory. When you save
the project for the first time, the software will display the save dialog box. The default
directory of the system is the file output directory in the option settings, and it is set
to.rcf or.rcfx format files by default. You can name the canvas project.
The entrance to the print confirmation interface.
Area printing: Print by customizing a proof. For customizing the proof, please refer to
the description of the proof customization operation in the following text.
Import images into the canvas.
Using this command will undo the last editing operation performed. This software
supports multi-level undo. Repeatedly executing the undo command will undo the
previously executed commands one by one. The number of undo steps is not unlimited.
Using this command restores the actions that were previously undone with the undo
command. If a command has been undone and new operations have been performed,
the redo command will not allow the re-execution of the previously undone actions.
The number of redo steps is not unlimited.
Copy the selected image(s) in the current canvas project.
Paste the copied image onto the current canvas.
Copy+Paste
Ctrl + D
One-click to achieve copy and paste.
Delete
Delete
Delete the selected image(s) from the canvas.
Group
Ctrl + G
Combine the two or more selected images into one image.
Ungroup
Ctrl + U
Ungroup the combined image back into the individual images before combination.
Split Image
Fill
Layout
Alt + S
/
Alt + L
Divide one image into multiple images as desired.
Fill the vector graphics such as rectangles and ellipses with the color you want.
Fill the vector rectangle with a picture. Under a fixed size, the picture can be
ensured to be distortion-free.
The entrance to use the typesetting tools.
The typesetting frame contains element position information such as the
X-coordinate, Y-coordinate, width, height of the graphic element, and the aspect
ratio constraint; one-dimensional typesetting information for horizontal and
vertical distribution of graphic elements, and two-dimensional typesetting
information for automatic typesetting;
typesetting functions for graphic elements, including left alignment, horizontal
centering, right alignment, top alignment, vertical centering, bottom alignment,
horizontal centering, and vertical centering; operation functions for graphic
elements, such as rotating left, rotating right, horizontal mirroring, vertical
mirroring, moving up one layer, moving down one layer, equal width, and equal
height.
9
 help-Eng")
 help-Eng")
 help-Eng")
 help-Eng")
 help-Eng")
 help-Eng")
 help-Eng")
 help-Eng")
 help-Eng")
 help-Eng")
 help-Eng")
 help-Eng")
 help-Eng")
 help-Eng")
 help-Eng")
 help-Eng")
 help-Eng")
 help-Eng")
 help-Eng")
 help-Eng")
 help-Eng")
 help-Eng")
 help-Eng")
 help-Eng")
 help-Eng")
 help-Eng")
 help-Eng")
 help-Eng")
 help-Eng")
 help-Eng")
 help-Eng")
 help-Eng")
 help-Eng")
 help-Eng")
 help-Eng")
 help-Eng")
 help-Eng")
 help-Eng")
 help-Eng")
 help-Eng")
 help-Eng")
 help-Eng")
 help-Eng")
 help-Eng")
 help-Eng")
 help-Eng")
 help-Eng")
 help-Eng")
 help-Eng")
 help-Eng")
 help-Eng")
 help-Eng")
 help-Eng")
 help-Eng")
 help-Eng")
 help-Eng")
 help-Eng")
 help-Eng")
 help-Eng")
 help-Eng")
 help-Eng")
 help-Eng")
 help-Eng")