PARTIAL PROTOTYPING: USING A TEST PIECE
MEASURE AND SCALE
Before beginning the digital/physical alignment
process, review “How to Digitally Dial In Joinery
Fit” on page 131. Because we’re still getting
started and this is your first time using the test
piece, we’ll go through the process in detail so
it’s clearly explained for subsequent projects.
MEASURE MATERIAL
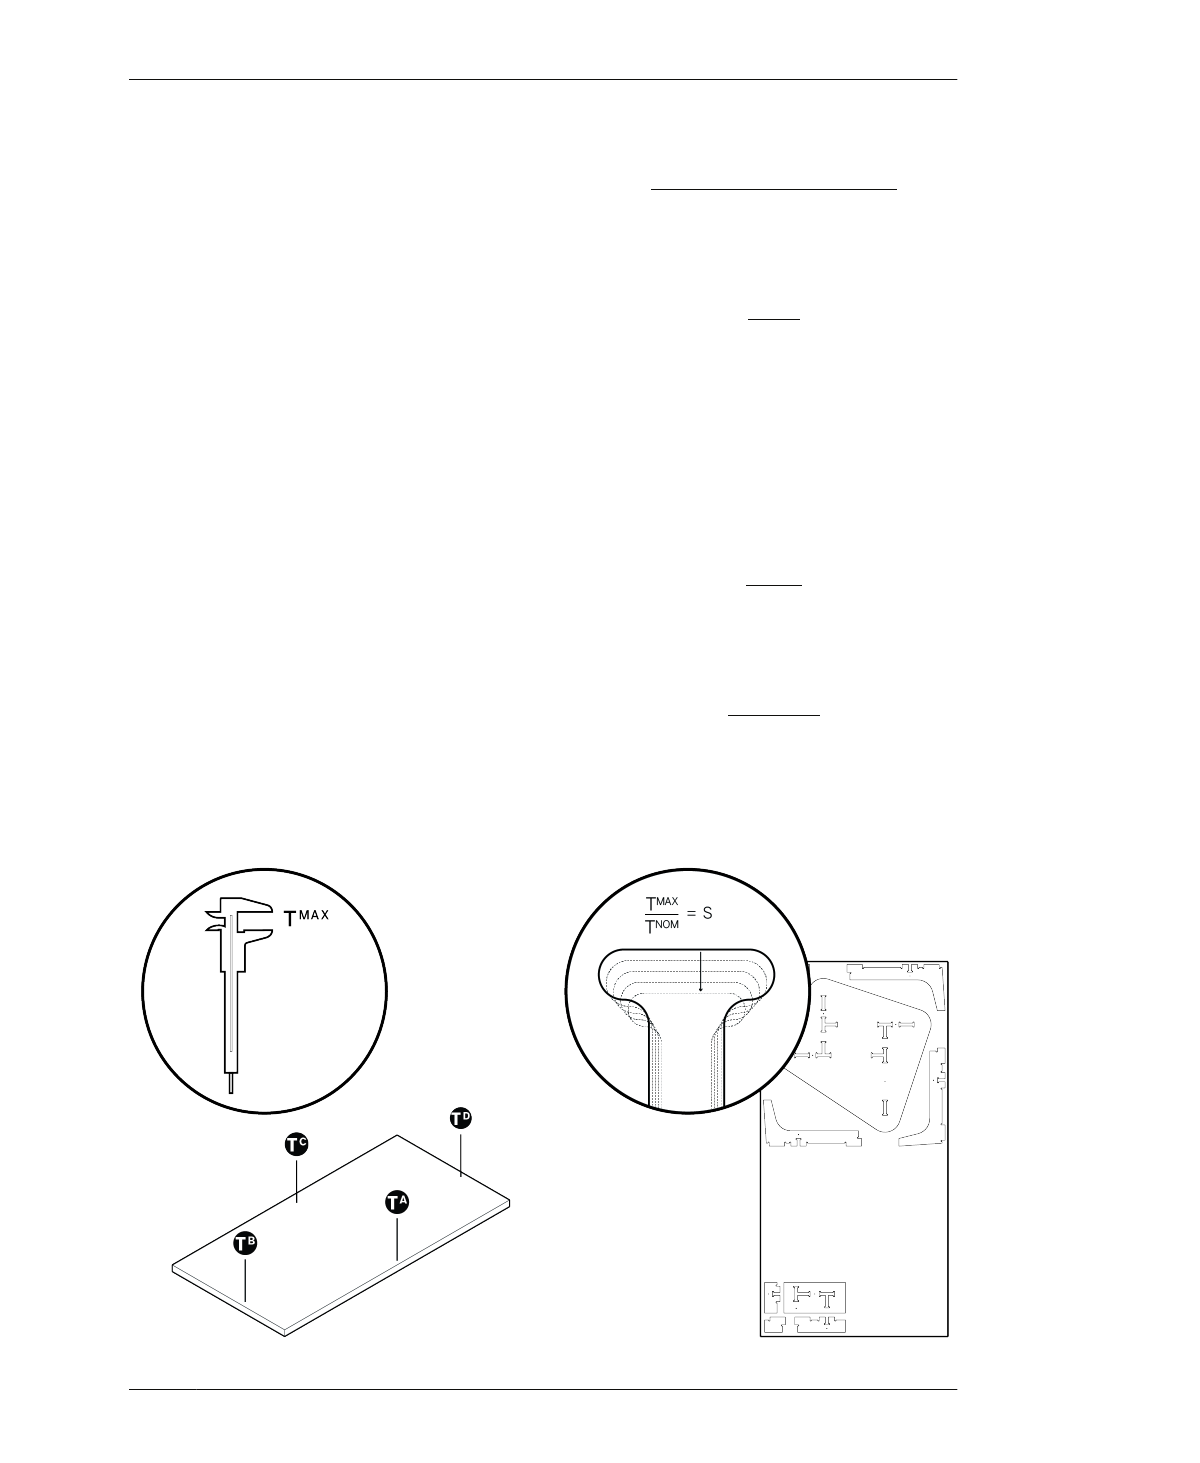
01: Once you have the sheet goods for your
table, you’ll need to accurately measure the
material’s thickness with calipers at several
points (TA, TB, TC, TD), shown in Figure 9-3.
02: Record each thickness measurement as
you take it, the largest measurement is TMAX—
your actual material thickness.
To visualize this relationship as an equation:
S
=
Actual Material Thickness
Nominal Material Thickness
Or:
S
=
TMAX
TNOM
Remember that for the nominal ¾″ material
used in this project, TNOM is equal to 19mm (or
0.748031 inches).
Plugging TNOM into the metric equation looks
like this:
S
=
TMAX
19mm
SCALE TEST PIECE CAD FILE
Next, you’ll divide TMAX by TNOM to define your
file scaling percentage or S. You’ll scale the Cat
in Bag ii CAD files by S to match your material
thickness, starting with the vectors in the Cat in
Bag ii test piece file (AtFAB_CiBii_TEST.skp).
And here’s the Imperial equivalent:
S
=
TMAX
0.748031”
03: Open the AtFAB_CiBii_TEST.skp CAD file in
SketchUp.
FIGURE 9-3
How to measure and
scale file
09/CAT IN BAG II TABLE
213
