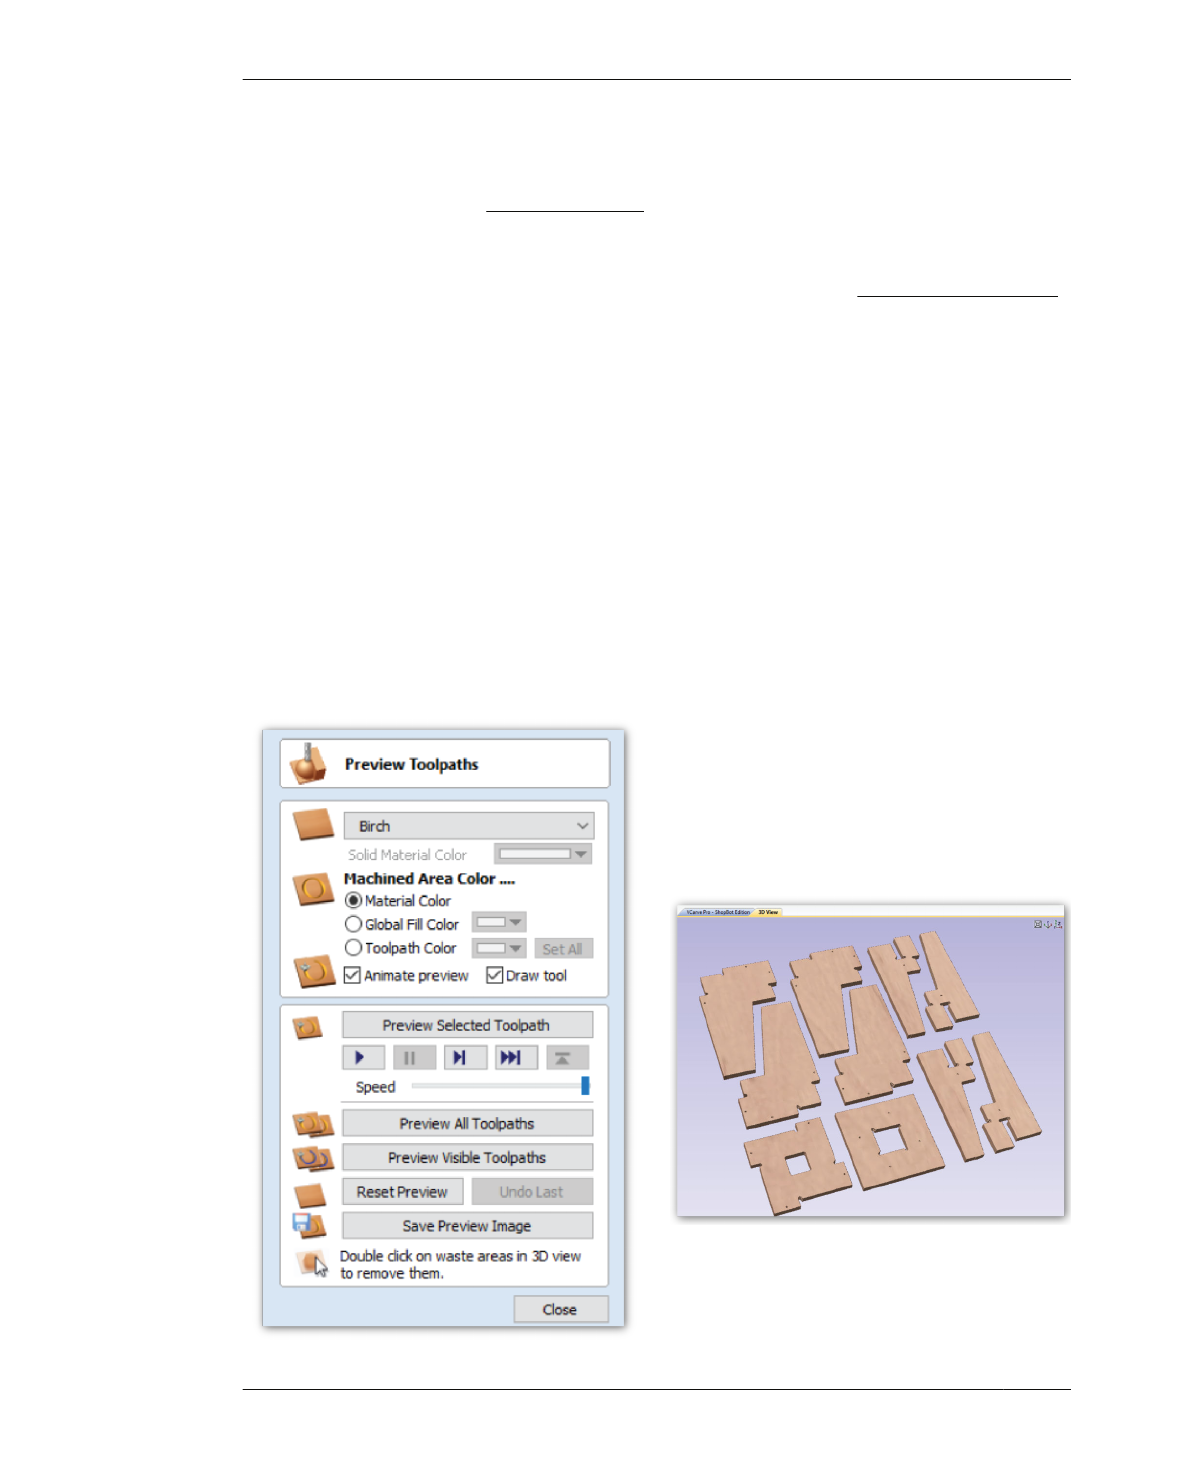
FIGURE 7-46
Visualization Menu
SIMULATION AND ANALYSIS
time-consuming, irreversible, costly mistake—
compared to a misspelling on the page.
VISUALIZE AND ANALYZE
Using multiple kinds of visualization will help
you catch errors made earlier in the workflow
or design process, before you fabricate them.
Experiment with VCarve’s various simulation
and visualization features in the 3D view.
Animated Simulation
35A: Run the animated preview again, but
now with all three toolpaths in the correct
order.
35B: Speed up or slow down the animation so
that you can follow the cutting process.
3D Views
35C: Zoom, pan, and rotate the view to see all
parts.
35D: Use Remove Waste Material to examine
the cut parts on their own.
35E: Turn on 2D Profiles to study cut parts rel-
ative to the original vectors.
QUALITY CONTROL
VCarve’s simulation features help you antici-
pate and plan for critical moments in the fabri-
cation process, such as the time it takes each
pass to complete, when the machine stops for
manual end-mill changes, and the order of
parts completion.
36A: Use the simulations to check that all
parts, including sniglets, are shaped properly,
and that the tool cuts every part out in its
entirety.
36B: Is your end-mill diameter too big? Will it
obliterate small details?
36C: Determine whether the tool is cutting
through the material and that all parts are
included in the cut sequence. If you find errors,
you can either adjust your design or increase
your tool size and re-simulate before actually
cutting.
196
DESIGN FOR CNC
FIGURE 7-47 Visualization of cut parts on their own
