FASTENER HOLE TOOLPATHS
This makes it a little confusing to note what
menu an operation is under. To clarify, we’ll ref-
erence the Toolpaths menu as a top-level menu
and then use an arrow to indicate the option
grouping in that menu (e.g., Toolpaths→Tool-
path Operations), just like we have done previ-
ously for other top-level menus.
FASTENER HOLE TOOLPATHS
First, you’ll define toolpath settings for the fas-
tener holes, sized for the fasteners that will be
used to hold the parts of the stool together.
These steps walk you through defining an
inside toopath for a smaller 1⁄8″ end mill, which
will cut all the way through the material.
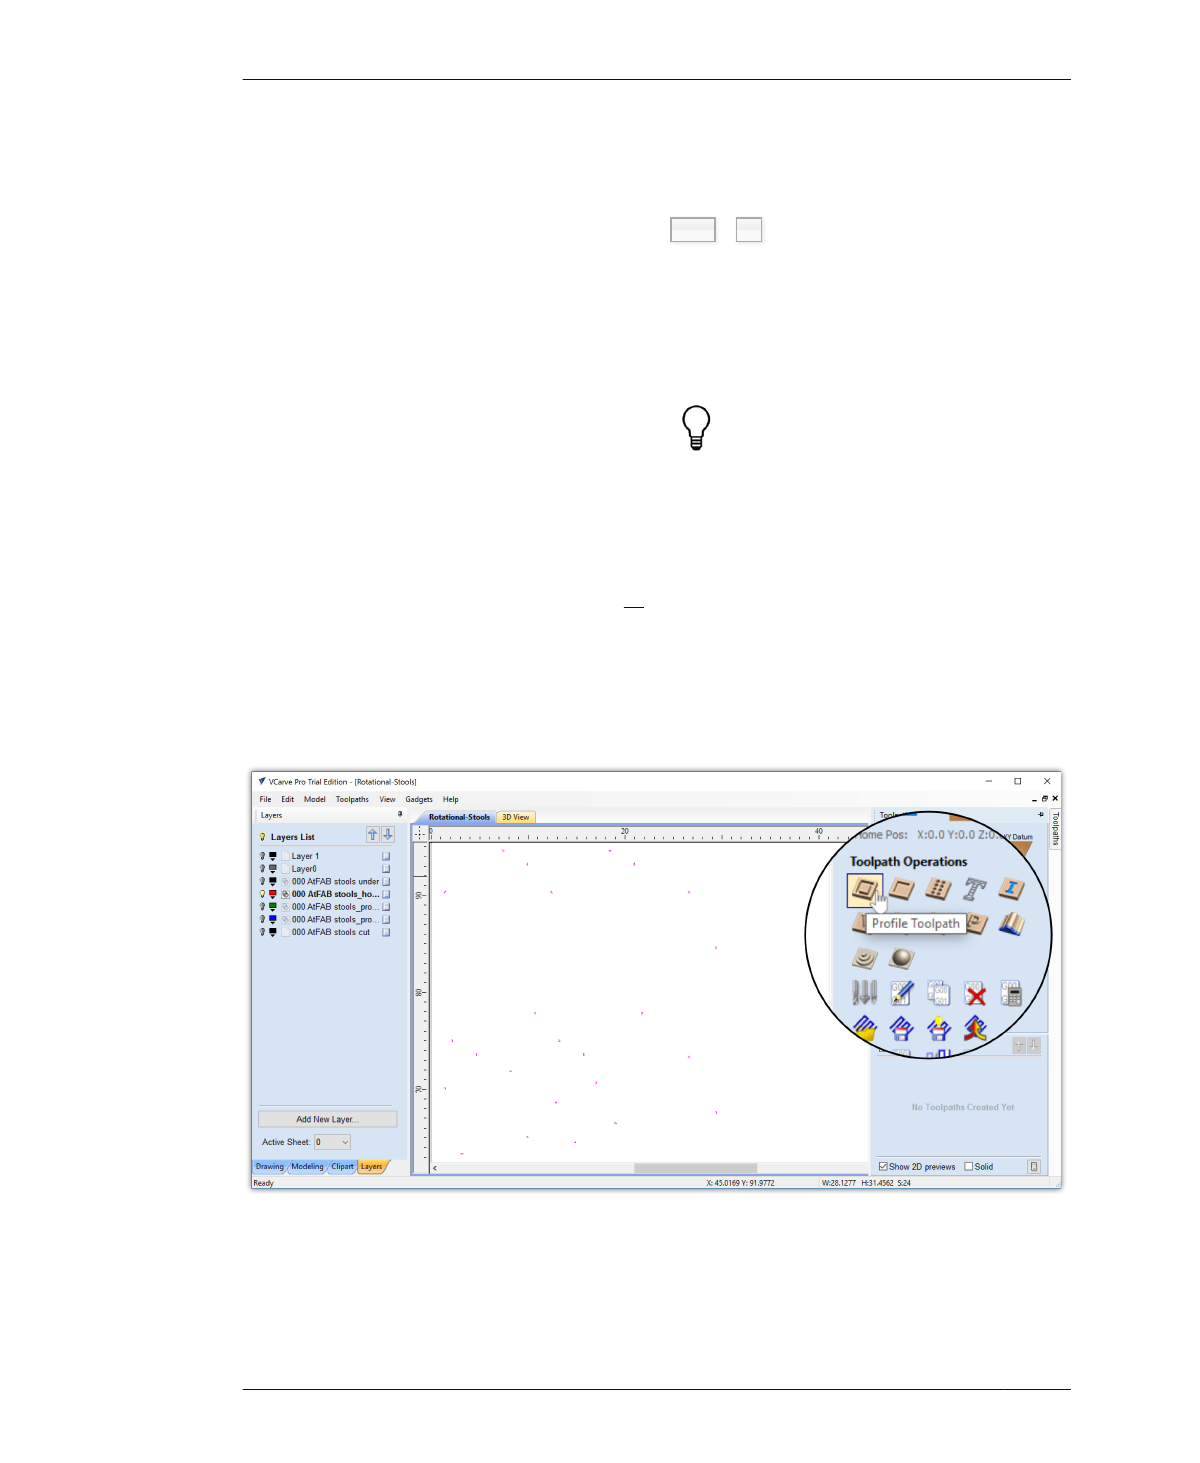
18B: Turn on the Profile Holes layer and turn
all other layers off.
18C: Select all vectors on the Holes layer,
Ctrl + A .
18D: To define a toolpath type, select Toolpath
Operations→Profile Toolpath to open the 2D
Toolpath menu, as shown in Figure 7-25.
Figure 7-26 shows the 2D Toolpath menu.
There’s a little thumbtack icon at the top right
of both the blue sidebar menus. Click it to
“pin” the menu open—or unpin it to increase
the size of the file-viewing area.
SELECT PROFILE TOOLPATH OPERATION
18A: Click the Toolpath tab on the right-hand
side of the screen to open the Toolpaths blue
side menu.
FIGURE 7-25
With the Holes layer
isolated, select all vec-
tors and click the Pro-
file Toolpath icon
182
DESIGN FOR CNC
