
EzCad2UNI User’s Manual
Figure 8-5-4 rotary marking dialog box
Step 5: Click button Param(F3) or press key F3 to setup configuration parameters.
Step 6: Click button Mark(F2) or press key F2 to start the job.
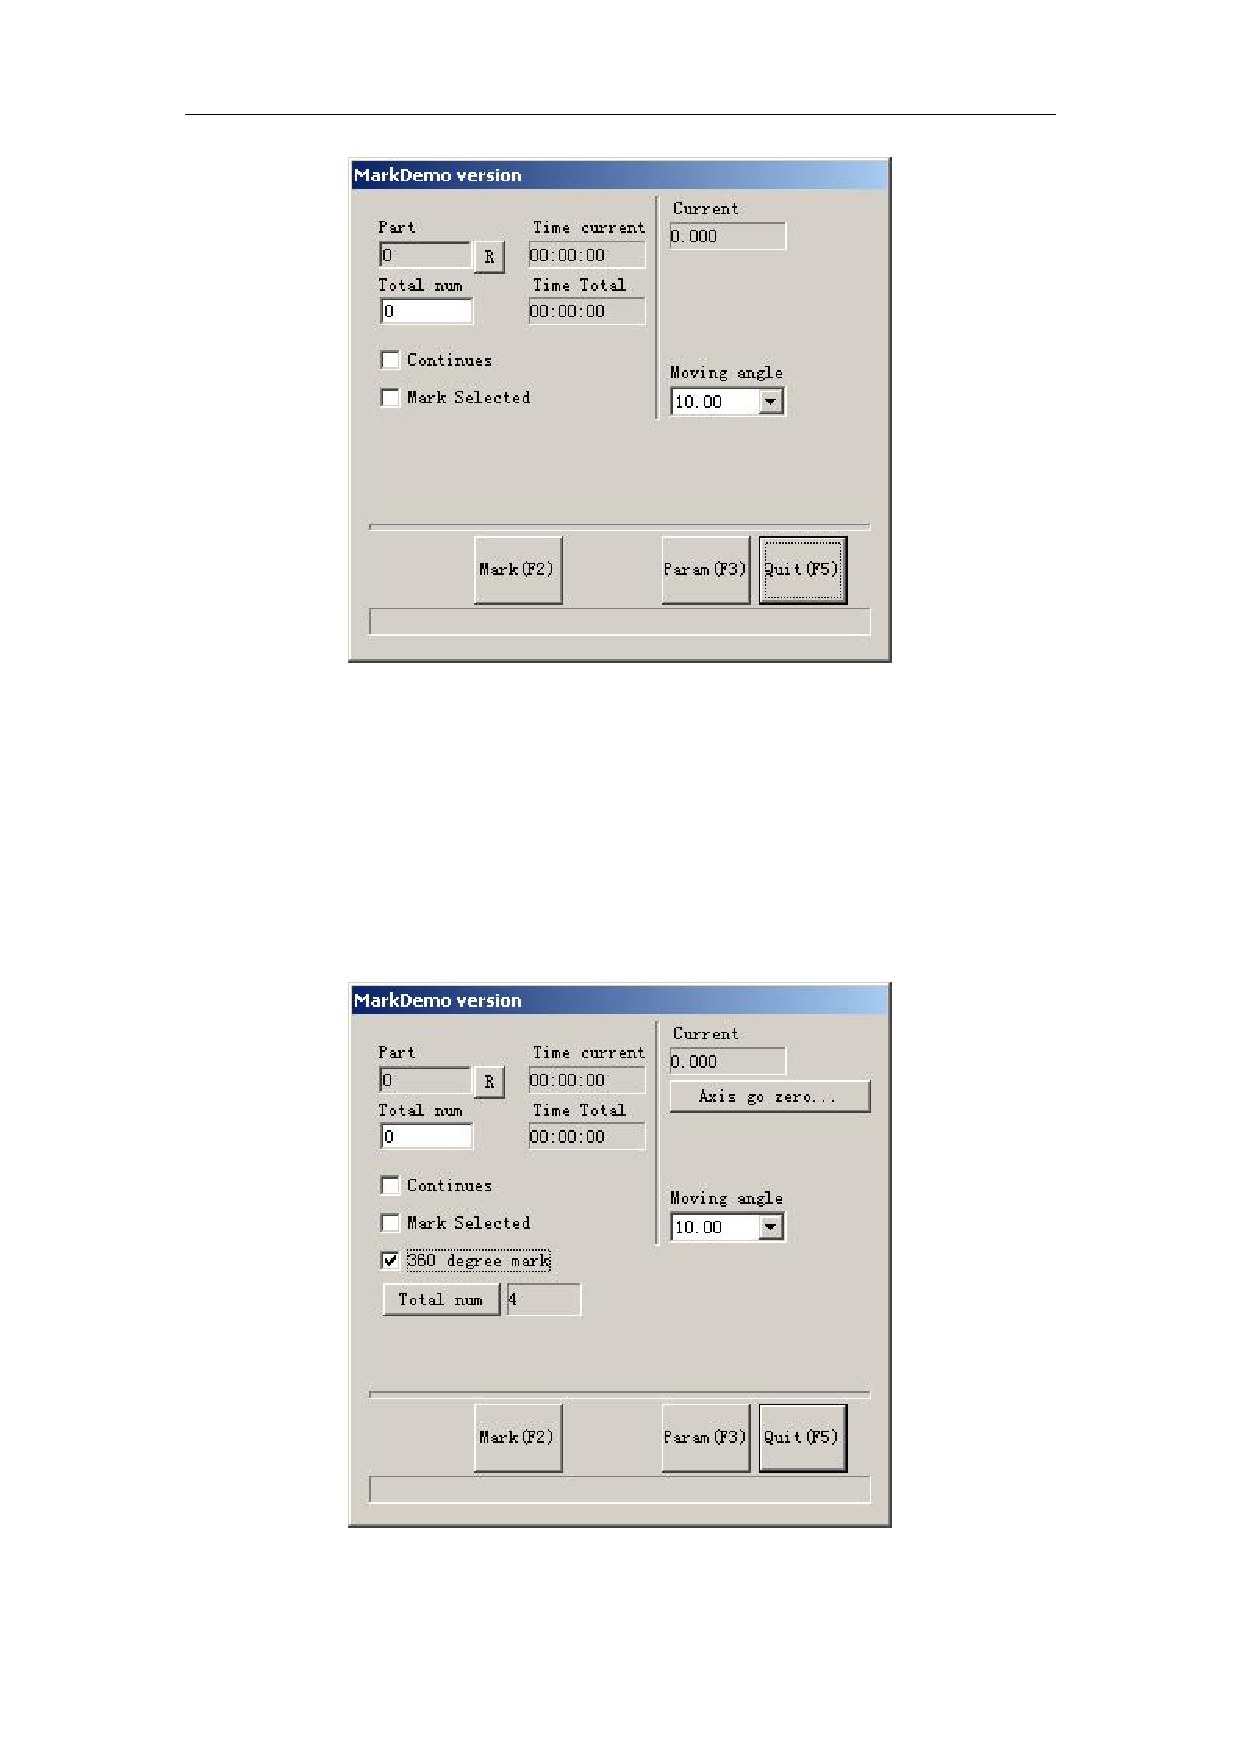
8.2 Rotary marking 2
Except the new option 360 degree mark, the others parameters in Rotary marking2 is the
same as those in Rotary marking, as is shown in Figure 8-6.
Figure 8-6 Rotary marking2 interface
88
All rights reserved
 SOF_CUB_EzCad2UNI_V2_1_EN_Manual")
 SOF_CUB_EzCad2UNI_V2_1_EN_Manual")
 SOF_CUB_EzCad2UNI_V2_1_EN_Manual")
 SOF_CUB_EzCad2UNI_V2_1_EN_Manual")
 SOF_CUB_EzCad2UNI_V2_1_EN_Manual")
 SOF_CUB_EzCad2UNI_V2_1_EN_Manual")
 SOF_CUB_EzCad2UNI_V2_1_EN_Manual")
 SOF_CUB_EzCad2UNI_V2_1_EN_Manual")
 SOF_CUB_EzCad2UNI_V2_1_EN_Manual")
 SOF_CUB_EzCad2UNI_V2_1_EN_Manual")
 SOF_CUB_EzCad2UNI_V2_1_EN_Manual")
 SOF_CUB_EzCad2UNI_V2_1_EN_Manual")
 SOF_CUB_EzCad2UNI_V2_1_EN_Manual")
 SOF_CUB_EzCad2UNI_V2_1_EN_Manual")
 SOF_CUB_EzCad2UNI_V2_1_EN_Manual")
 SOF_CUB_EzCad2UNI_V2_1_EN_Manual")
 SOF_CUB_EzCad2UNI_V2_1_EN_Manual")
 SOF_CUB_EzCad2UNI_V2_1_EN_Manual")
 SOF_CUB_EzCad2UNI_V2_1_EN_Manual")
 SOF_CUB_EzCad2UNI_V2_1_EN_Manual")
 SOF_CUB_EzCad2UNI_V2_1_EN_Manual")
 SOF_CUB_EzCad2UNI_V2_1_EN_Manual")
 SOF_CUB_EzCad2UNI_V2_1_EN_Manual")
 SOF_CUB_EzCad2UNI_V2_1_EN_Manual")
 SOF_CUB_EzCad2UNI_V2_1_EN_Manual")
 SOF_CUB_EzCad2UNI_V2_1_EN_Manual")
 SOF_CUB_EzCad2UNI_V2_1_EN_Manual")
 SOF_CUB_EzCad2UNI_V2_1_EN_Manual")
 SOF_CUB_EzCad2UNI_V2_1_EN_Manual")
 SOF_CUB_EzCad2UNI_V2_1_EN_Manual")
 SOF_CUB_EzCad2UNI_V2_1_EN_Manual")
 SOF_CUB_EzCad2UNI_V2_1_EN_Manual")
 SOF_CUB_EzCad2UNI_V2_1_EN_Manual")
 SOF_CUB_EzCad2UNI_V2_1_EN_Manual")
 SOF_CUB_EzCad2UNI_V2_1_EN_Manual")
 SOF_CUB_EzCad2UNI_V2_1_EN_Manual")
 SOF_CUB_EzCad2UNI_V2_1_EN_Manual")
 SOF_CUB_EzCad2UNI_V2_1_EN_Manual")
 SOF_CUB_EzCad2UNI_V2_1_EN_Manual")
 SOF_CUB_EzCad2UNI_V2_1_EN_Manual")
 SOF_CUB_EzCad2UNI_V2_1_EN_Manual")
 SOF_CUB_EzCad2UNI_V2_1_EN_Manual")
 SOF_CUB_EzCad2UNI_V2_1_EN_Manual")
 SOF_CUB_EzCad2UNI_V2_1_EN_Manual")
 SOF_CUB_EzCad2UNI_V2_1_EN_Manual")
 SOF_CUB_EzCad2UNI_V2_1_EN_Manual")
 SOF_CUB_EzCad2UNI_V2_1_EN_Manual")
 SOF_CUB_EzCad2UNI_V2_1_EN_Manual")
 SOF_CUB_EzCad2UNI_V2_1_EN_Manual")
 SOF_CUB_EzCad2UNI_V2_1_EN_Manual")
 SOF_CUB_EzCad2UNI_V2_1_EN_Manual")
 SOF_CUB_EzCad2UNI_V2_1_EN_Manual")
 SOF_CUB_EzCad2UNI_V2_1_EN_Manual")
 SOF_CUB_EzCad2UNI_V2_1_EN_Manual")
 SOF_CUB_EzCad2UNI_V2_1_EN_Manual")
 SOF_CUB_EzCad2UNI_V2_1_EN_Manual")
 SOF_CUB_EzCad2UNI_V2_1_EN_Manual")
 SOF_CUB_EzCad2UNI_V2_1_EN_Manual")
 SOF_CUB_EzCad2UNI_V2_1_EN_Manual")
 SOF_CUB_EzCad2UNI_V2_1_EN_Manual")
 SOF_CUB_EzCad2UNI_V2_1_EN_Manual")
 SOF_CUB_EzCad2UNI_V2_1_EN_Manual")
 SOF_CUB_EzCad2UNI_V2_1_EN_Manual")
 SOF_CUB_EzCad2UNI_V2_1_EN_Manual")
 SOF_CUB_EzCad2UNI_V2_1_EN_Manual")
 SOF_CUB_EzCad2UNI_V2_1_EN_Manual")
 SOF_CUB_EzCad2UNI_V2_1_EN_Manual")
 SOF_CUB_EzCad2UNI_V2_1_EN_Manual")
 SOF_CUB_EzCad2UNI_V2_1_EN_Manual")
 SOF_CUB_EzCad2UNI_V2_1_EN_Manual")
 SOF_CUB_EzCad2UNI_V2_1_EN_Manual")
 SOF_CUB_EzCad2UNI_V2_1_EN_Manual")
 SOF_CUB_EzCad2UNI_V2_1_EN_Manual")
 SOF_CUB_EzCad2UNI_V2_1_EN_Manual")
 SOF_CUB_EzCad2UNI_V2_1_EN_Manual")
 SOF_CUB_EzCad2UNI_V2_1_EN_Manual")
 SOF_CUB_EzCad2UNI_V2_1_EN_Manual")
 SOF_CUB_EzCad2UNI_V2_1_EN_Manual")
 SOF_CUB_EzCad2UNI_V2_1_EN_Manual")
 SOF_CUB_EzCad2UNI_V2_1_EN_Manual")
 SOF_CUB_EzCad2UNI_V2_1_EN_Manual")
 SOF_CUB_EzCad2UNI_V2_1_EN_Manual")
 SOF_CUB_EzCad2UNI_V2_1_EN_Manual")
 SOF_CUB_EzCad2UNI_V2_1_EN_Manual")
 SOF_CUB_EzCad2UNI_V2_1_EN_Manual")
 SOF_CUB_EzCad2UNI_V2_1_EN_Manual")
 SOF_CUB_EzCad2UNI_V2_1_EN_Manual")
 SOF_CUB_EzCad2UNI_V2_1_EN_Manual")
 SOF_CUB_EzCad2UNI_V2_1_EN_Manual")
 SOF_CUB_EzCad2UNI_V2_1_EN_Manual")
 SOF_CUB_EzCad2UNI_V2_1_EN_Manual")
 SOF_CUB_EzCad2UNI_V2_1_EN_Manual")
 SOF_CUB_EzCad2UNI_V2_1_EN_Manual")
 SOF_CUB_EzCad2UNI_V2_1_EN_Manual")
 SOF_CUB_EzCad2UNI_V2_1_EN_Manual")
 SOF_CUB_EzCad2UNI_V2_1_EN_Manual")
 SOF_CUB_EzCad2UNI_V2_1_EN_Manual")
 SOF_CUB_EzCad2UNI_V2_1_EN_Manual")
 SOF_CUB_EzCad2UNI_V2_1_EN_Manual")