
divided by the figure. It is used to split the line segment beforehand to deliver
the data, so as to improve the marking accuracy.
Use the Calibration File: Use the calibration file generated by external
calibration program to calibrate the scanhead.
XY Change: Change the axes corresponding to the original galvanometer
signal 1 and signal 2.
reverseX/reverseY: The opposite direction of the current scanhead.
indicates the barrel distortion or pincushion distortion calibration
coefficient with default of 1.0 (parameter range: 0.875-1.125).
indicates the parallelogram calibration coefficient with default of 1.0
(parameter range: 0.875-1.125).
indicates the trapezium calibration,with default of 1.0 (parameter range:
0.875-1.125).
Scale: It refers to the flex percentage, and the default is 100%. This parameter
will be adjusted when the trim size marked is different from the setting size. If
the trim size is smaller than the designed one, users can raise this parameter;
if the trim size is bigger than the designed one, users can lower this parameter.
Note: If there are some distortions with the laser scanhead, users must firstly
adjust the distortions and then the flex percentage.
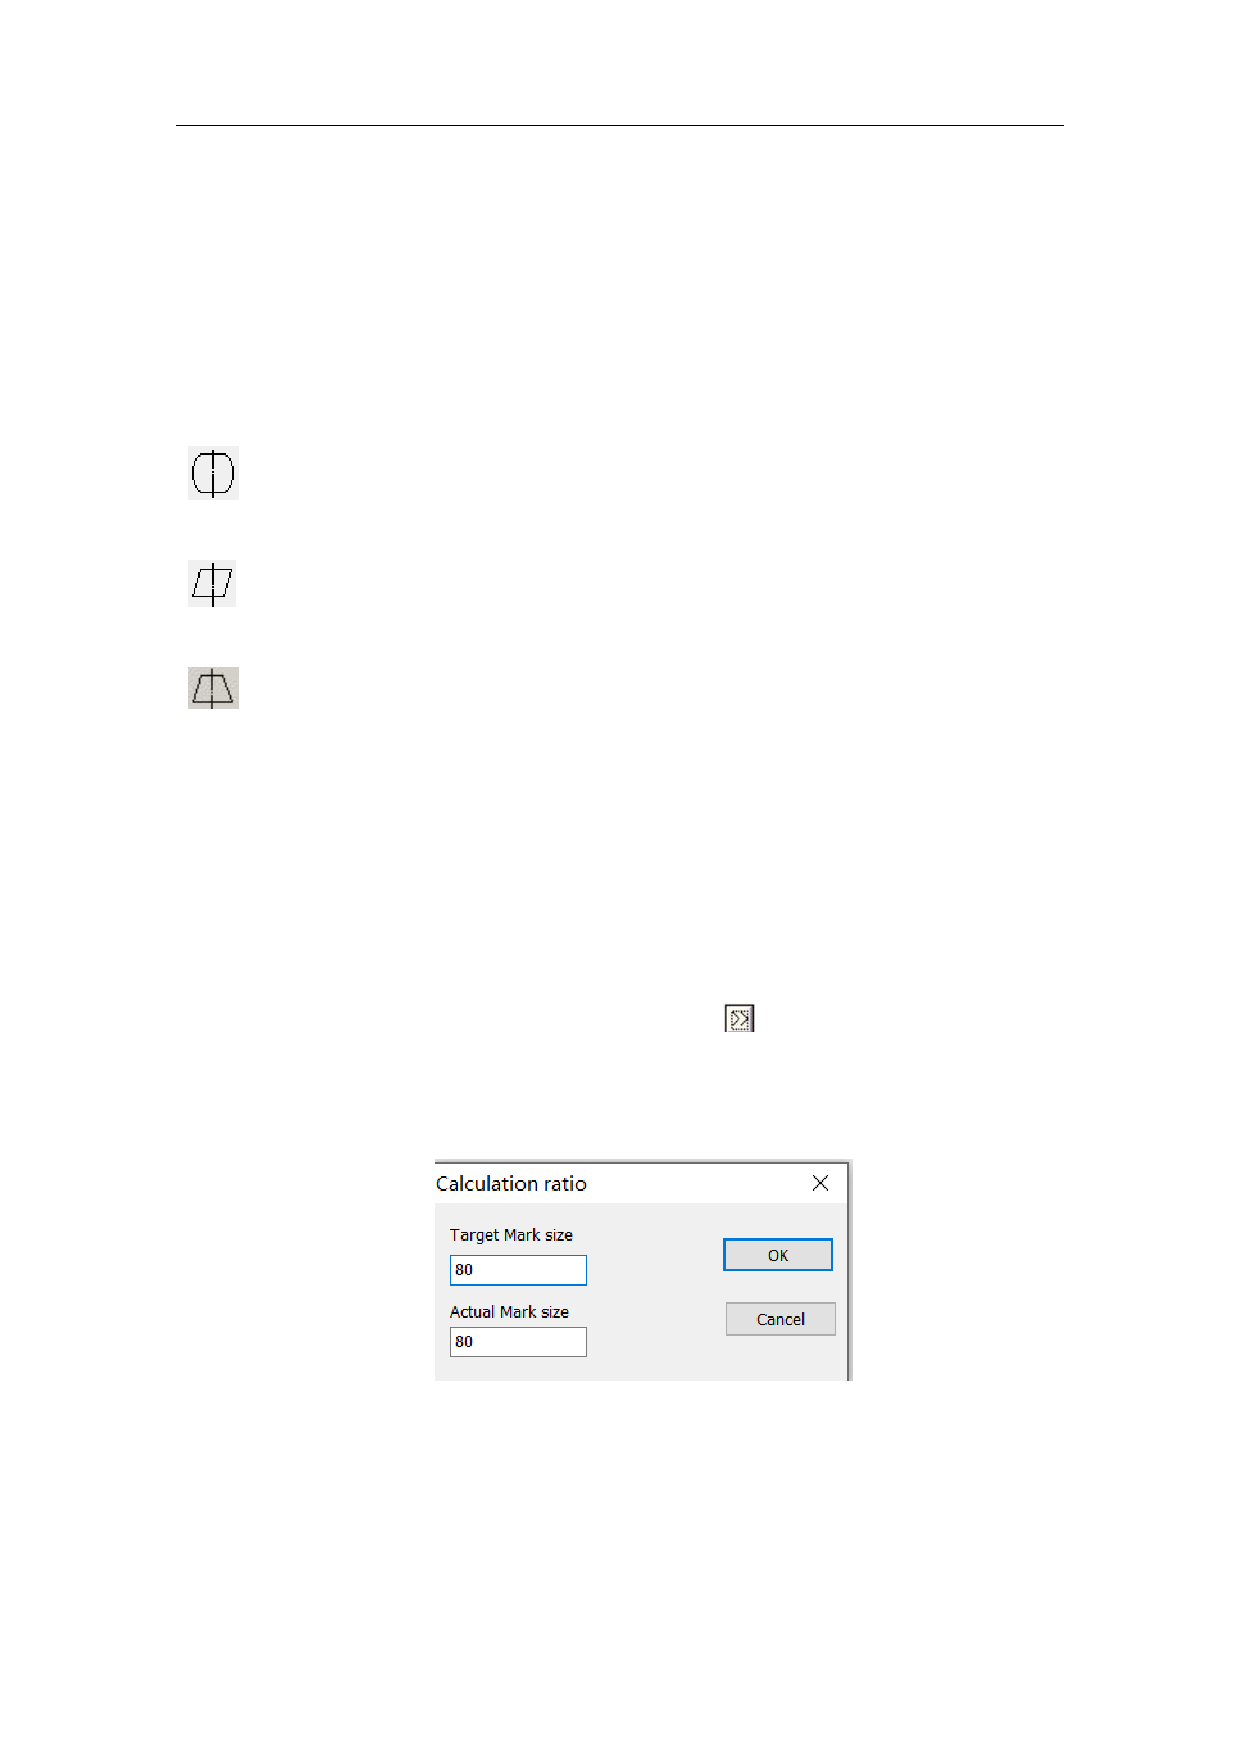
During scale setting, we may press the button directly, and a dialog box
like Fig. 9-5 will be popped up. After we input the set size in software and the
actual marking size measured, the software will automatically calculate the flex
percentage.
Calculation Scale
Target Marking Size
Actual Marking Size
OK
168 / 217
 LabelMark 5 Software Manual, v3.6")
 LabelMark 5 Software Manual, v3.6")
 LabelMark 5 Software Manual, v3.6")
 LabelMark 5 Software Manual, v3.6")
 LabelMark 5 Software Manual, v3.6")
 LabelMark 5 Software Manual, v3.6")
 LabelMark 5 Software Manual, v3.6")
 LabelMark 5 Software Manual, v3.6")
 LabelMark 5 Software Manual, v3.6")
 LabelMark 5 Software Manual, v3.6")
 LabelMark 5 Software Manual, v3.6")
 LabelMark 5 Software Manual, v3.6")
 LabelMark 5 Software Manual, v3.6")
 LabelMark 5 Software Manual, v3.6")
 LabelMark 5 Software Manual, v3.6")
 LabelMark 5 Software Manual, v3.6")
 LabelMark 5 Software Manual, v3.6")
 LabelMark 5 Software Manual, v3.6")
 LabelMark 5 Software Manual, v3.6")
 LabelMark 5 Software Manual, v3.6")
 LabelMark 5 Software Manual, v3.6")
 LabelMark 5 Software Manual, v3.6")
 LabelMark 5 Software Manual, v3.6")
 LabelMark 5 Software Manual, v3.6")
 LabelMark 5 Software Manual, v3.6")
 LabelMark 5 Software Manual, v3.6")
 LabelMark 5 Software Manual, v3.6")
 LabelMark 5 Software Manual, v3.6")
 LabelMark 5 Software Manual, v3.6")
 LabelMark 5 Software Manual, v3.6")
 LabelMark 5 Software Manual, v3.6")
 LabelMark 5 Software Manual, v3.6")
 LabelMark 5 Software Manual, v3.6")
 LabelMark 5 Software Manual, v3.6")
 LabelMark 5 Software Manual, v3.6")
 LabelMark 5 Software Manual, v3.6")
 LabelMark 5 Software Manual, v3.6")
 LabelMark 5 Software Manual, v3.6")
 LabelMark 5 Software Manual, v3.6")
 LabelMark 5 Software Manual, v3.6")
 LabelMark 5 Software Manual, v3.6")
 LabelMark 5 Software Manual, v3.6")
 LabelMark 5 Software Manual, v3.6")
 LabelMark 5 Software Manual, v3.6")
 LabelMark 5 Software Manual, v3.6")
 LabelMark 5 Software Manual, v3.6")
 LabelMark 5 Software Manual, v3.6")
 LabelMark 5 Software Manual, v3.6")
 LabelMark 5 Software Manual, v3.6")
 LabelMark 5 Software Manual, v3.6")
 LabelMark 5 Software Manual, v3.6")
 LabelMark 5 Software Manual, v3.6")
 LabelMark 5 Software Manual, v3.6")
 LabelMark 5 Software Manual, v3.6")
 LabelMark 5 Software Manual, v3.6")
 LabelMark 5 Software Manual, v3.6")
 LabelMark 5 Software Manual, v3.6")
 LabelMark 5 Software Manual, v3.6")
 LabelMark 5 Software Manual, v3.6")
 LabelMark 5 Software Manual, v3.6")
 LabelMark 5 Software Manual, v3.6")
 LabelMark 5 Software Manual, v3.6")
 LabelMark 5 Software Manual, v3.6")
 LabelMark 5 Software Manual, v3.6")
 LabelMark 5 Software Manual, v3.6")
 LabelMark 5 Software Manual, v3.6")
 LabelMark 5 Software Manual, v3.6")
 LabelMark 5 Software Manual, v3.6")
 LabelMark 5 Software Manual, v3.6")
 LabelMark 5 Software Manual, v3.6")
 LabelMark 5 Software Manual, v3.6")
 LabelMark 5 Software Manual, v3.6")
 LabelMark 5 Software Manual, v3.6")
 LabelMark 5 Software Manual, v3.6")
 LabelMark 5 Software Manual, v3.6")
 LabelMark 5 Software Manual, v3.6")
 LabelMark 5 Software Manual, v3.6")
 LabelMark 5 Software Manual, v3.6")
 LabelMark 5 Software Manual, v3.6")
 LabelMark 5 Software Manual, v3.6")
 LabelMark 5 Software Manual, v3.6")
 LabelMark 5 Software Manual, v3.6")
 LabelMark 5 Software Manual, v3.6")
 LabelMark 5 Software Manual, v3.6")
 LabelMark 5 Software Manual, v3.6")
 LabelMark 5 Software Manual, v3.6")
 LabelMark 5 Software Manual, v3.6")
 LabelMark 5 Software Manual, v3.6")
 LabelMark 5 Software Manual, v3.6")
 LabelMark 5 Software Manual, v3.6")
 LabelMark 5 Software Manual, v3.6")
 LabelMark 5 Software Manual, v3.6")
 LabelMark 5 Software Manual, v3.6")
 LabelMark 5 Software Manual, v3.6")
 LabelMark 5 Software Manual, v3.6")
 LabelMark 5 Software Manual, v3.6")
 LabelMark 5 Software Manual, v3.6")
 LabelMark 5 Software Manual, v3.6")
 LabelMark 5 Software Manual, v3.6")