
- You are here:
- AM.CO.ZABuythisCNC Utilities Homepage
- PrintUP-3D-Printer
- Component Manuals
- 3D打印机使用英文说明.pdf
- Page 9 of 17
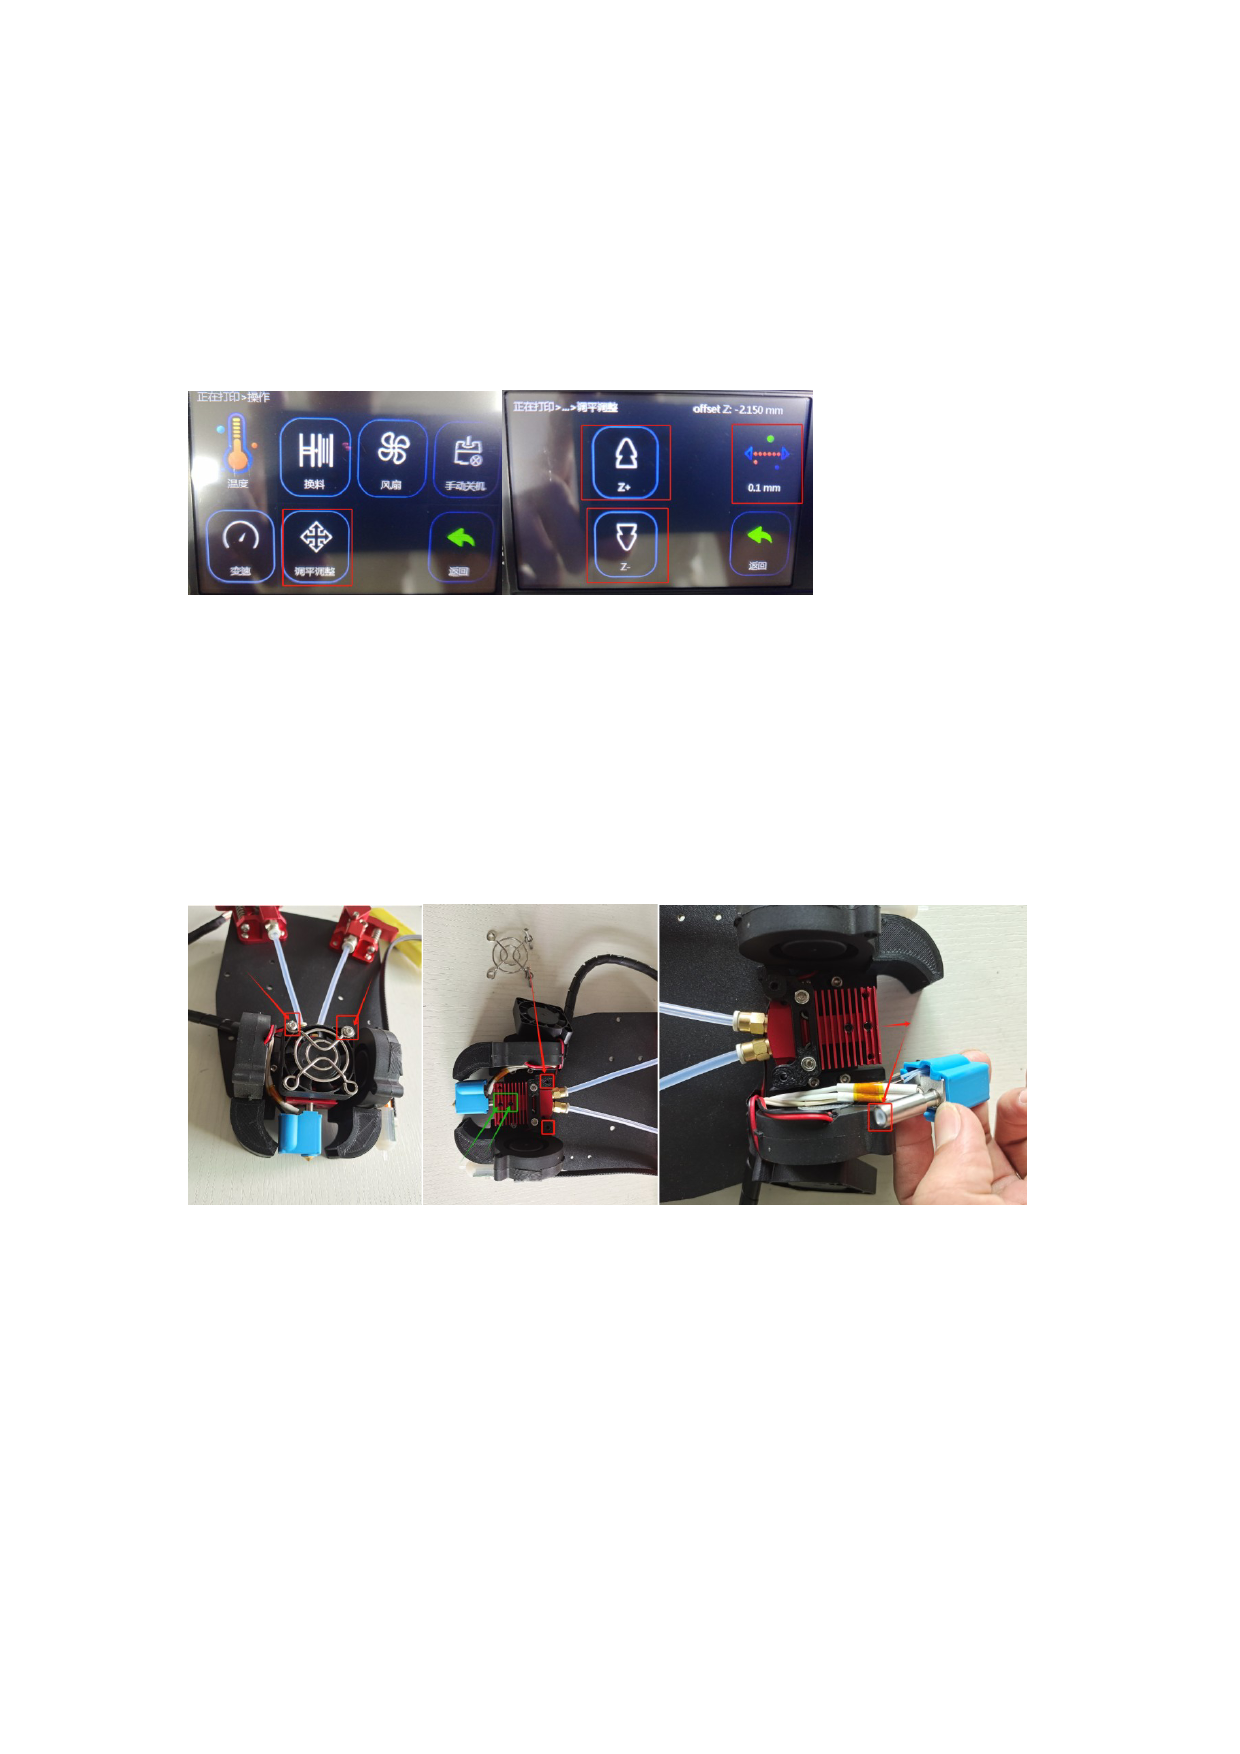
width of the first layer of printing is 0.8mm-1.6mm as normal line width). You can print the first
layer during the printing process. Click operation - Leveling adjustment - Click the upper right
corner to switch to 0.1mm - Then click Z+ or Z- to adjust the distance between the print head
and the table, so that the line width of the first layer of printing is within the range of 0.8mm-
1.6mm. If printing the first layer is finished and printing has started and the second layer has
not been adjusted yet, you need to click Return to stop printing, restart printing the first layer
and adjust the print head height again, and then click Return directly without saving.
Printing head disassemble , assemble
Note: Don’t try to disassemble the print head unless there is no way to clear the blockage by
pushing the material manually, then you need to disassemble the print head. There is no need
to remove the entire sheet metal like in the picture, just follow the instructions below.
1. First, remove the main fan in the middle. You can see that there are 2 black top wires in the
middle of the red heat sink. You only need to loosen it to separate the lower print head from
the red heat sink. Then heat the print head to 220°C. °C, clean out the debris blocked in the
print head, and then insert the material from the extruder position to try to see if it can be
unclogged to the bottom. Use the same method to check the left and right extrusion sides.
Only when it is finally confirmed that there is no problem can you restart. Install it back; when
installing the print head, you need to pay attention to the print head that has just been heated
to 220° to prevent burns; you can turn off the machine and wait for the temperature of the
print head to drop before operating the installation.、
 3D打印机使用英文说明")
 3D打印机使用英文说明")
 3D打印机使用英文说明")
 3D打印机使用英文说明")
 3D打印机使用英文说明")
 3D打印机使用英文说明")
 3D打印机使用英文说明")
 3D打印机使用英文说明")
 3D打印机使用英文说明")
 3D打印机使用英文说明")
 3D打印机使用英文说明")
 3D打印机使用英文说明")
 3D打印机使用英文说明")
 3D打印机使用英文说明")
 3D打印机使用英文说明")
 3D打印机使用英文说明")
 3D打印机使用英文说明")