
- You are here:
- AM.CO.ZABuythisCNC Utilities Homepage
- PrintUP-3D-Printer
- Component Manuals
- 3D打印机使用英文说明.pdf
- Page 8 of 17
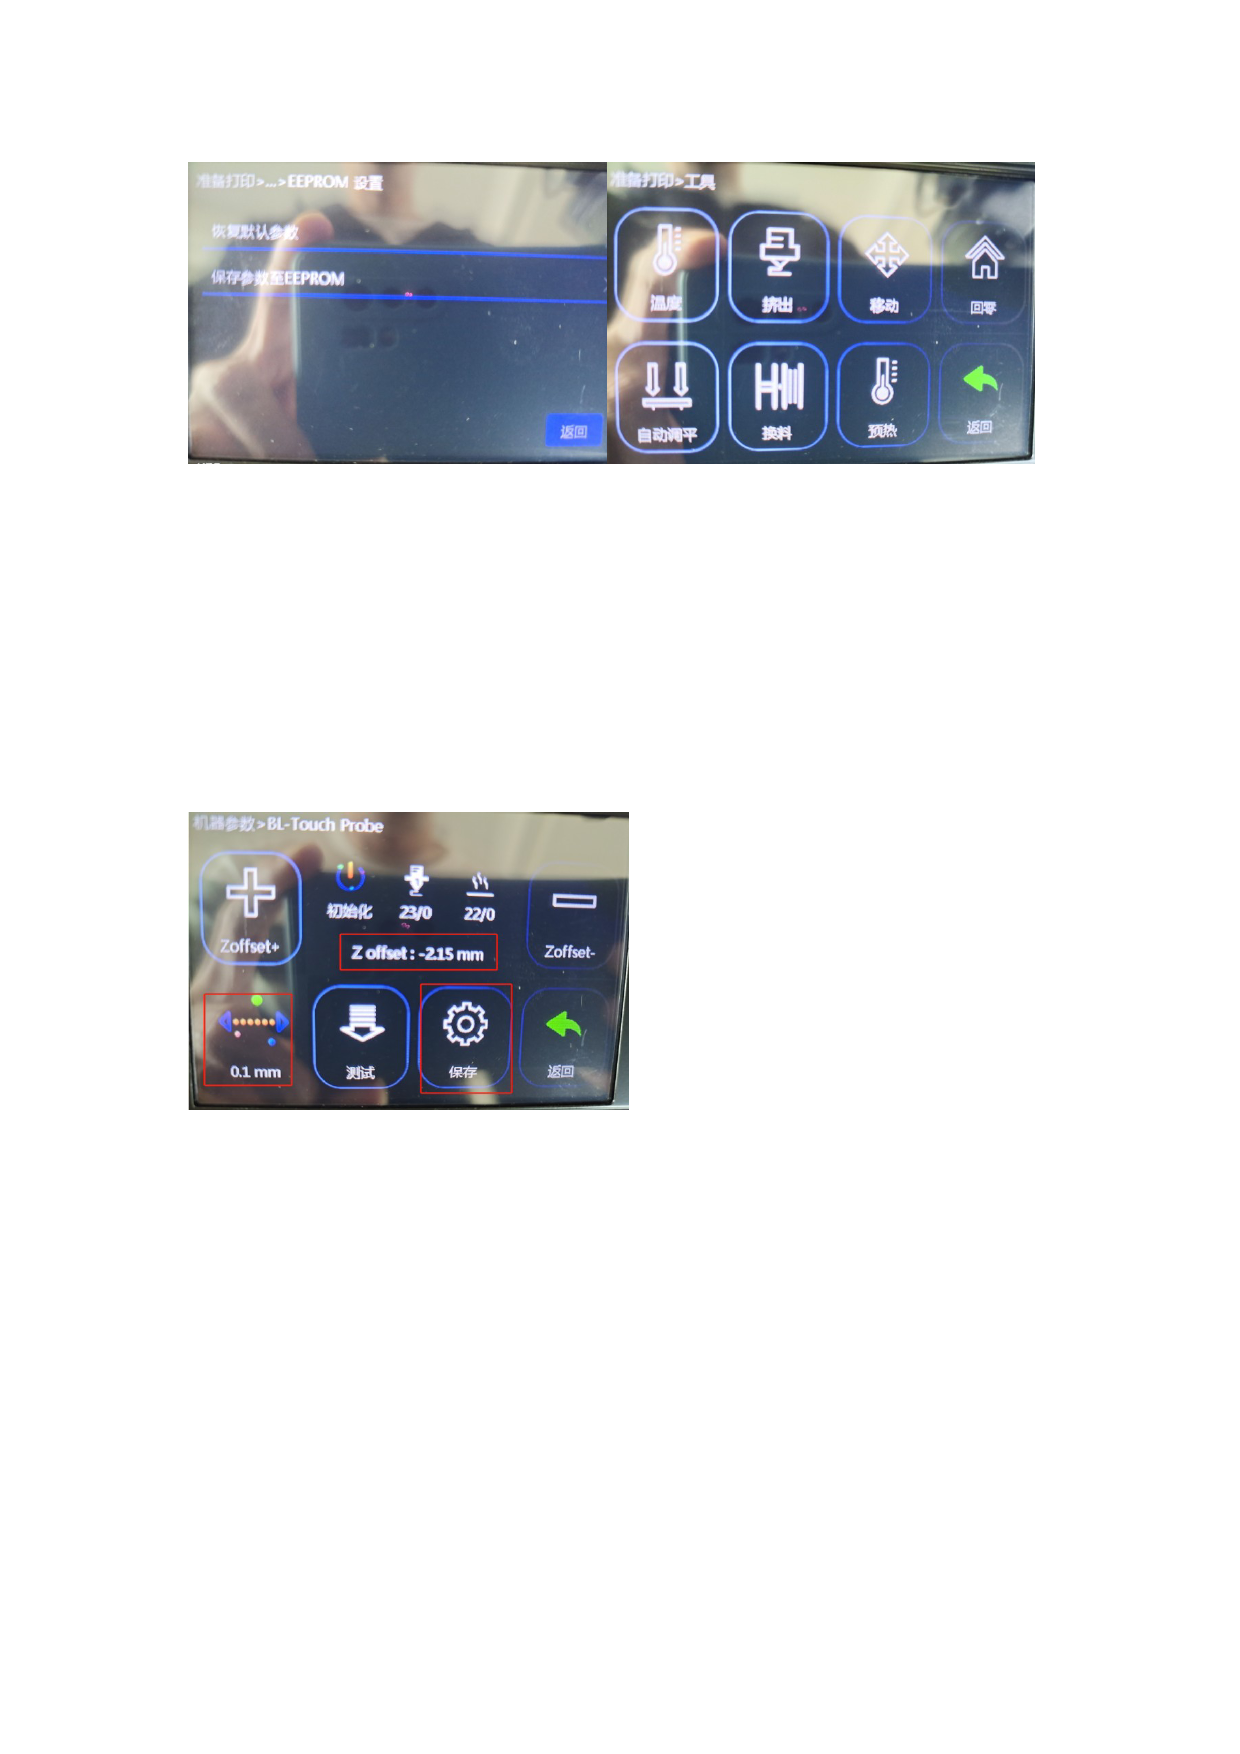
Automatic leveling operation steps:
Main interface--Tool interface--Temperature--Switch to the hot bed in the lower left corner
and click Add+ to set the hot bed temperature to 50°C--Return--Return to zero--All--All--
Return--Return- -Main interface--Setting interface--Eeprom settings--Restore default
parameters--OK--Save parameters to EEPROM--OK--Return--Return--Main interface--
Tool interface--Automatic leveling
(Note: After starting the automatic leveling, you need to check whether all the countertops
have been tested. If not, or other abnormalities occur, please contact the technician.)
After the automatic detection is completed, the print head will automatically move to the
middle of the table. You need to use a piece of A4 paper and place it in the middle of the table
in advance. After the print head reaches the middle of the table, it will drop to the A4 paper. At
this time, you need to go to the display operation and click the lower left corner to switch.
Progress to 0.1mm, and then click +/- to correct and adjust the distance between the print
head and the A4 paper on the platform (+ means to raise the print head, - means to lower the
print head) so that the distance between the print head and the A4 paper just touches the
height. . Adjust +/- to match the value in the middle of the display. Click Save after the
adjustment is completed. The print head will automatically return to zero, and then click to
return to the main interface to complete the leveling.
Supplementary note: If the printing is uneven after the automatic leveling is completed, it may
be that the distance between the nozzle and the A4 paper has not been calibrated (the line
 3D打印机使用英文说明")
 3D打印机使用英文说明")
 3D打印机使用英文说明")
 3D打印机使用英文说明")
 3D打印机使用英文说明")
 3D打印机使用英文说明")
 3D打印机使用英文说明")
 3D打印机使用英文说明")
 3D打印机使用英文说明")
 3D打印机使用英文说明")
 3D打印机使用英文说明")
 3D打印机使用英文说明")
 3D打印机使用英文说明")
 3D打印机使用英文说明")
 3D打印机使用英文说明")
 3D打印机使用英文说明")
 3D打印机使用英文说明")