Acquisition and Live View in 1-Window Mode
You can view the live video of a specific camera or multiple cameras in 1-window mode. When viewing live videos of multiple cameras, you can switch camera to view live video.
-
Start acquiring image data.
-
If only one camera is connected, click
 to start acquiring image
data from the camera.
to start acquiring image
data from the camera. -
If multiple cameras are connected, click
 to start acquiring image
data from the connected cameras simultaneously.
to start acquiring image
data from the connected cameras simultaneously.
If you are acquiring image data from a single camera, the live view of the camera will be displayed; If multiple cameras,the live view of the currently selected camera will be displayed.
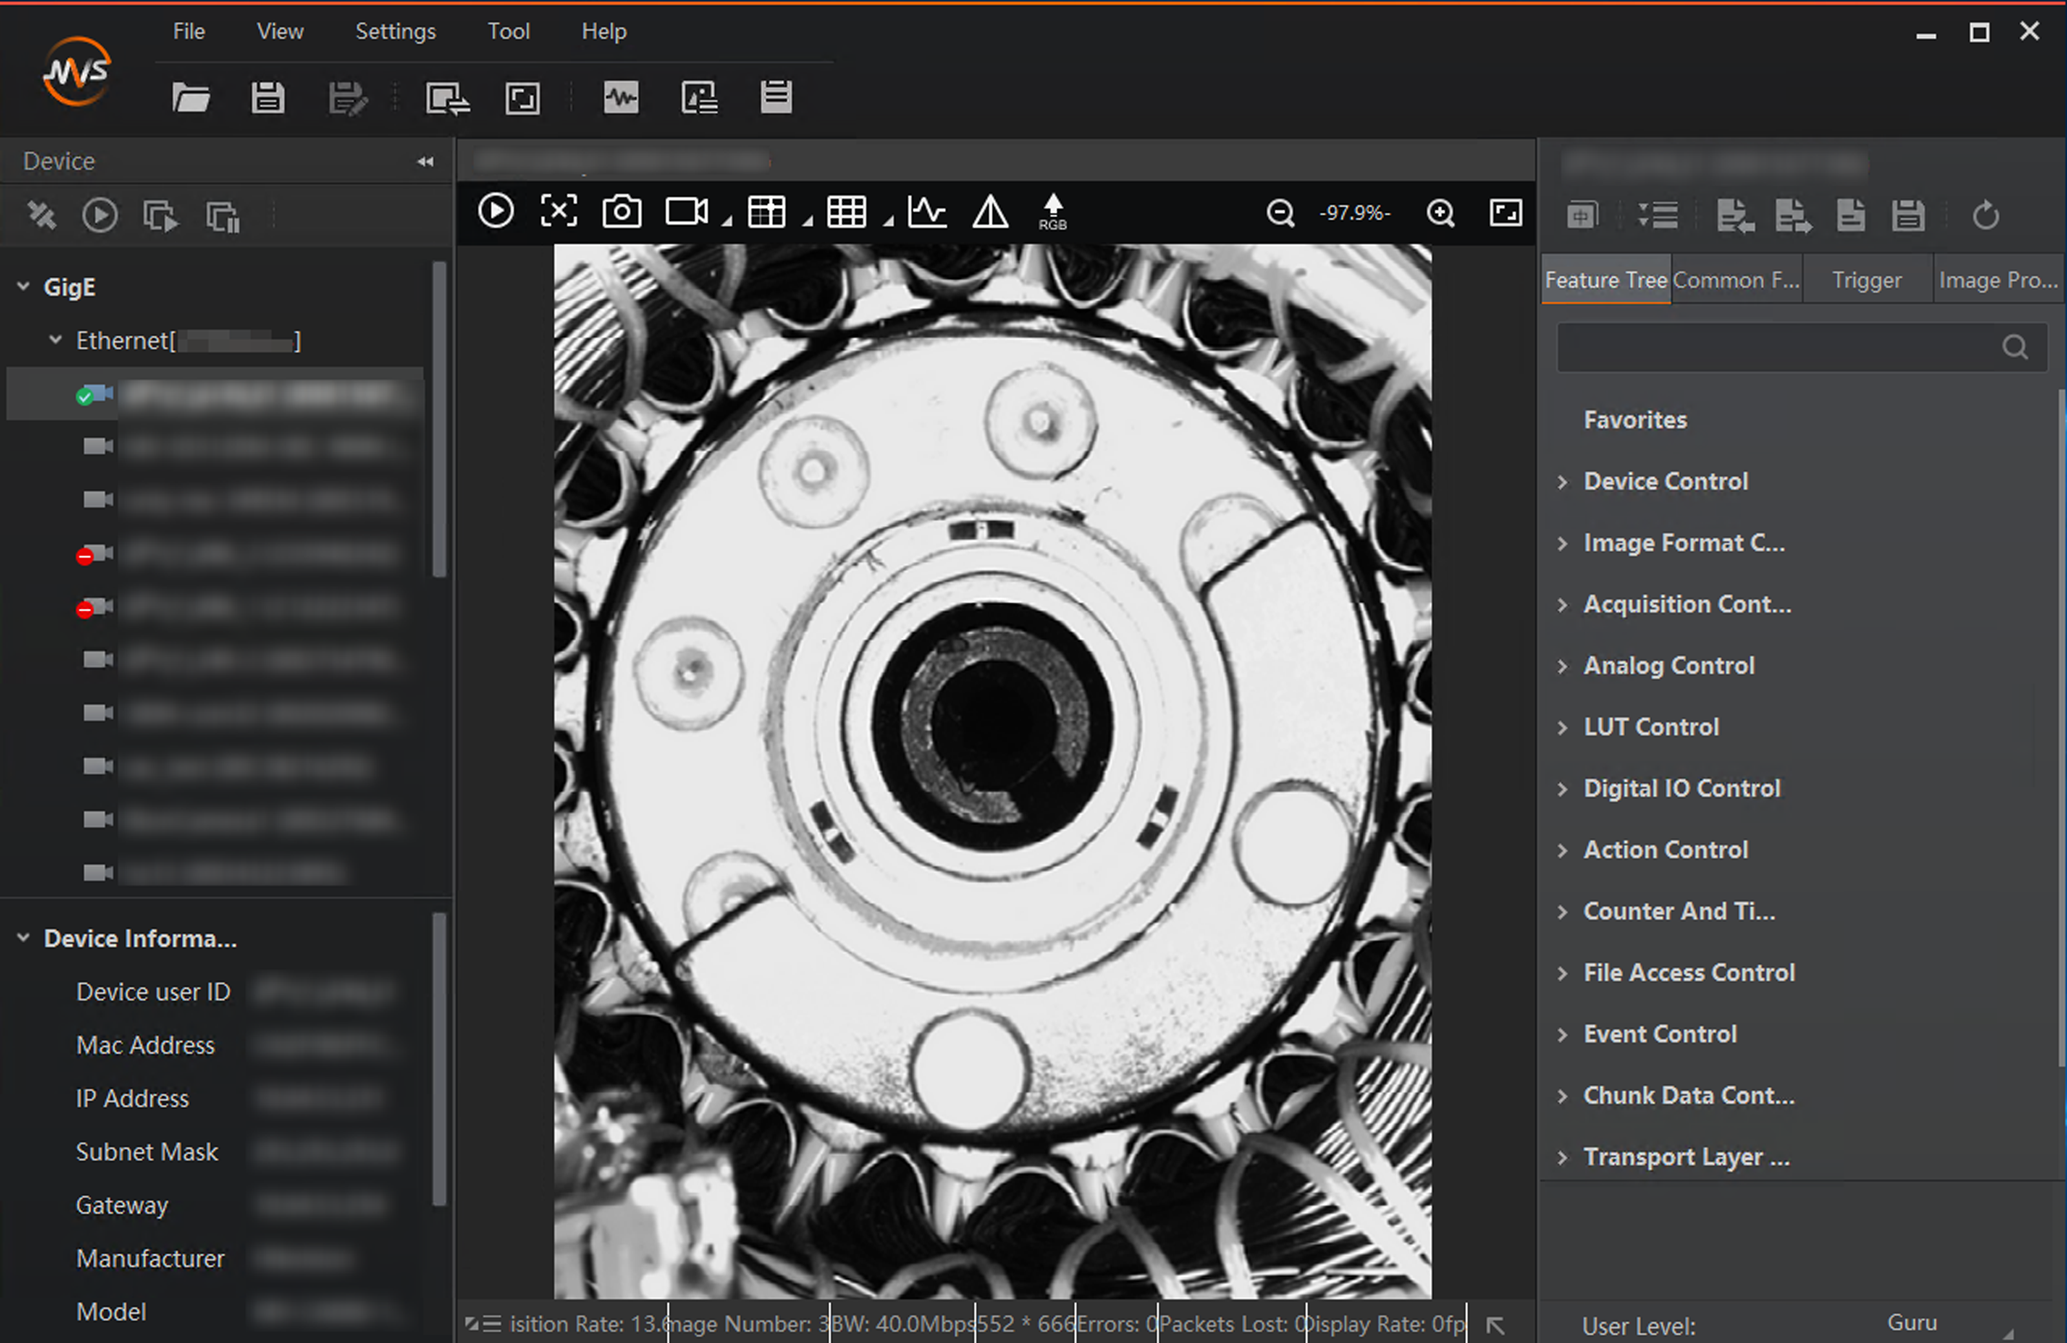 Figure 1 1-Window Mode Live
View
Figure 1 1-Window Mode Live
View -
- Optional:
Perform the following operations if required.
Option Description Stop/Resume Live View
Click
 to stop live view,
and click
to stop live view,
and click  to resume live
viewNote:
to resume live
viewNote:After live view being stopped, acquisition still goes on.
Switch Camera for Live View
If you are acquiring image data from multiple cameras, you can double-click the connected camera on the device list to switch camera for live view.
Display Thumbnail View
Click
 at the lower-right
of the image to display the thumbnail view.
at the lower-right
of the image to display the thumbnail view.When you zoom in the live view image, an orange rectangle, which represents the zoomed-in part of the original image, will display on the thumbnail view. You can drag the rectangle to view details of different parts of the original image.
Note:See More Functions for details about image zoom.
-
Stop acquisition.
-
Click
 to stop acquiring image
data from the currently selected camera.
to stop acquiring image
data from the currently selected camera. -
Click
 to batch stop acquiring
image data from the connected cameras.
to batch stop acquiring
image data from the connected cameras.
-