Configure White Balance (Bayer)
If the Pixel Format parameter of the camera is set to Bayer, perform the following steps to configure white balance parameters.
Make sure you have started acquiring image data. For details, see Acquisition and Live View in 1-Window Mode.
-
If you select Off as the value of Balance
White Auto, perform the following sub-steps to configure white balance
manually.
Note:
-
To configure white balance manually, the Gamma Enable parameter in the feature tree should be turned off.
-
To configure white balance manually, the Color Transformation Enable parameter in the feature tree should be turned off if the camera supports this parameter.
-
To configure white balance manually, the Hue Enable parameter and the Saturation Enable parameter should be turned off if the camera supports the two parameters.
-
Click
 draw a Region of Interest
(ROI), which is shown as a green rectangle, on the original image to
select the white area on the image.
Note:
draw a Region of Interest
(ROI), which is shown as a green rectangle, on the original image to
select the white area on the image.
Note:-
If there's no white area on the original image, place a white object in front of the camera.
-
You can also click
 to
cancel the ROI settings.
to
cancel the ROI settings.
Once you have drawn the ROI, the recommended value for the R (Red) channel, G (Green) channel, and B (Blue) channel will be displayed. You can manually adjust them if required.
-
-
Click Optimize to execute optimization.
-
The optimized image will be displayed on the right.
-
You can view the optimized value of R (Red) channel, G (Green) channel, and B (Blue) channel at the lower right of optimized image.
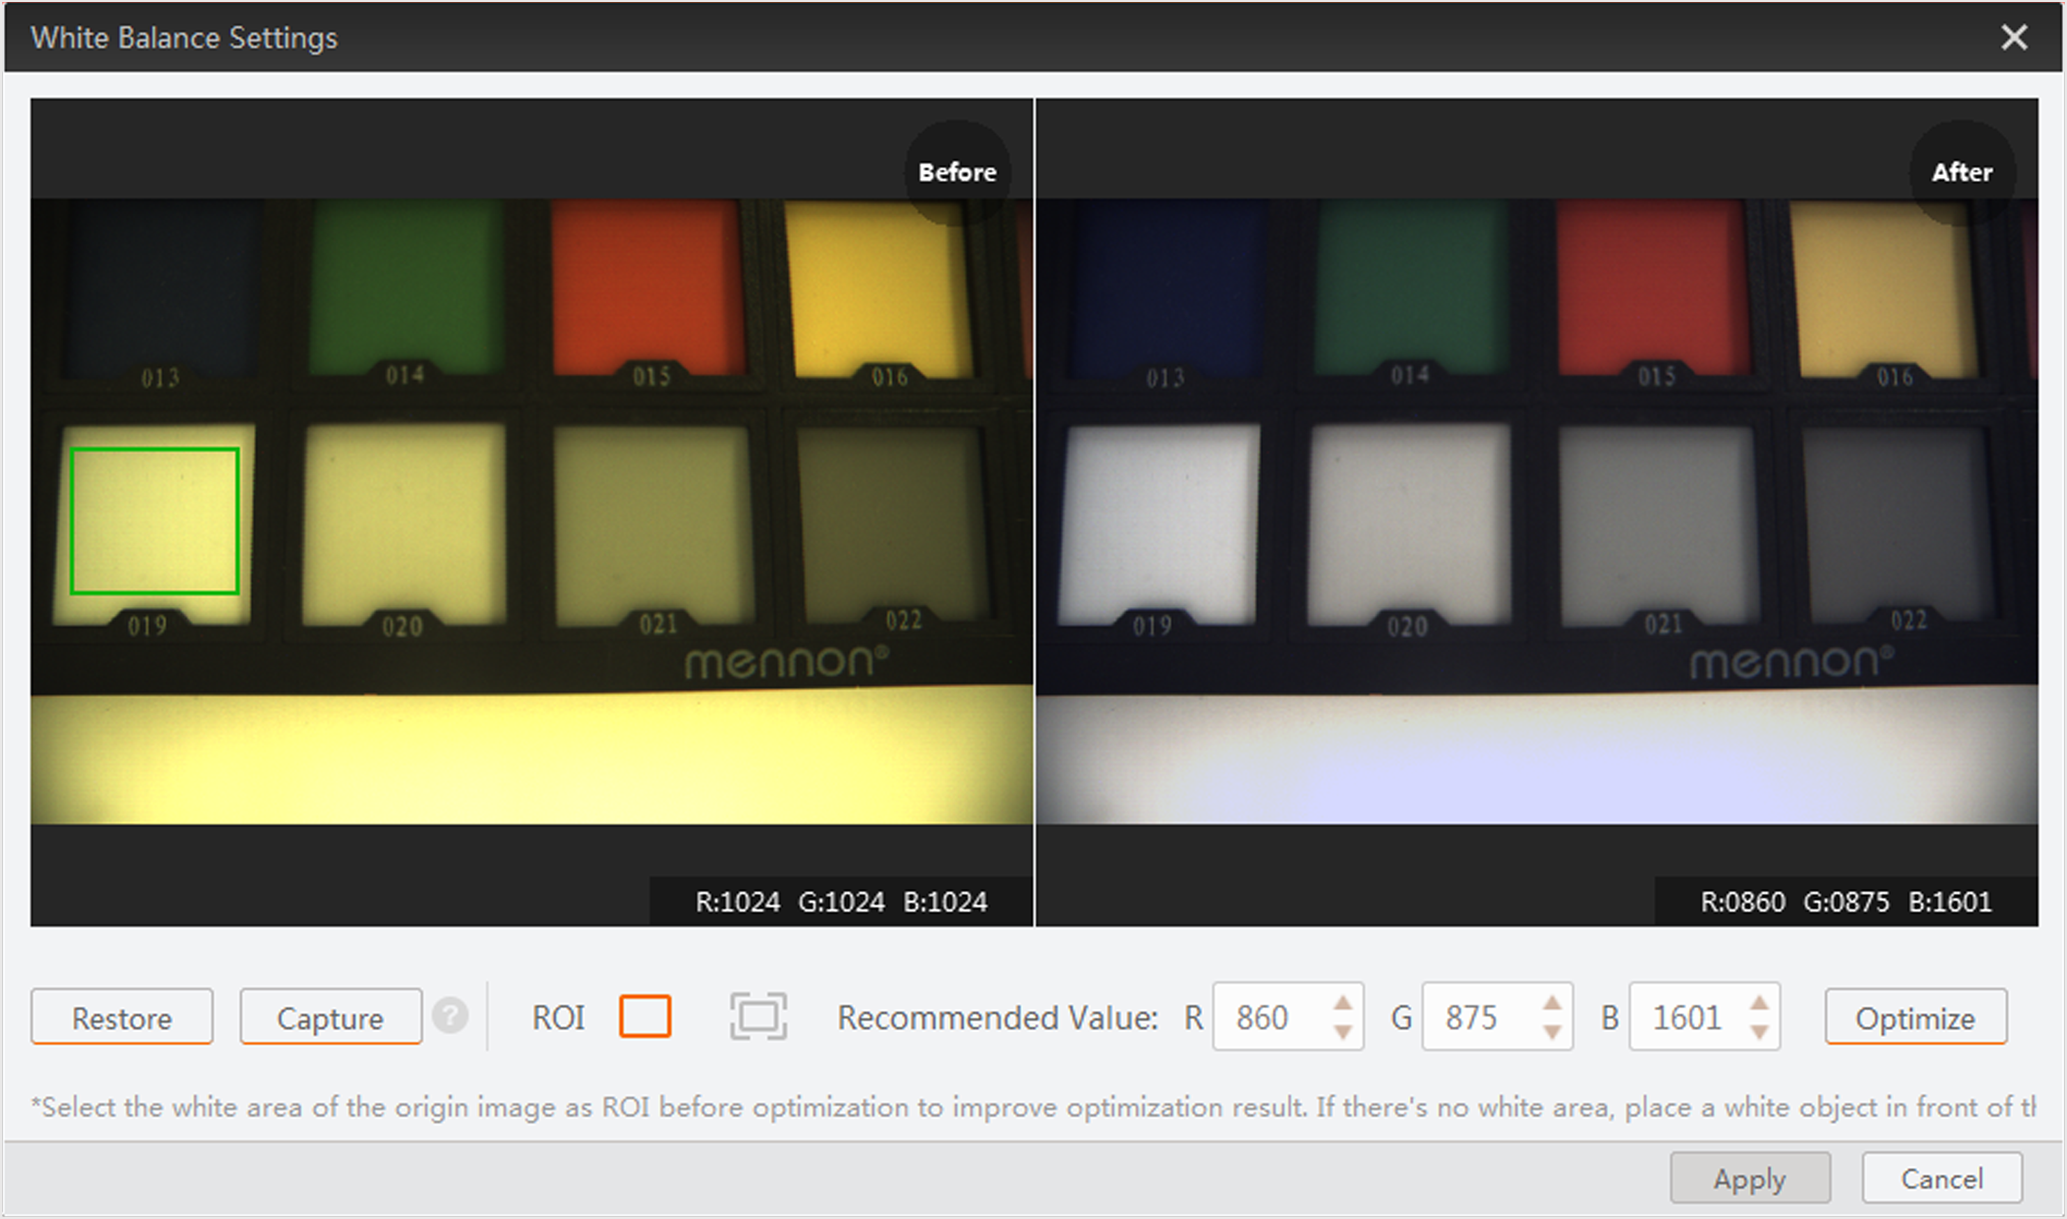 Figure 1 Optimization
Result
Figure 1 Optimization
Result -
-