
f Click Change to change this single instance of the
misspelled word, or Change All to change all instances of
the misspelled word in the design.
4 To ignore a word listed as being misspelled, click Ignore to
ignore this instance of the word, or Ignore All to ignore all
instances of the word in the design.
5 To add a new word to the custom dictionary list, click Add.
6 To edit the custom dictionary list:
g Click Edit List.
h To add a word to the custom dictionary list, type the word
in the field below the list and click Add.
i To change a word listed in the custom dictionary list, select
the word in the list, then type the new spelling in the field
below the list, and click Change.
j To remove a word from the dictionary, select the word in
the list and click Remove.
k Click Done.
7 Click Done to end spell checking.
Changing Case
1 Select the text.
2 From the Text menu, point to Case then select the desired
capitalization from the menu:
UPPER CASE All text is changed to capital letters.
lower case
All text is changed to lower case letters.
Sentence case The first character of each sentence is changed to
capital and the rest lower case.
Title Case
The first character of each word is changed to capital
and the rest lower case.
tOGGLE
cASE
Changes the lower case letters to capitals and vice
versa.
Changing Kerning
Kerning is the space between characters of text. Kerning varies from font
to font, and each font contains specific kerning information.
© 2006 SA International
Using Automatic Kerning
1 Select the text.
2 From the Text menu, point to Kerning and select the desired
kerning setting.
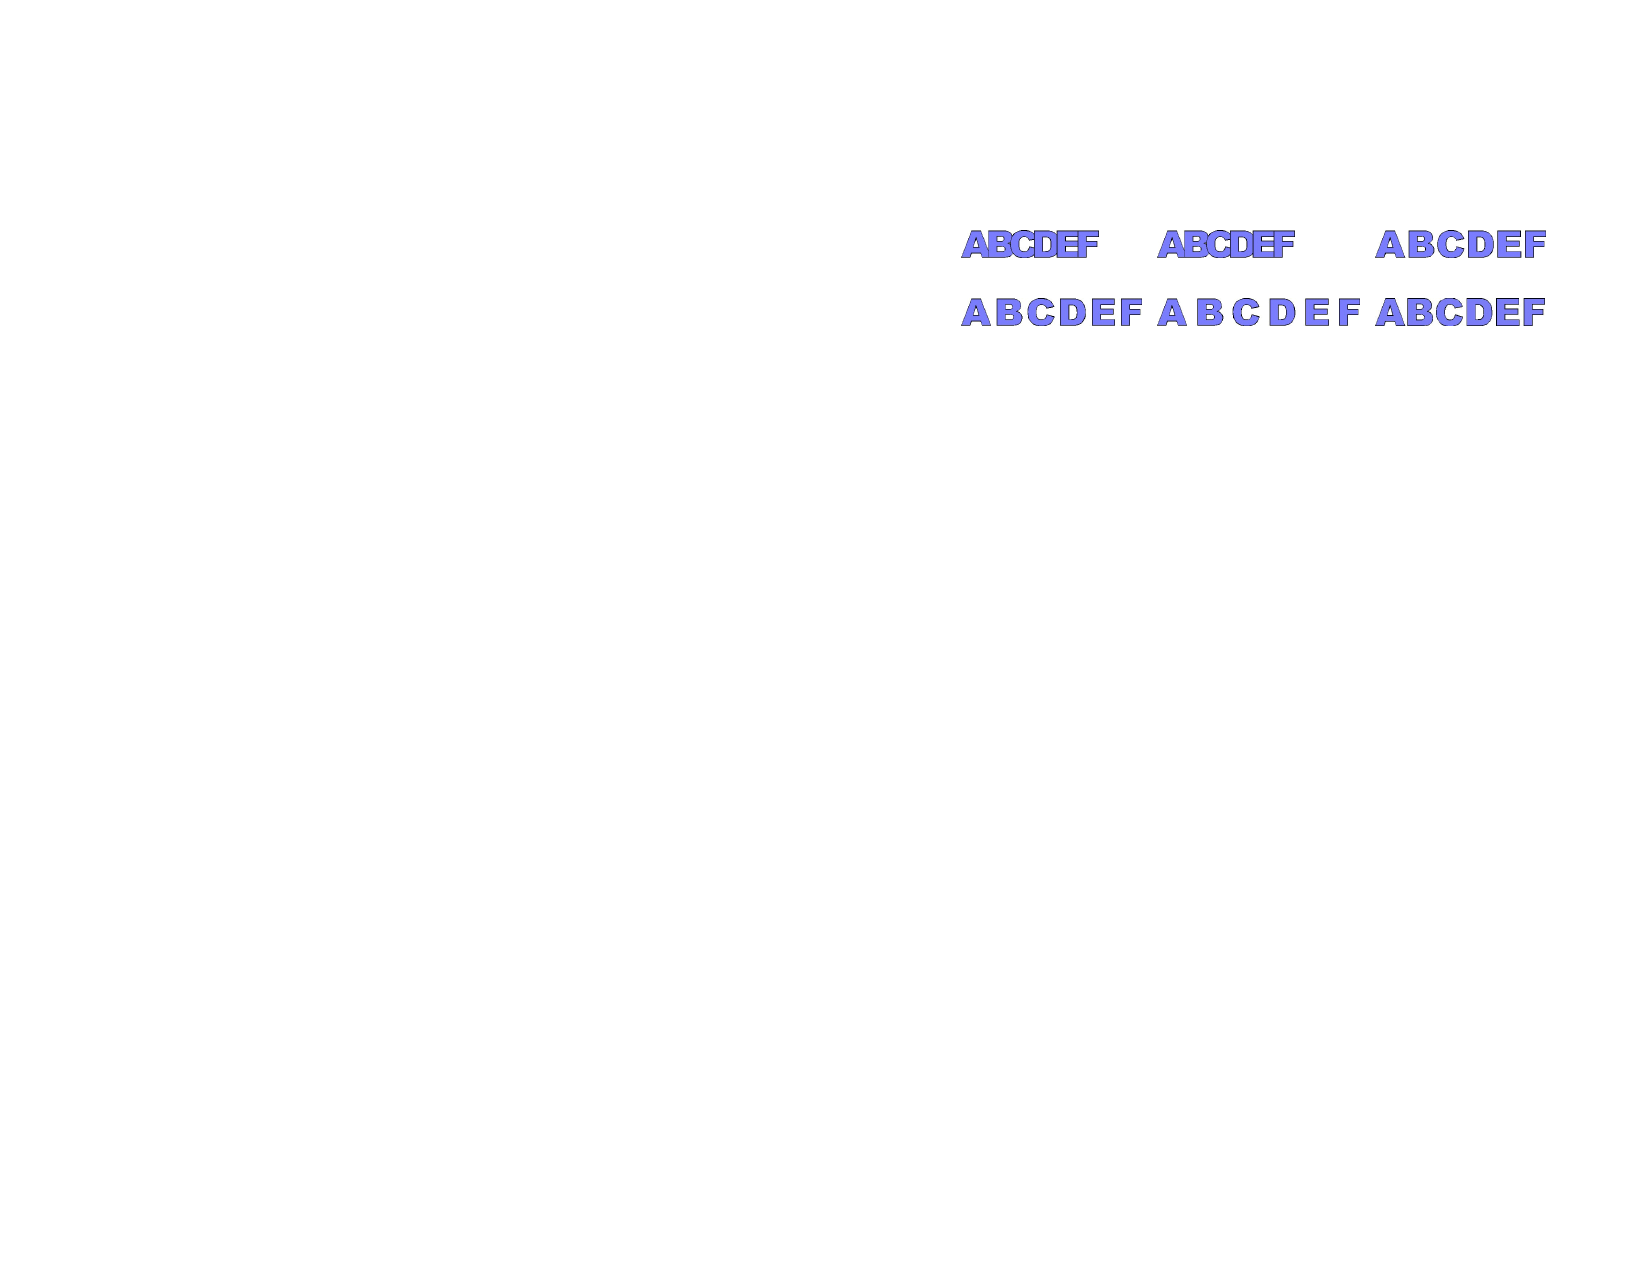
Overlap
Touch
Narrow
Medium
Wide
Default
Using Manual Kerning
Changing Kerning for All Text
1 Select the text.
2 Change the value of the Tracking field on the DesignCentral -
Character tab.
Changing Kerning between Two Characters
1 Click the Text tool between two characters.
2 Adjust the kerning by changing the value of the Tracking field
on DesignCentral - Character tab.
Ctrl and right arrow / left arrow keys narrows or widens the kerning.
Defining Kerning
Instead of setting the kerning each time you create a design, you can change
the default kerning for a pair of characters for one font. By setting up a
table of kerning pairs for your frequently used fonts, you can ensure that
they will look right every time you use them.
The kerning specified here is used only by this program and will not affect or
be used by other applications.
1 Select the text.
2 From the Text menu, select Define Kerning.
3 Select where the kerning will be stored:
Selection only
In document
Kerning is used only for selected text.
Kerning is used for all text that is using this font and
pair of characters for this file.
As default
Kerning is used in all files.
75
 Flexi Help")
 Flexi Help")
 Flexi Help")
 Flexi Help")
 Flexi Help")
 Flexi Help")
 Flexi Help")
 Flexi Help")