
Compounding Objects
Compounding lets you view overlapping objects exactly as they will appear
when cut. This feature is useful for creating holes through objects.
Compounded objects are treated as a single object.
Compounding Objects
1 Align the objects on top of each other.
2 Select the objects.
3 From the Arrange menu, point to Compound and select
Compound.
If objects with different colors are selected, the compound object will
have the color of the topmost object.
Compounding Objects by Color
1 Select the objects.
2 From the Arrange menu, point to Compound and select
Compound by Color.
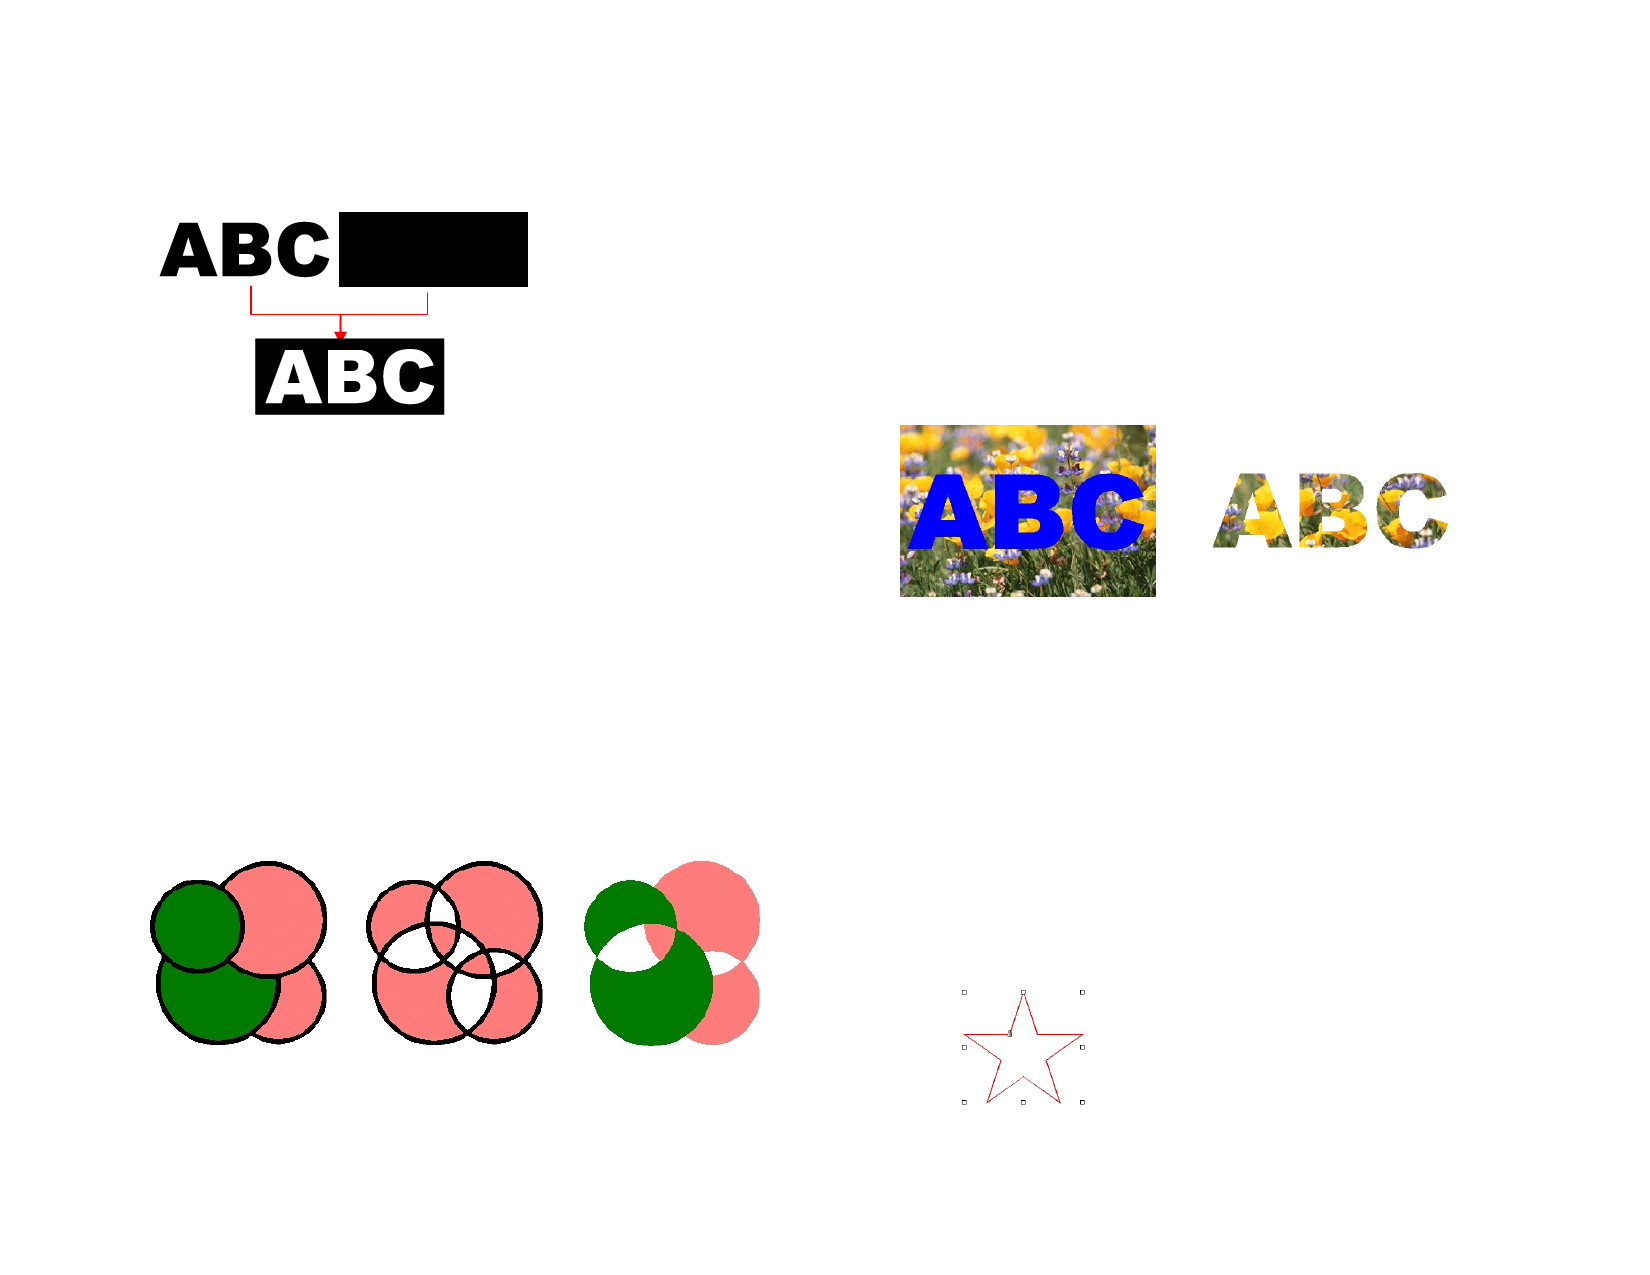
Objects compounded by color are converted to outlines.
Original objects
Normal compound
Releasing Compounded Objects
1 Select the compounded object.
Compound by color
© 2006 SA International
2 From the Arrange menu, point to Compound and select
Uncompound.
Masking Objects
Masking is the process of clipping objects, vectors or bitmaps to the shape
of a vector object.
If you want to use more than one object as a mask, you must group them first.
Creating a Mask
1 Select the objects. The topmost object will be used as a mask
2 From the Arrange menu, point to Mask and select Mask.
The Mask (ABC) and the bitmap that The masked image
will be masked
Unmasking Objects
1 Select the masked objects.
2 From the Arrange menu, point to Mask and select Unmask.
Locking Objects
Locked objects can be selected, but cannot be edited, moved or resized.
Locking Objects
1 Select the objects.
2 From the Arrange menu, point to Lock and select Lock.
In some cases the Control Point will overlap
the Padlock.
Locked object with
a Padlock symbol
In a path, you can change the padlock’s
position by changing the starting point of the
path. See “Changing Starting Point” on page
90 for more information.
40
 Flexi Help")
 Flexi Help")
 Flexi Help")
 Flexi Help")
 Flexi Help")
 Flexi Help")
 Flexi Help")
 Flexi Help")