
21 Engraving your Design
In order to output the job, engraving fills must be applied to the design. See
“Applying Engraving Fills” on page 119 for more information.
Before you can output any design, make sure you have established a
connection from your design software to the Production Manager and
created a setup for your output device as instructed in the Production
Manager User Manual.
1 From the File menu, select Engrave.
2 Select material size from Material group box.
3 Adjust the settings available in the Engrave dialog box as
necessary and click Send.
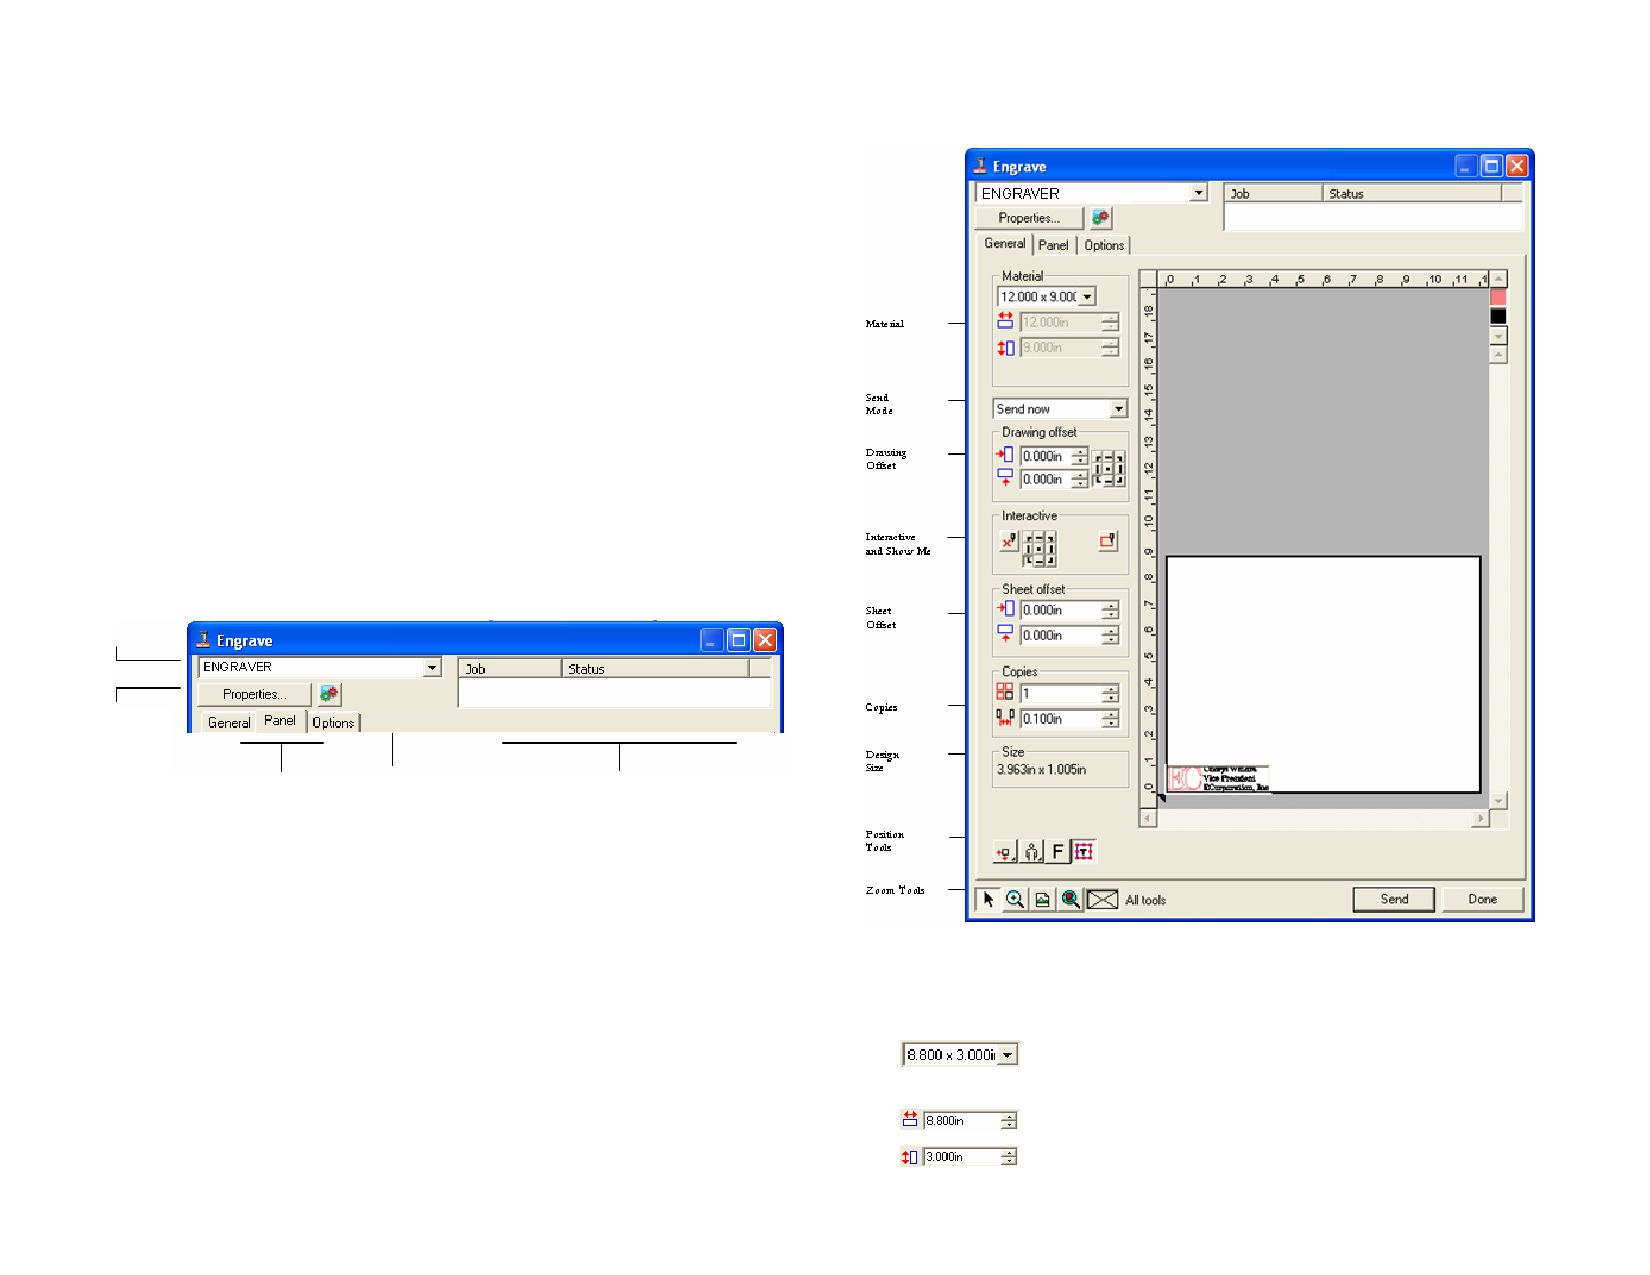
Engrave Dialog Settings
The Engrave dialog box gives you complete control over how the job is
produced.
The area on top of this dialog is common for all tabs:
Current Cutter
Engrave Dialog – General Tab
Displays the
Setup
Properties
Tabs
Active jobs for this device
© 2006 SA International
Material Settings
The Material group box allows you to specify the size of the media used in
your output device.
Select your media size from the list or specify a custom size by
selecting User Defined.
Width of material.
Height of material.
158
 Flexi Help")
 Flexi Help")
 Flexi Help")
 Flexi Help")
 Flexi Help")
 Flexi Help")
 Flexi Help")
 Flexi Help")