
1 Click on the Contour button on the Advanced tab of the RIP
and Print dialog.
If you have not yet set up your vinyl cutter, you will be prompted to add a
setup before you can access the Contour Options dialog.
6 Select the drawing color for which you want to change the
mapping and select the Printer color from the map to list. Select
Print as process color if you want to print that color using
process colors (CMYK). Select Skip to disable the color.
7 Click OK.
8 Set the appropriate options in the RIP and Print dialog and
select Send to print the job.
The printer or the Production Manager will prompt whenever you have to
change the spot color ink in the printer.
Contour Cutting
Contour cutting allows you to print and then cut a contour line around your
design. The output of a design with contour cut involves several steps as
follow:
1 Create your design in your software and add a contour cut line.
See “Using Contour Cut” on page 118 for more information.
2 From the File menu, select RIP and Print.
3 Select the Advanced tab in the RIP and Print dialog.
4 Click Contour.
5 Set the contour cut options.
6 Print your design.
7 Cut the contour cut.
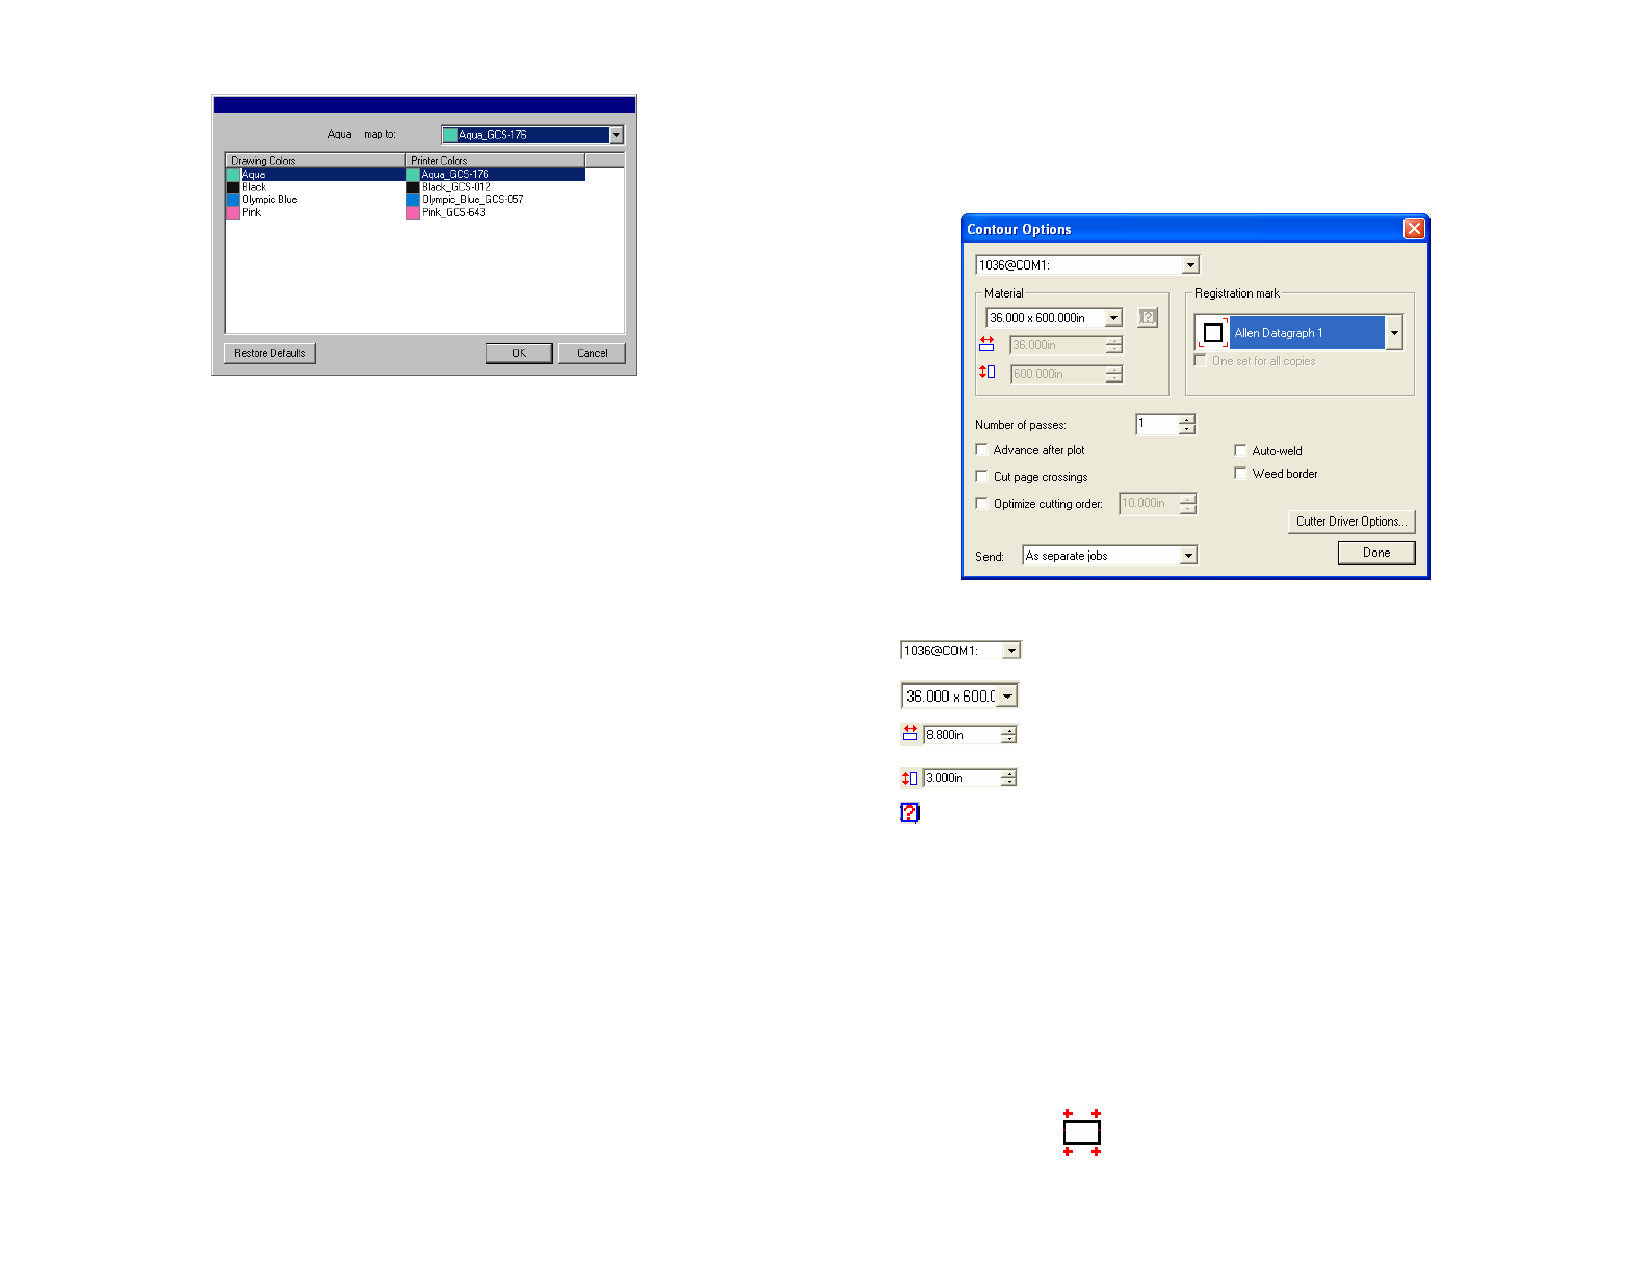
Setting Contour Cut Options
When a print job containing one or more contour cuts is opened in the RIP
and Print dialog, you can set the cutting options for the contour cuts in the
Contour Options dialog.
© 2006 SA International
2 Adjust the following parameters:
The cutter that will be used to cut the contour.
Media size.
Material width.
Registration
mark
Material height.
Poll Size: polls the size of the media loaded in the cutter. This
feature only works for devices that are capable of two-way
communication, such as serial or USB devices.
Select the type of registration mark to help you align the
printed media in the cutter for contour cutting. Some cutters
are equipped with sensors that detect the registration marks
automatically.
The Print Marks Color setting in the Advanced tab of the
RIP and Print dialog determines the color of the registration
marks.
For best result with an automatically aligned cutter, use the
registration mark for that manufacturer and device.
4 Points Places registration marks along the
Horizontal upper and lower horizontal edges of
the job.
155
 Flexi Help")
 Flexi Help")
 Flexi Help")
 Flexi Help")
 Flexi Help")
 Flexi Help")
 Flexi Help")
 Flexi Help")