
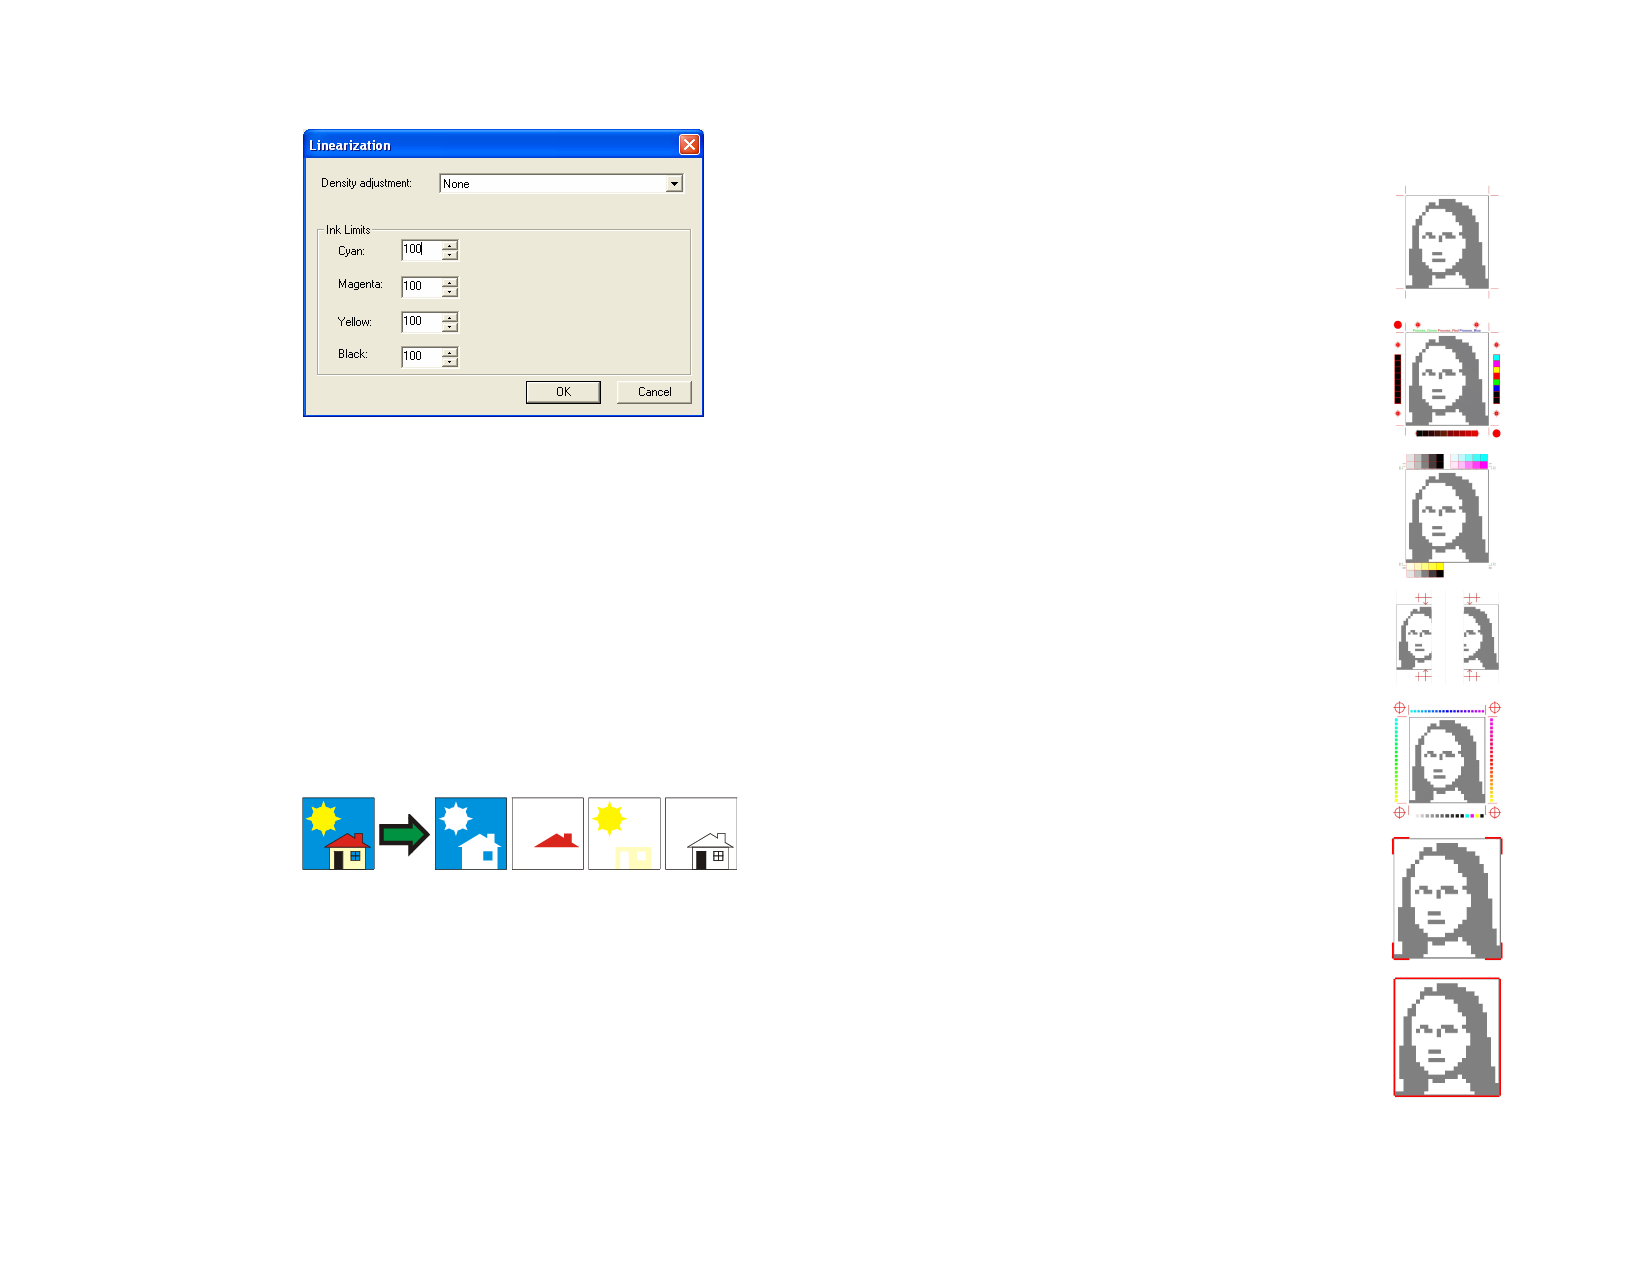
Linearization Click to launch the Linearization dialog.
Print substrate
Print
dimensions
and labels
Print as
separations
Density
adjustment
Selecting a density file applies the ink density
adjustments created in Color Profiler. If you do
not wish to apply a density adjustment, set this
field to None.
Ink Limits
Set the ink limit for each color of ink to the
maximum percent coverage that the device can
output without causing bleeding or drying
issues, then click OK.
If checked, the color of the drawing area will be printed with
the design.
Selects if the labels and dimensions added with
dimension/label tools will be printed with the design.
Check to print each color plane separately.
Use printer
spot colors
You can select to print one color channel or all color channels
as a separate job.
Print
separations
in color
Check to make each process color separation
print in the appropriate color of ink. If this
option is not selected, all process color
separations will print in black.
Separations for spot colors will always print in
black.
Allows you to map the spot color used in the design to specific
ink in the printer. See “Printing with Spot Colors” on page 154
for more information.
© 2006 SA International
Labels and
marks
Check Print Marks to print the selected type of mark. Set
Color to the ink color that will be used to print the marks. The
available types of print mark are:
Crop
Marks
Adds crop marks to the
output to aid in trimming
the printout.
Standard
marks
Standard marks intended
for aligning color
separations.
Swatch
Color swatches for each
color of ink will be
printed around the job.
Overlap
Marks
Tonal
Scale
Margin
Overlap marks will be
printed, indicating how
the tiles of a tiled job
should overlap.
Color swatches
containing blended CMY
colors and a gray scale
will be printed around the
job.
Marks will be printed at
the corners of the job
indicating its outside
margins.
Border
A border will be printed
around the outside edge
of the job.
152
 Flexi Help")
 Flexi Help")
 Flexi Help")
 Flexi Help")
 Flexi Help")
 Flexi Help")
 Flexi Help")
 Flexi Help")