
Auto-tile: A tile will automatically be created that includes all
selected objects. If no objects are selected, all of the objects in
the design will be included. If the design is too large to fit on
the selected media, it will automatically be tiled so that each tile
is the maximum possible size. Auto-tile does not attempt to tile
the entire page, just the design or the selected objects.
Tile to Border: The entire design page is automatically tiled. If
the page is too large to fit on the selected media, it will be tiled
so that each tile is the maximum possible size.
Resizing the Panel
The panel defines the area of design that will be processed for output.
Elements of the design that are outside the bounds of the panel will not be
printed.
You can resize the panel by dragging the panel border or using the Panel
Size group to numerically enter the panel size.
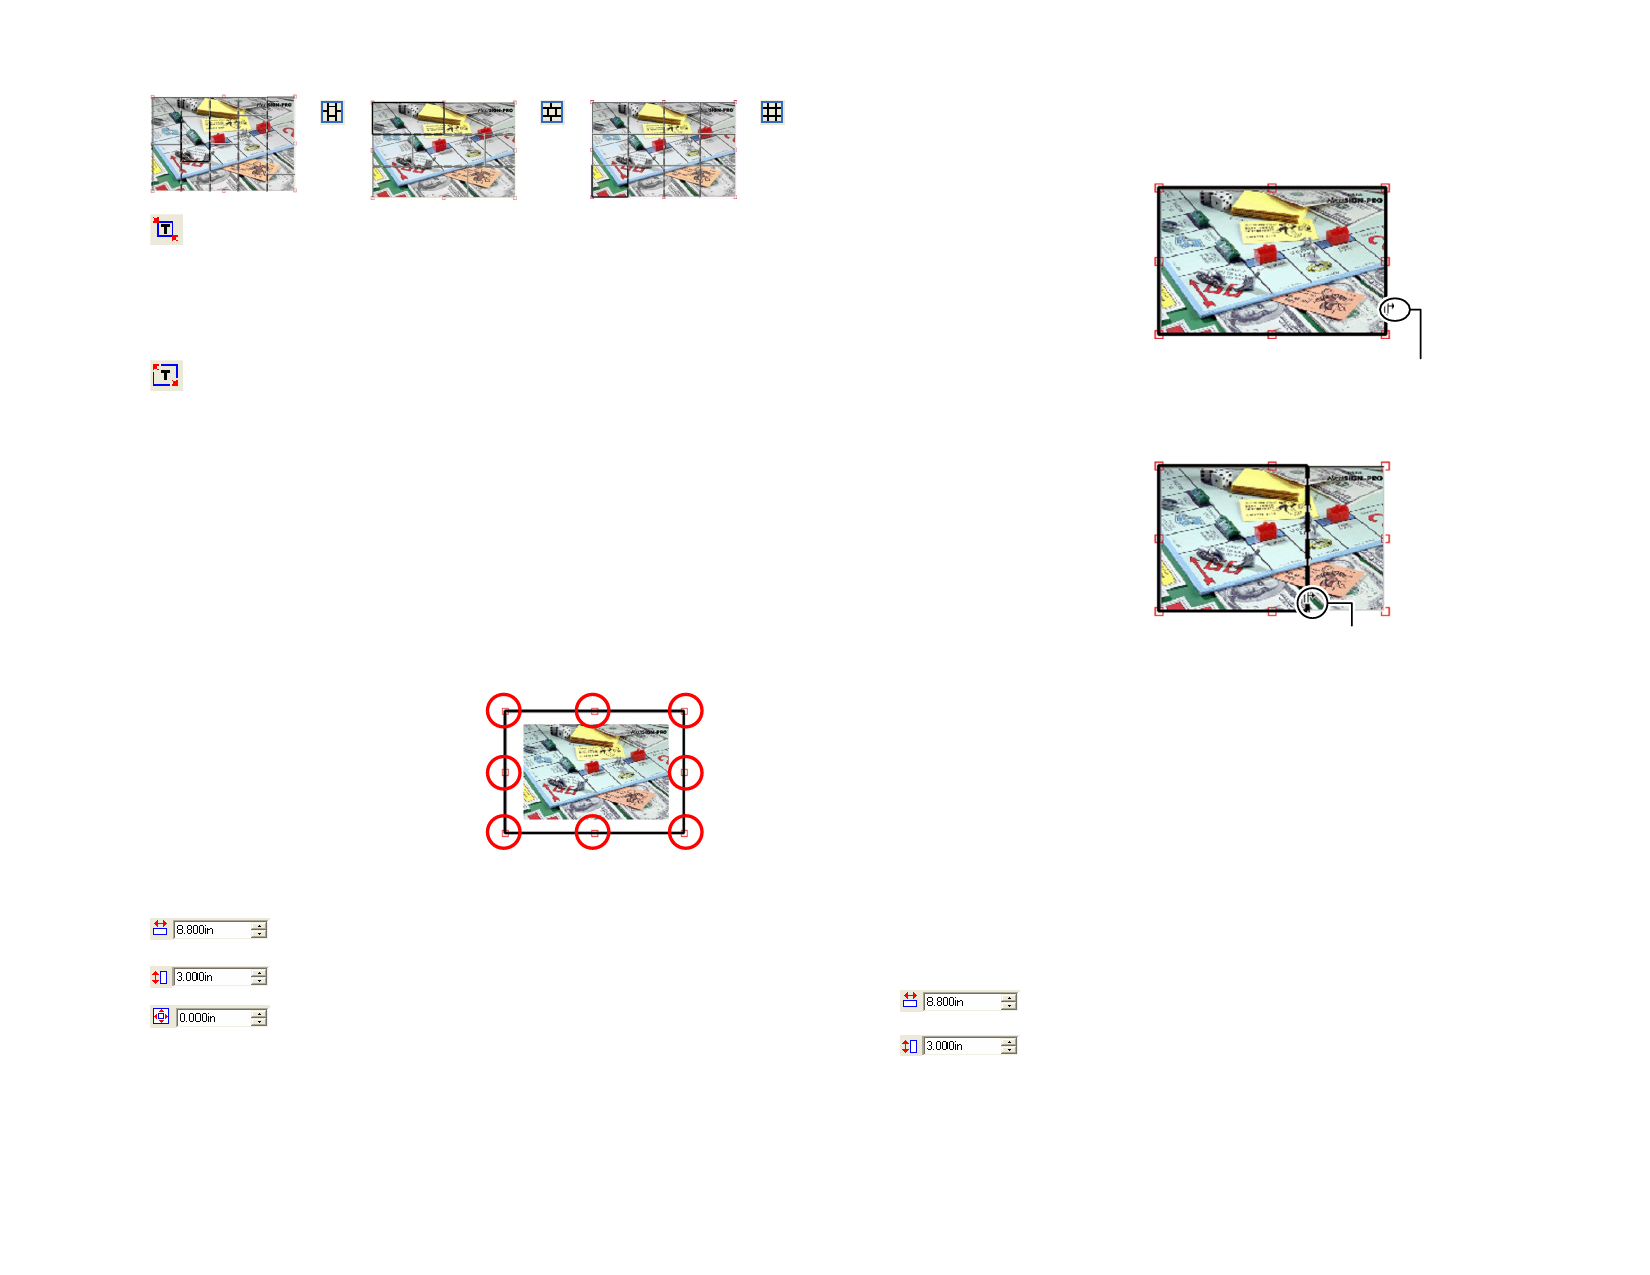
Changing Panel Size with the Mouse
1 Move the cursor on top of
the small red squares along
the panel border.
2 Click and drag to resize the
panel.
Changing Panel Size Numerically
The width of the panel.
The height of the panel.
Margin around the panel.
Tiling the Job Using the Preview Area
Adding New Tiles to the Panel
1 Move the mouse
cursor on top of
the panel border.
2 Click and drag
towards the center
of the panel to add
a new panel.
Panel border
Resizing Existing Tiles
1 Move the mouse
cursor on top of
the tile border.
2 Click and drag to
resize the tile.
Tile border
Tiling the Job Using the Tile Group Box
The Tile group allows you to specify the tiles numerically.
Changing Tile Size with the Mouse
1 Move the cursor on top of the tile border.
2 Click and drag to resize the tile.
Changing Tile Size Numerically
1 Select the tile you want to resize in the preview area.
2 Enter the new size.
The width of the selected tile.
The height of the selected tile.
Tiling the Job Evenly
To tile the job evenly, check the tiling option you want to perform and
enter the desired number or the size of rows and columns.
© 2006 SA International
149
 Flexi Help")
 Flexi Help")
 Flexi Help")
 Flexi Help")
 Flexi Help")
 Flexi Help")
 Flexi Help")
 Flexi Help")