
20 Printing your Design
Before you can print any design, make sure you have established a
connection from your design software to the Production Manager and
created a setup for your output device as instructed in the section “Setting
up the Production Manager and Configuring Output Devices.”
Sending Follow the steps below to send the document to your cutting
device:
1 From the File menu, select RIP and Print.
If you have any object selected, only the selected objects will be cut.
2 Adjust the settings available in the dialog box as necessary and
click Send.
RIP and Print Settings
The RIP and Print dialog box gives you complete control over how the job
is produced.
The area on top of this dialog is common for all tabs:
Current Cutter
Displays the
Setup
Properties
Switches to
Active jobs for this device
Tabs
Production
Manager
© 2006 SA International
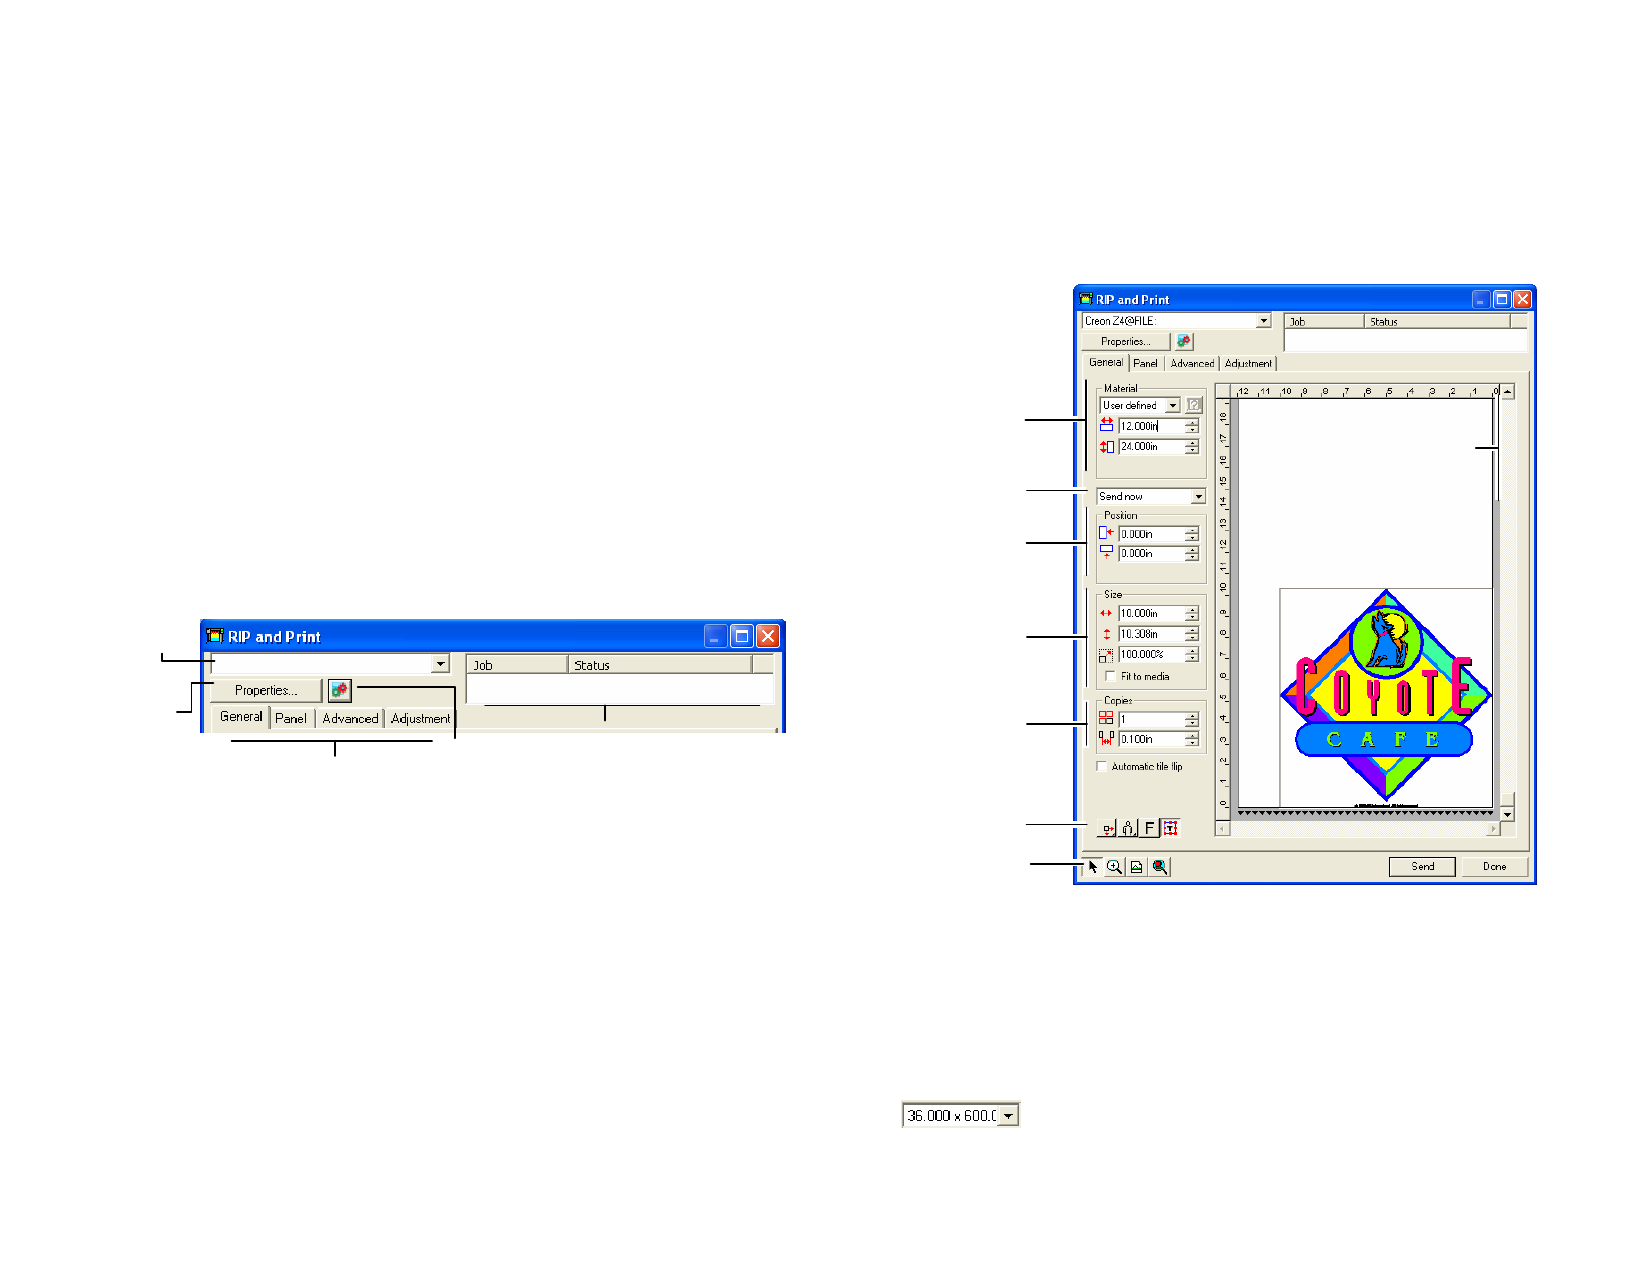
RIP and Print Dialog - General Tab
The General tab allows you to specify the size of media, size of the job and
the location of your output on the media.
Material Group box
Sending Mode
Position Group box
Size Group box
Copies Group box
Preview Area
Color
Palette
Positioning tools
Zoom tools
You can resize the RIP and Print dialog, by clicking and dragging the lower
right corner.
Material Settings
The Material group box allows you to specify the size of media used in your
output device by entering the Media Width and Height. The media size is
used to panel your job if it is larger than the media.
Select your media size from the list or specify a custom size by
selecting User Defined.
146
 Flexi Help")
 Flexi Help")
 Flexi Help")
 Flexi Help")
 Flexi Help")
 Flexi Help")
 Flexi Help")
 Flexi Help")