
15 Working with Measurements and Labels
The software allows you to measure, label and dimension objects. By using
the measuring tools, you can indicate the horizontal, vertical or diagonal
dimensions of the design, or label objects.
The lines and labels can be output to a printer or cutter. See “RIP and Print
Dialog - Advanced Tab” on page 149 or “Cut / Plot Dialog - Advanced
Tab” on page 142 for more information.
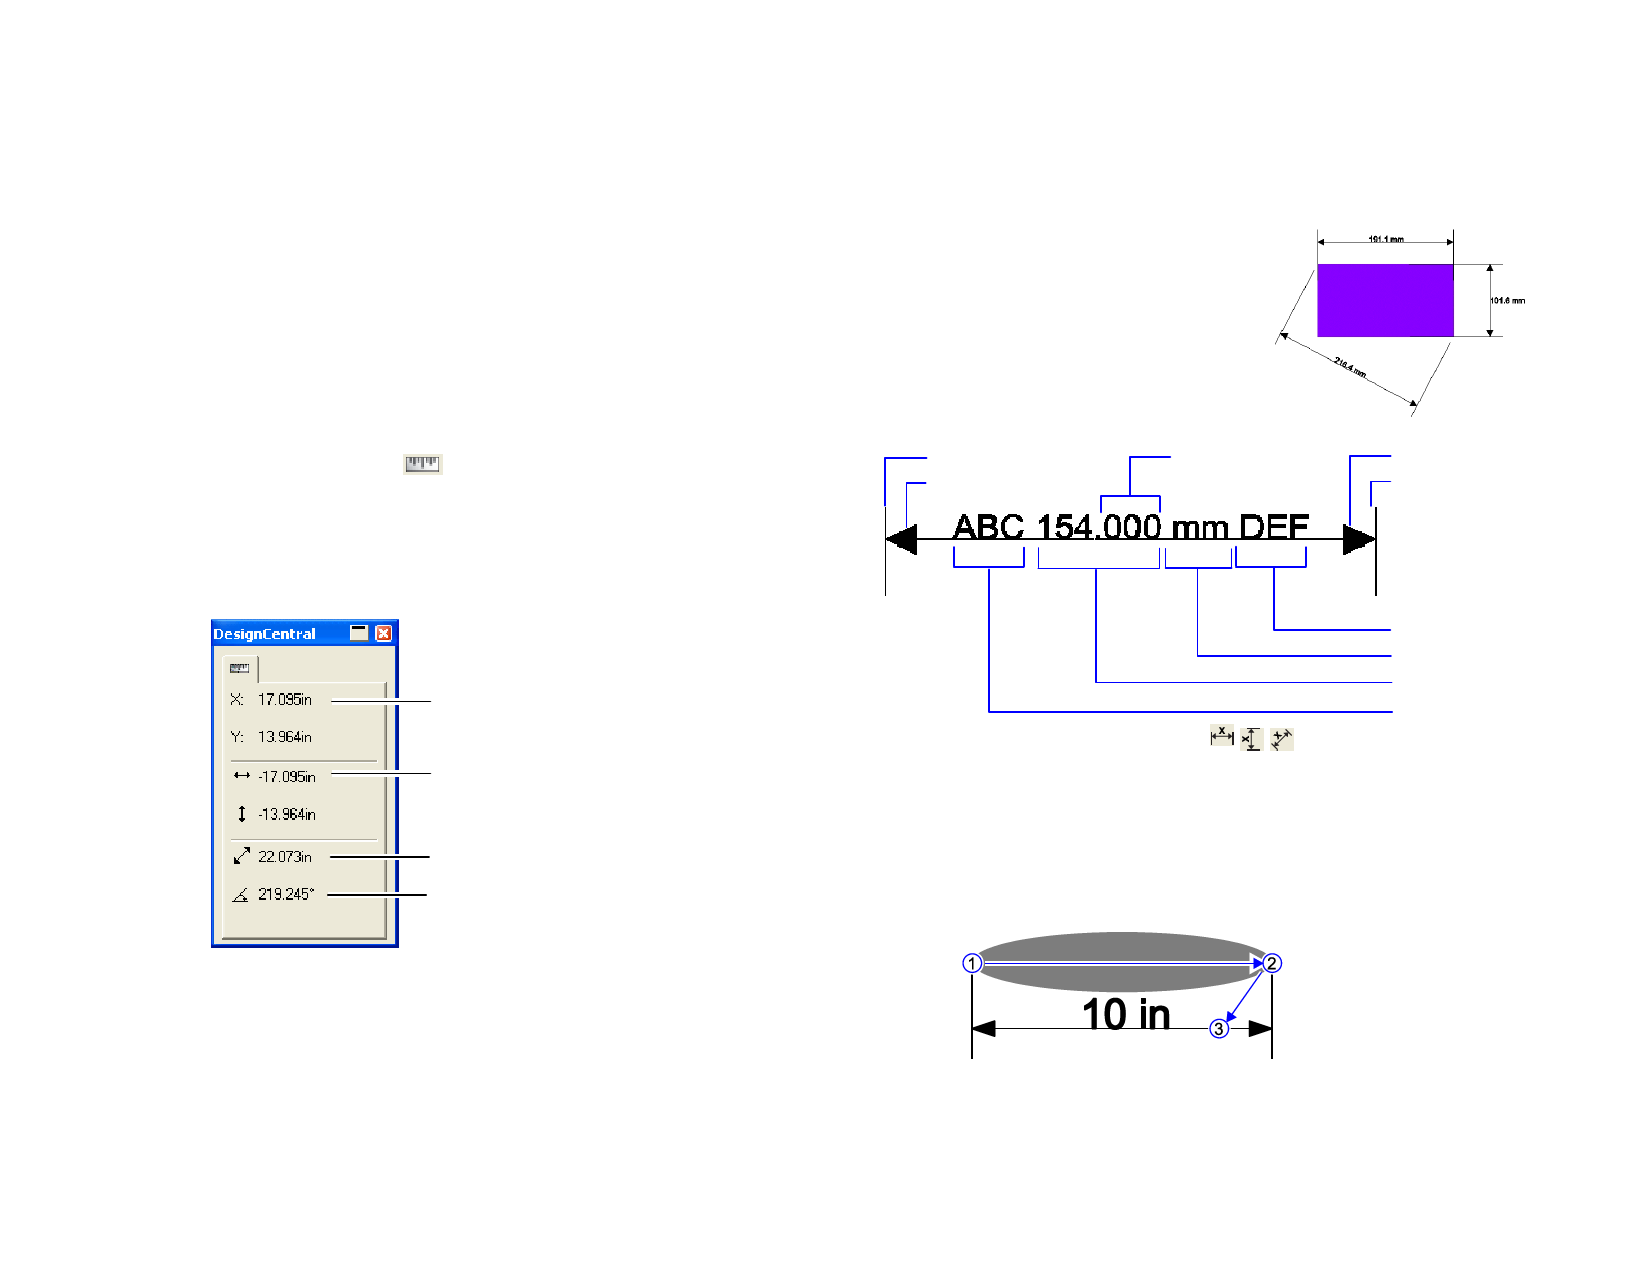
Measuring Distances
Use the Measure tool when you need to know the distance between two
points in your design.
1 Select Measure tool.
2 Click and drag the cursor.
Just click to show a position of one point in your design.
Once you release the mouse button, Design Central displays the following
information:
X, Y coordinates of the first point.
Horizontal and vertical distances from the starting point to
the end point.
Actual distance between starting and end point.
Angle of the line that joins the starting and end points will
have with the horizontal.
Creating Dimensioning Lines
The Dimension tool allows you to create
dimensioning lines between two points in
your design. The dimension lines can be
horizontal, vertical or diagonal.
When you are creating a dimension label,
the Snap to Point feature is automatically
enabled.
Sideline
Arrow
Trailing Zeros
Arrow
Sideline
Suffix
Unit
Dimension Value
Prefix
1 Select the Dimension tool.
2 Click the point where the dimension line will start.
3 Either click the point where the dimension line will end, or drag
from the start point to the ending point. As you move the cursor,
a line displays the direction you are moving.
4 Click a third time to set the distance between the dimension line
and the starting and ending points.
DesignCentral for Measuring
© 2006 SA International
• Hold Shift to constrain the line angle to increments of 45
degrees.
• Hold Ctrl to constrain the dimension lines to be perpendicular
127
 Flexi Help")
 Flexi Help")
 Flexi Help")
 Flexi Help")
 Flexi Help")
 Flexi Help")
 Flexi Help")
 Flexi Help")