Applying Separate Overlap Effect
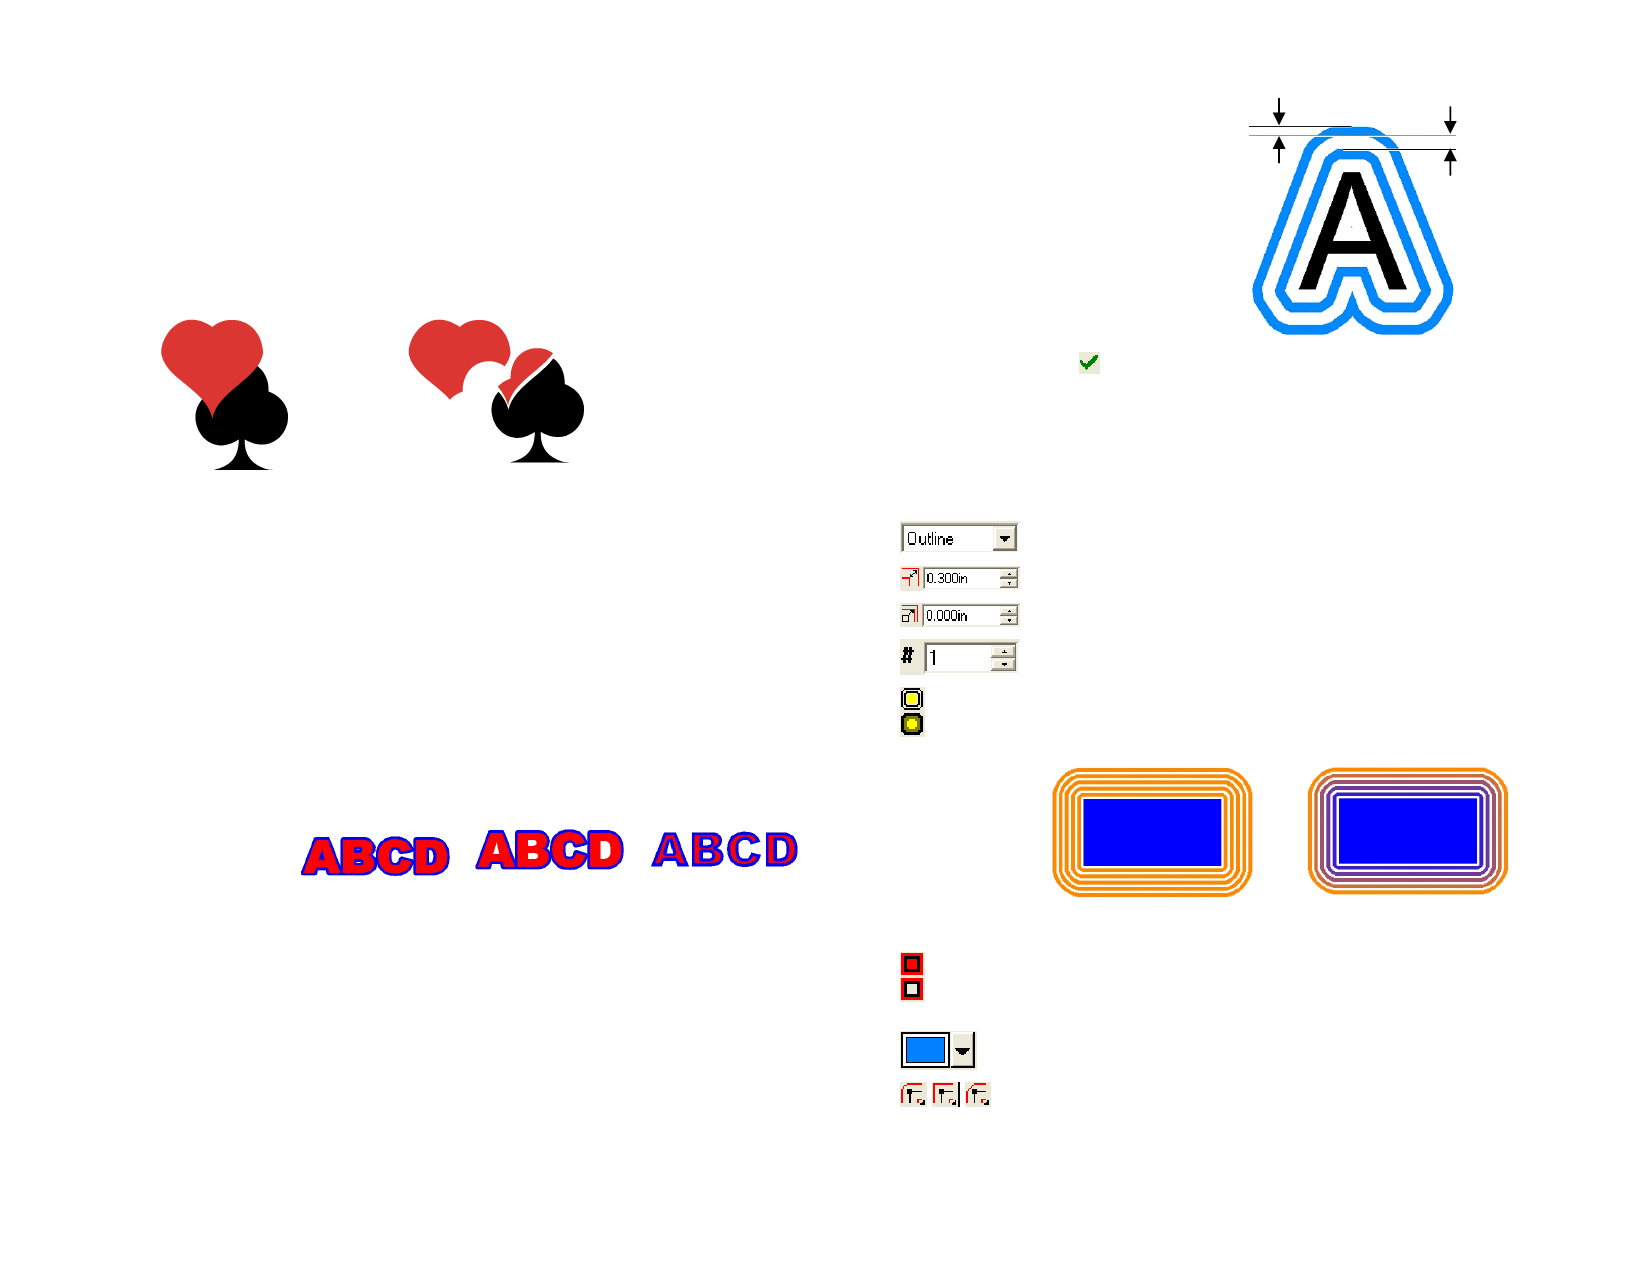
The Separate Overlap effect is applied to overlapping objects. It removes
the overlapping areas from the objects, and makes them into separate
objects.
1 Select the objects.
2 From the Effects menu, point to Combine and select Separate
Overlap.
Original Objects
Objects after Separate Overlap effect
Using the Outline Effect
Your software allows you to place inlines, outlines or contour lines around
any object.
Outline
Contour
Inline
A closed path created around the outer edges of the selected
object and inside holes such as the inside of closed letters (a, o,
etc).
An outline without holes.
A closed path created around the inner edge of the selected
object.
Applying Outlines Effect
Gap
1 Select the objects that the
effects will be applied to.
2 From the Effects menu, select
Outline.
3 Adjust the parameters in
DesignCentral or drag the
control points.
4 Click Apply.
Adjusting Outlines Using DesignCentral
When outlines are applied to objects, the following attributes can be
adjusted in DesignCentral.
Select the effect type between Outline, Inline and Contour.
Width of the outline.
Distance between outlines.
Number of outlines.
This option allows you to choose between using the same color
for each outline generated or to create a "gradient" of colors
for each outline created.
Outline
Contour
Inline
The term “outline” in this chapter refers to Inlines, Outlines and Contours.
In an outline, you can adjust the number of lines, their width and the
spacing between them.
Width
Outlines with same color
Gradient Outlines
Allows you to select to create a backing behind the original
object. This option is only available when the distance between
outlines is zero.
The outline color.
Select the appropriate Joint Type option to specify how corners
are outlined.
© 2006 SA International
109


