
4. Check the Send cut job box and select the cutter you
want to use as the second half of your virtual hybrid.
When you select the cutter in the Workflow tab, the default registration
marks for that cutter are automatically added to the job.
5. Click OK to close the Job Properties dialog.
6. RIP and print the job.
Once you RIP and print the job, the cut portion of the job automatically
appears in the Hold Queue.
7. Remove the output medium from the printer and load it into
the cutter. Make sure the output medium is straight, and
align the registration marks to the origin for the cutter.
8. Output the cut job in the Hold Queue as you would a
normal print job.
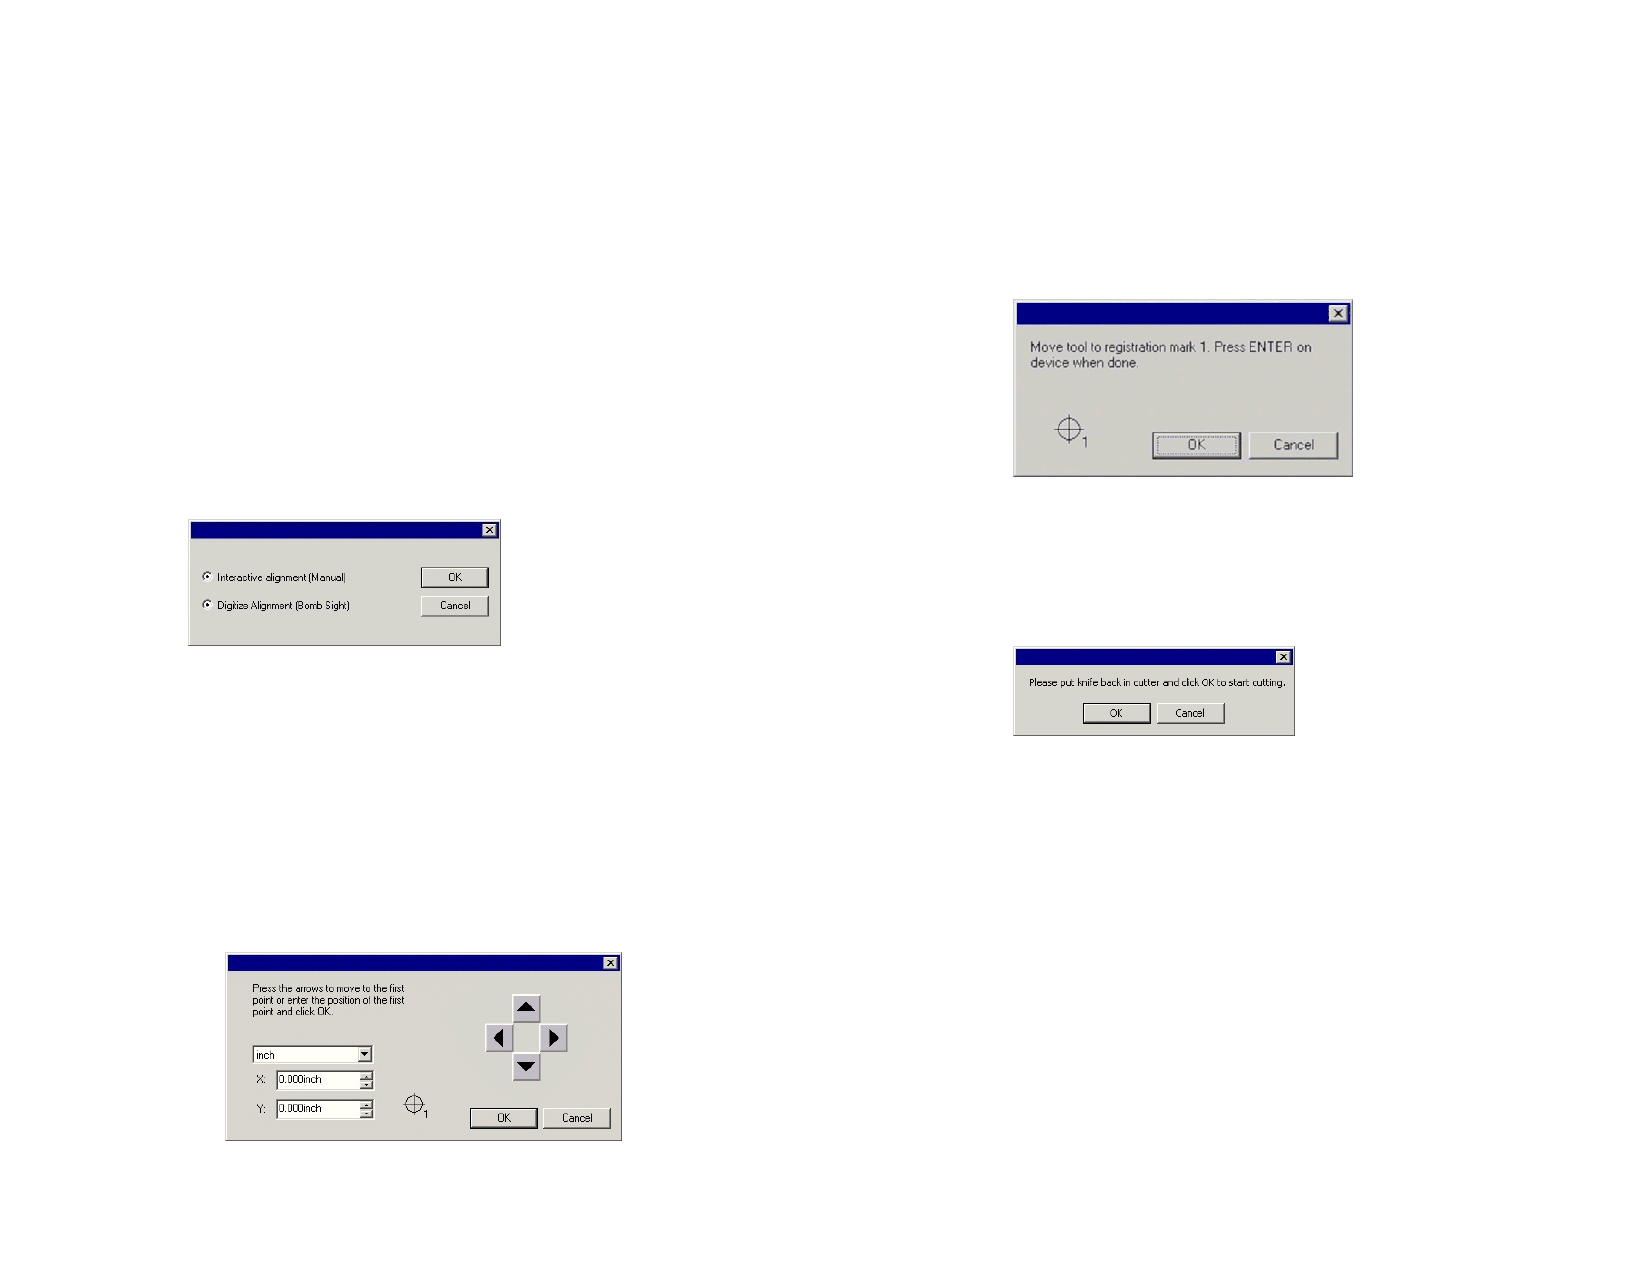
9. Select the method to be used to position the cut head over
the registration marks and click OK.
Interactive You will position the cut head over the registration
alignment marks using software controls.
Digitize
You will position the cut head over the registration
alignment marks using the controls on the face of the cutter.
This option is only available when a bi-directional
communications protocol such as serial or USB is used.
a. To indicate the position of the registration marks using
Interactive alignment:
i. Use the arrow buttons to position the head of the
cutting device over registration mark 1 and click
OK.
ii. Repeat for all additional registration marks.
b. To indicate the position of the registration marks using
Digital alignment:
i. Use the front panel controls on the cutter to position
the head of the cutting device over registration
mark 1. Press Enter on the cutting device and click
OK.
ii. Repeat for all additional registration marks.
10. Make sure the knife is loaded into the cutter, then click OK
to cut the contour portion of the design.
© 2006 Scanvec Amiable, Inc.
8
 Contour Cutting Guide")
 Contour Cutting Guide")
 Contour Cutting Guide")
 Contour Cutting Guide")
 Contour Cutting Guide")
 Contour Cutting Guide")
 Contour Cutting Guide")
 Contour Cutting Guide")