Laser Engraving & Cutting Control System Manual
3.4 Technics Process
3.4.1 Set the Stop Position of the Laser Head
The corresponding icon is on the toolbar.
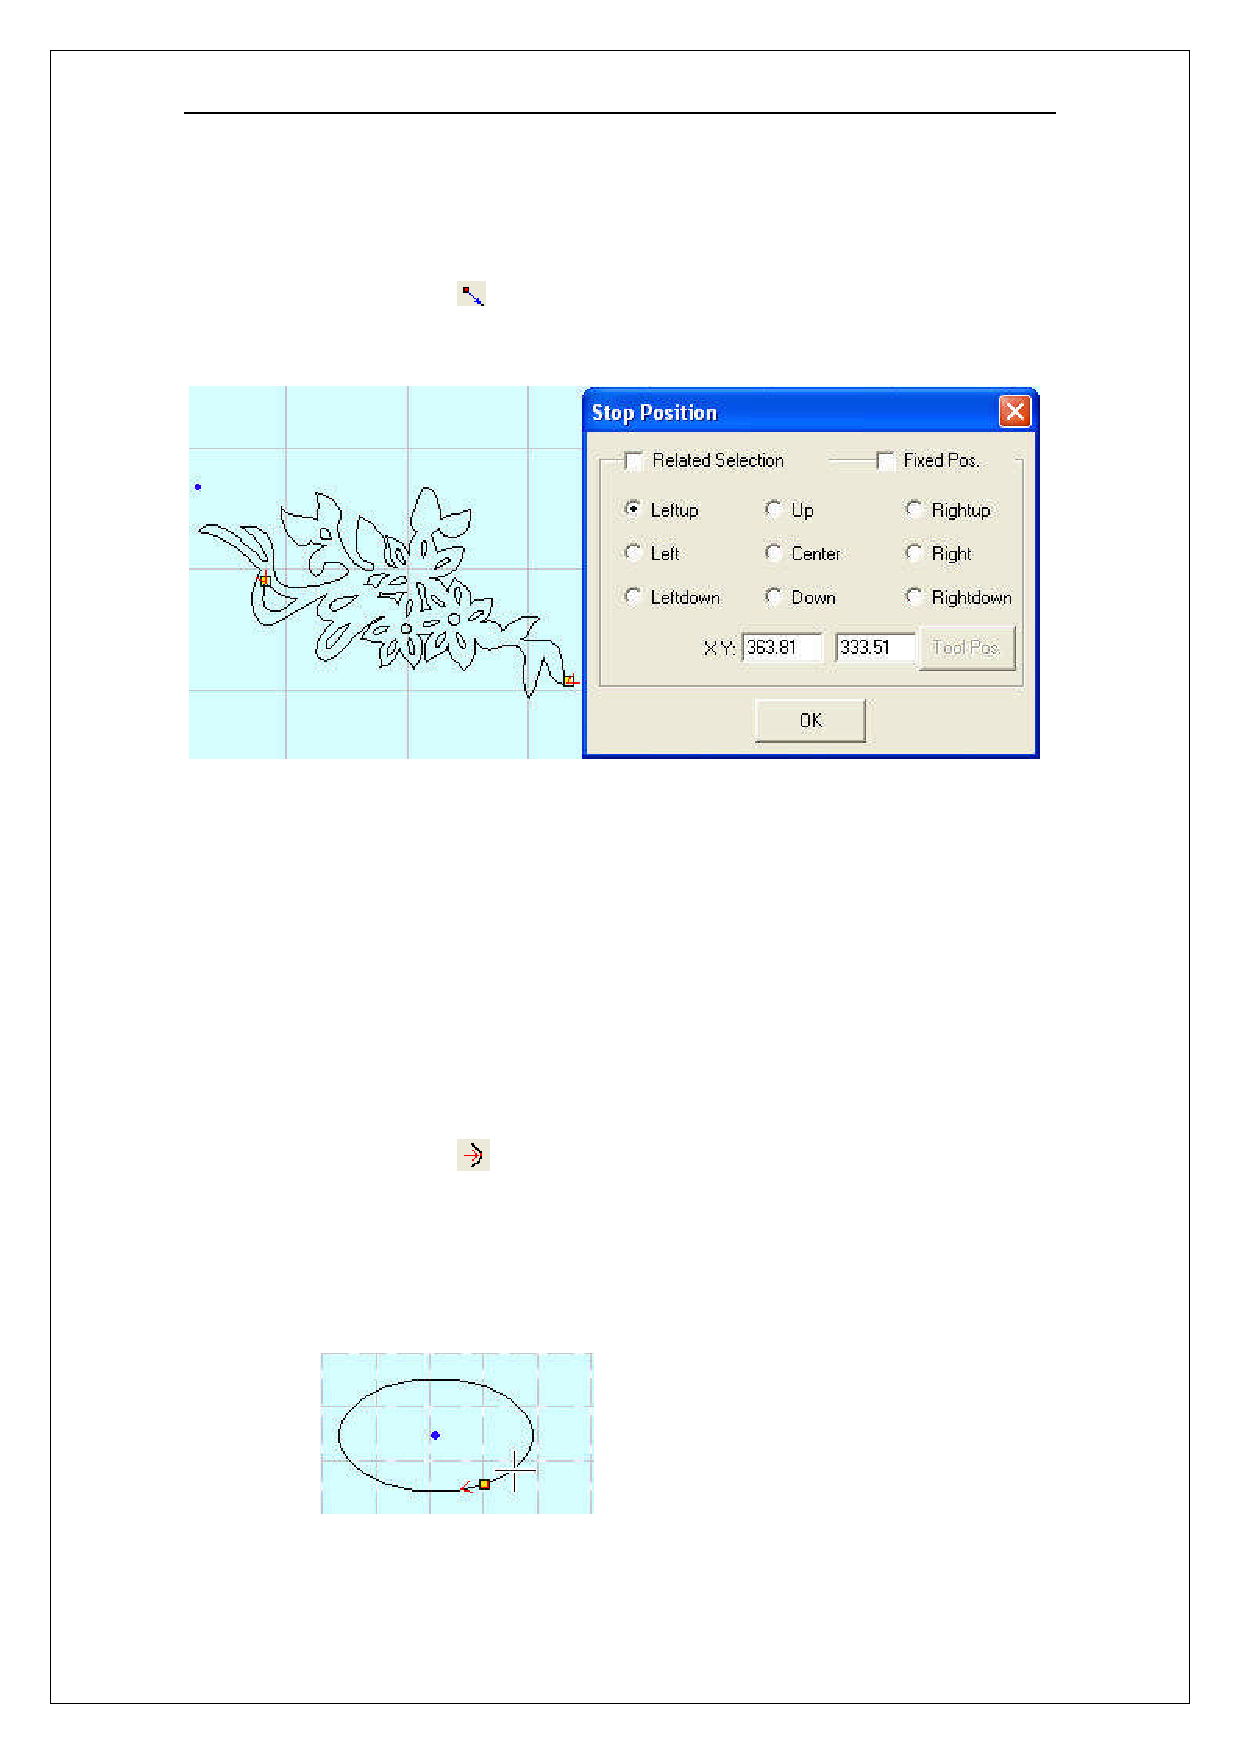
The laser head will move to the point after the data is processed. Click the button and the
mouse arrow will change to a circle, dialog box appears as below:
There are 4 modes:
Related selection:Select part of the graph first, select the “Related Selection”option, and
select relative position of the graph (i.e. Left up, Right down).
Relative whole graph: Without selecting the “Related Selection”option, and select relative
position of the graph (i.e. Left up, Right down).
Fixed Position:Select “Fixed Pos.” and input the coordinate value to set the stop point
precisely.
Anywhere:Move the mouse to any point and set the stop position as you need.
3.4.2 Set Start Point
The corresponding icon is on the toolbar.
The system will automatically define the start point (usually the crossed point of two lines)
and the direction of cutting process. Select the vector graph, click this button, move the mouse to
the vector graph, and the mouse will change to a cross. Click the mouse on any position of the
vector graph, the point will be the start point of cutting, and click “F”to invert the direction. It
appears as below:
18

