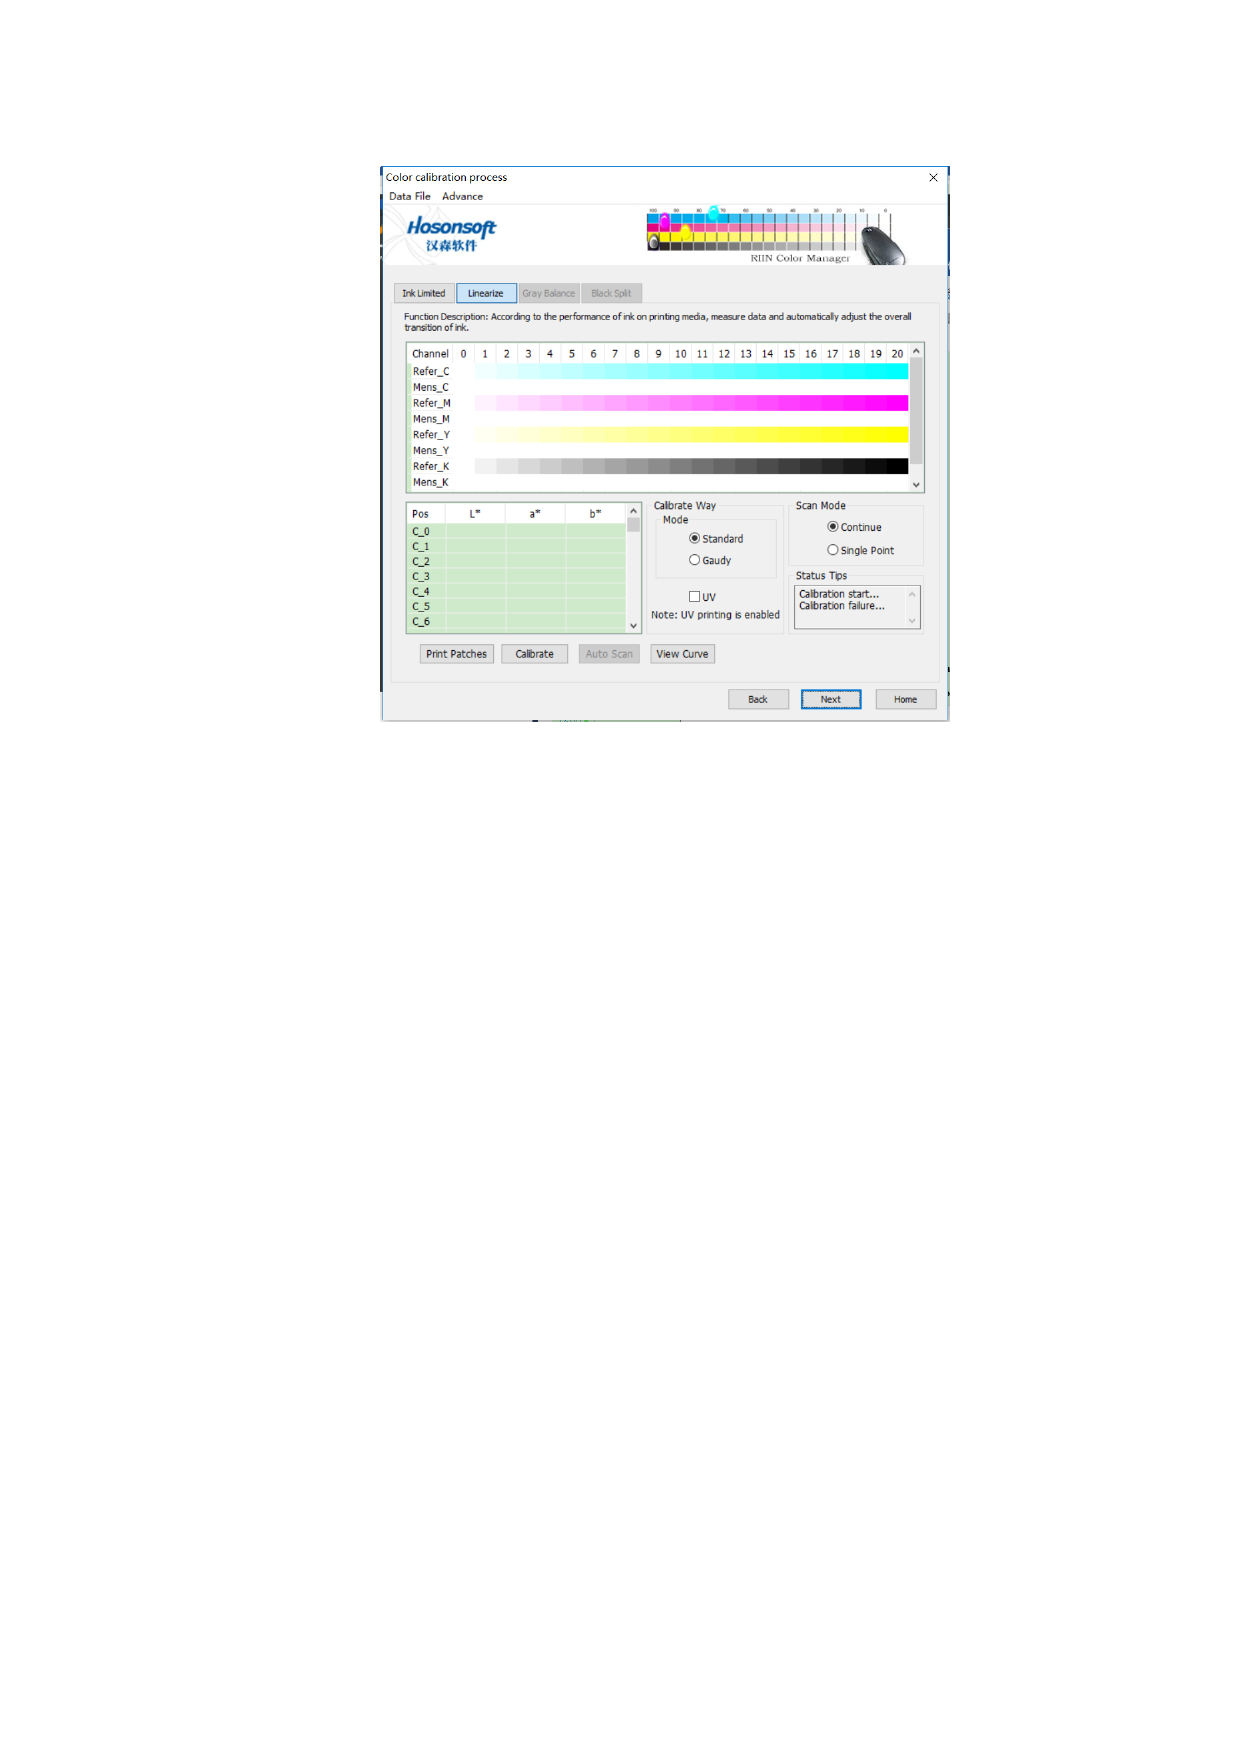
Pay attention to the following issues to finish a complete linear calibration.
1.Click the “Print Calibration Diagram” and print a calibration diagram on the machine. Cut
it after it is a bit dry. Scan and measure after it is completely dry.
2.Before this, connect with eye-one, the program will automatically start “Calibration
Device”. If it is connected to eye-on at this step, please click the “Calibration Device”.
3.Scan by referring to the color block diagram on the guide, and the scanning sequence
should be green, pink, yellow and black, from light to dark. The program will record
corresponding results.
4.After scanning the four color blocks, check the curve. If the “actual curve” is relatively
smooth, go to next step. Otherwise, re-scan the color blocks that are not smooth, or adjust
manually to make them smooth in the curve adjustment.
5.In the scanning, try to scan the relatively even areas in the color blocks. If t he scanning is
wrong, re-select and re-scan. Like (The green is scanned wrong, you can select the gree n
block and re-scan it).
6.Click the button “Check Curve”. There will be three line charts.
82 / 92

