
User Manual of Machine Vision Camera SDK Demo (Halcon)
1.1.2 Operation Procedure
Before running the demo, Halcon plugin (hAcqMVision.dll) should be copied from the
Development\ThirdPartyPlatformAdapter under the MVS installation path to the Halcon installation location.
Please be noted that the plugin used needs to be the corresponding one to the installed Halcon version. If the
64-bit version of Halcon is installed, the plugin should be copied to the 64-bit file. (The same principle is
applied to hAcqMVisionxl.dll if Halcon XL is used.)
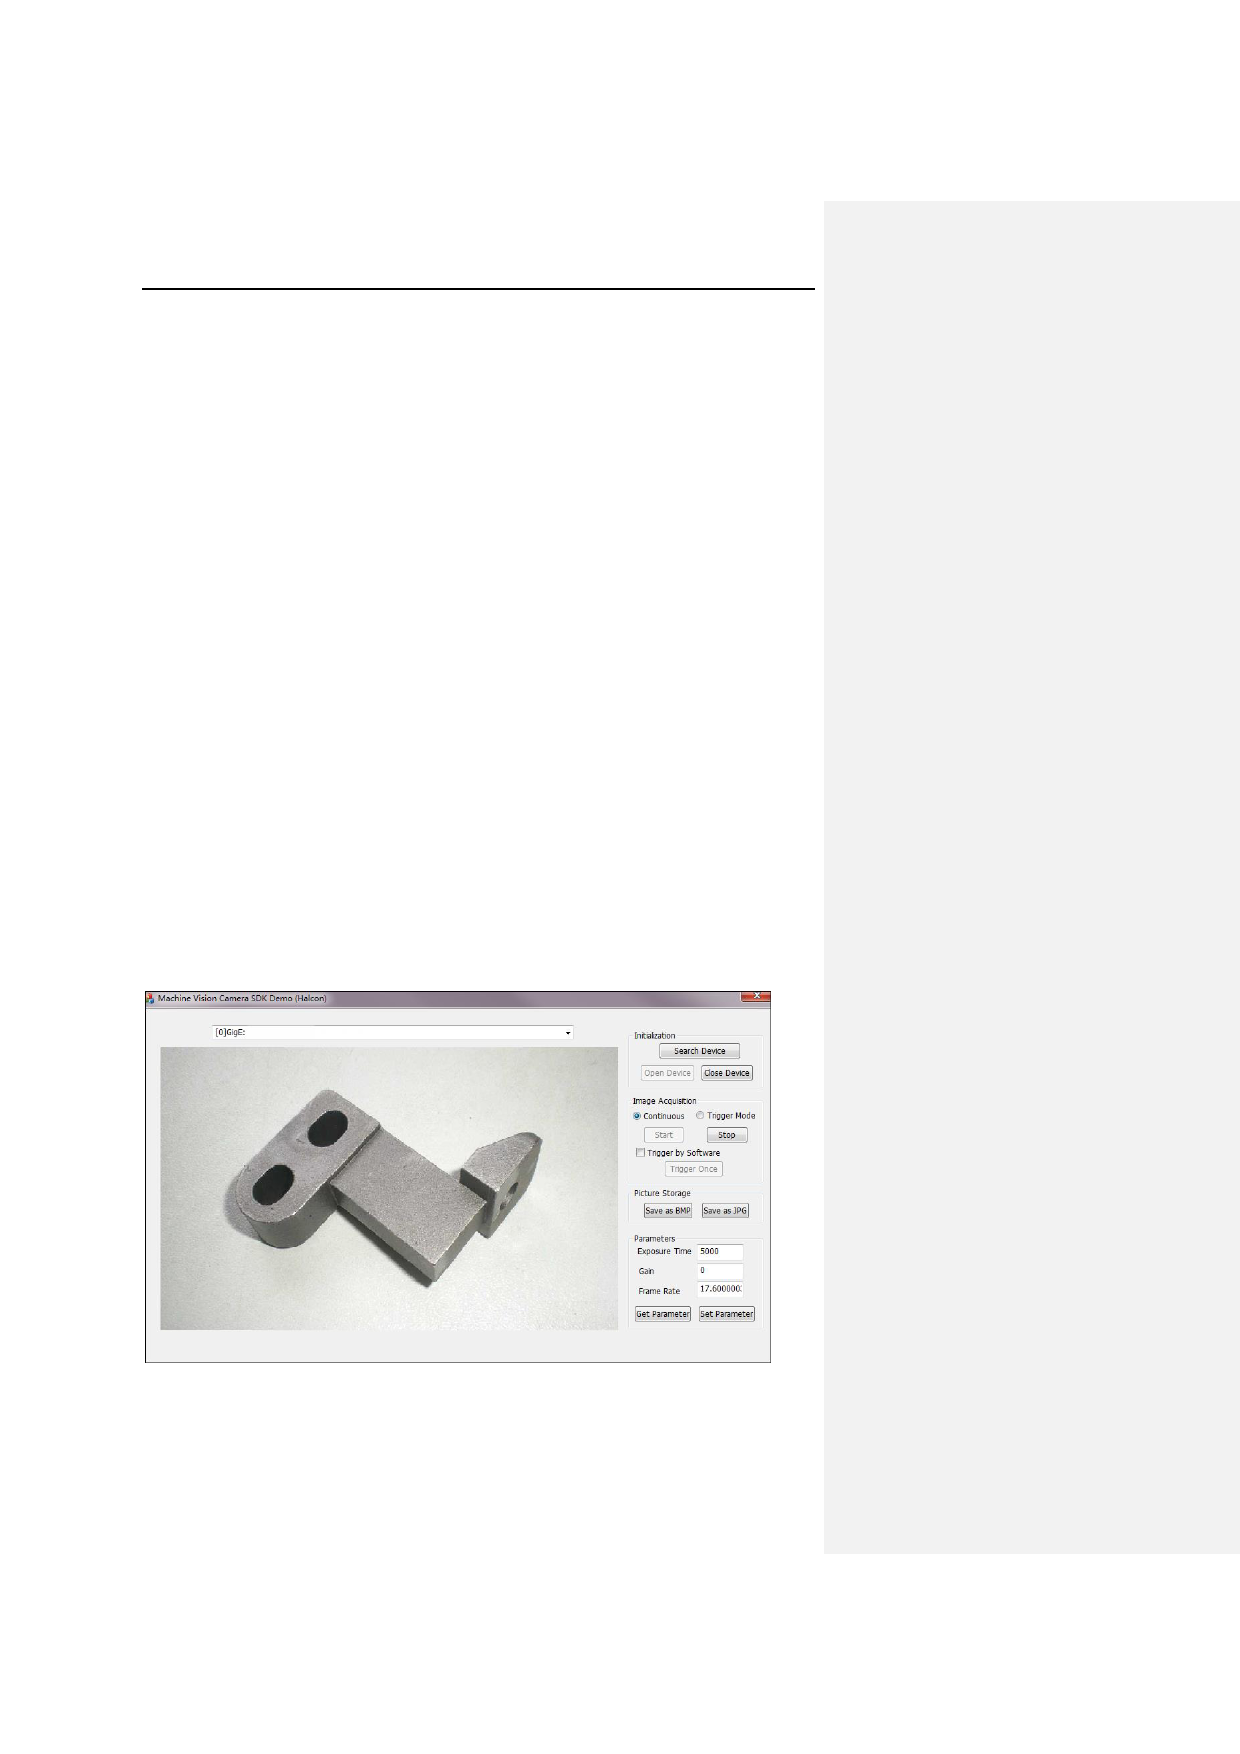
1. Click Search Device in the initialization area to enumerate the online devices and the online devices will
be displayed in the drop-down list. Please be noted if the User ID is not blank, the device will be displayed
in the format of “Serial N0.” + “Device Type” + “Device Name” + “IP Address”.
2. Select a device in the drop-down list.
3. Click Open Device button in the Initialization field to active the Image Acquisition field.
4. Select image acquisition mode as Continuous or Trigger Mode.
Please be noted the default image acquisition mode is Continuous.
When Trigger Mode is selected, you can check the Trigger by Software checkbox. Click Start button in the
Image Acquisition field to start image acquisition.
The real-time image will display on the left display window if the Continuous mode is selected.
You can also click Trigger Once button to realize software trigger for once if Trigger by Software checkbox
is checked in Trigger mode.
5. Set the value of exposure time, gain and frame rate in the Parameter field.
6. Click Set Parameter button to save the settings.
7. (Optional) You can click Get Parameter button in the Parameter field to refresh the value of exposure
time, gain and frame rate.
Please be noted if exception or error occurred during the procedure, the prompt dialog will pop up.
Otherwise, the program is running normally.
3
 User Manual of MVC SDK Demo (Halcon)")
 User Manual of MVC SDK Demo (Halcon)")
 User Manual of MVC SDK Demo (Halcon)")
 User Manual of MVC SDK Demo (Halcon)")
 User Manual of MVC SDK Demo (Halcon)")
 User Manual of MVC SDK Demo (Halcon)")
 User Manual of MVC SDK Demo (Halcon)")
 User Manual of MVC SDK Demo (Halcon)")
 User Manual of MVC SDK Demo (Halcon)")
 User Manual of MVC SDK Demo (Halcon)")
 User Manual of MVC SDK Demo (Halcon)")
 User Manual of MVC SDK Demo (Halcon)")
 User Manual of MVC SDK Demo (Halcon)")
 User Manual of MVC SDK Demo (Halcon)")
")