
Page 14 of 37
4.3.3 Disassembly and assembly of protective glass
※ The disassembly and assembly shall be completed in a clean
place. When the lens are dismounted, the dust-free gloves or
dust-free fingerstall.
Replace the protective glass 01
Step 1: hold both sides of the handle of the green drawer module
1 with hands to draw out the protective glass in the horizontal
direction. Pay attention to dust prevention and seal the exposed
window on the cavity with textured paper to prevent the dust
from entering the cavity, resulting in pollution, and then replace
the protective glass.
Step 2: Gently press the gland down for 90° rotation, and loosen
it when two lugs align to two notches to take out the gland to
replace the protective glass.
Replace the protective glass 02
Step 1: Take out the green drawer handle module 1 to take out
the handle module 2 in the horizontal direction. Pay attention to
dust prevention and seal the exposed window on the cavity with
textured paper to prevent the dust from entering the cavity,
resulting in pollution, and then replace the protective glass.
Gently press the gland down for 90° rotation, and loosen it when
two lugs align to two notches to take out the gland to replace the
protective glass.
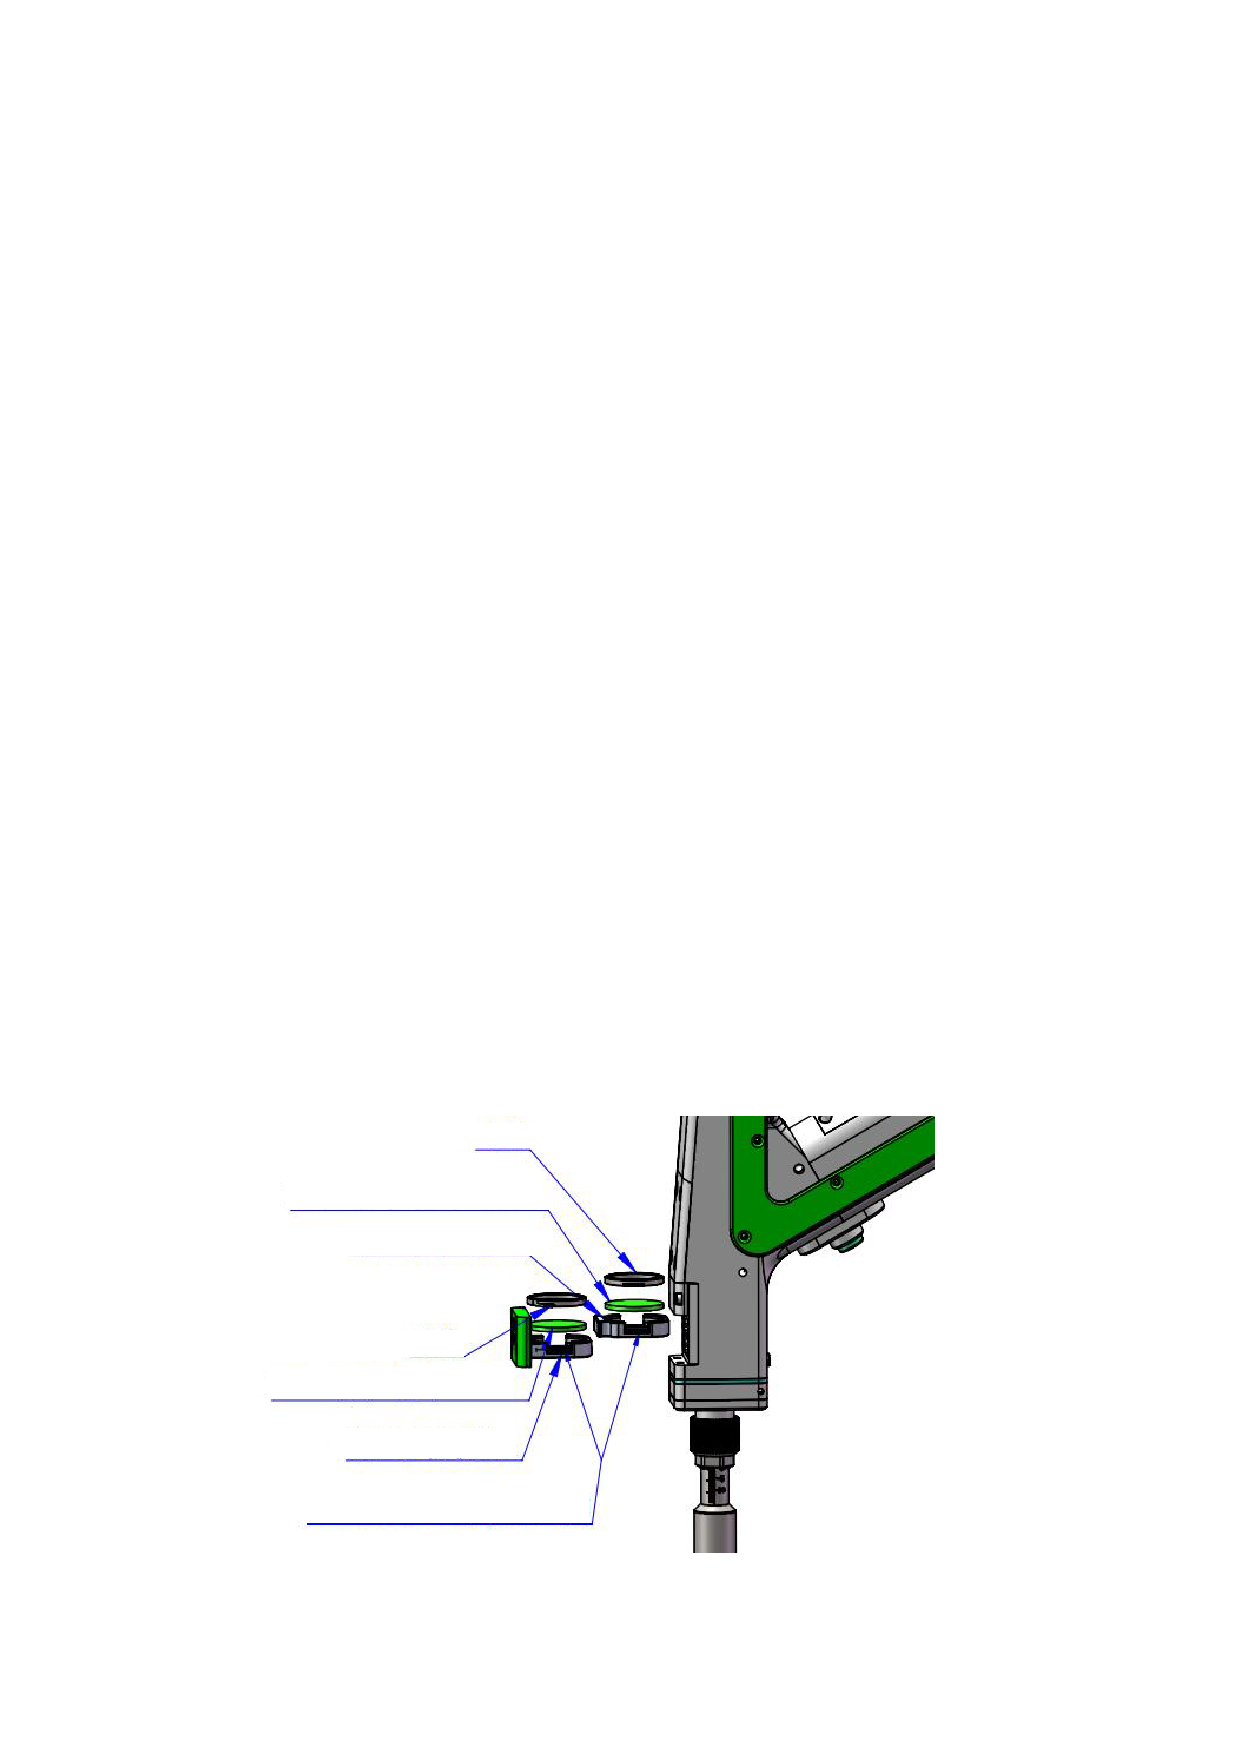
Cap pressing
pressing
D25*2 protective glass (02)
Drawer handle module 2
Cap
pressing
D25*2 protective gplareCsssas(pi0n1g)
Drawer handle module 1
20.5*16*2.3 elastic sealing ring
14
 FWH30-D10C 睿法双摆手持焊接头英文说明书(单送丝四合一)A版本 2024-02-24")
 FWH30-D10C 睿法双摆手持焊接头英文说明书(单送丝四合一)A版本 2024-02-24")
 FWH30-D10C 睿法双摆手持焊接头英文说明书(单送丝四合一)A版本 2024-02-24")
 FWH30-D10C 睿法双摆手持焊接头英文说明书(单送丝四合一)A版本 2024-02-24")
 FWH30-D10C 睿法双摆手持焊接头英文说明书(单送丝四合一)A版本 2024-02-24")
 FWH30-D10C 睿法双摆手持焊接头英文说明书(单送丝四合一)A版本 2024-02-24")
 FWH30-D10C 睿法双摆手持焊接头英文说明书(单送丝四合一)A版本 2024-02-24")
 FWH30-D10C 睿法双摆手持焊接头英文说明书(单送丝四合一)A版本 2024-02-24")
 FWH30-D10C 睿法双摆手持焊接头英文说明书(单送丝四合一)A版本 2024-02-24")