
- You are here:
- AM.CO.ZABuythisCNC Utilities Homepage
- LabelMark-Laser-Marking-Machine
- LabelMark Marking Software Manual, v2.6.pdf
- Page 131 of 154
EzCad2UNI User’s Manual
the front will be marked.
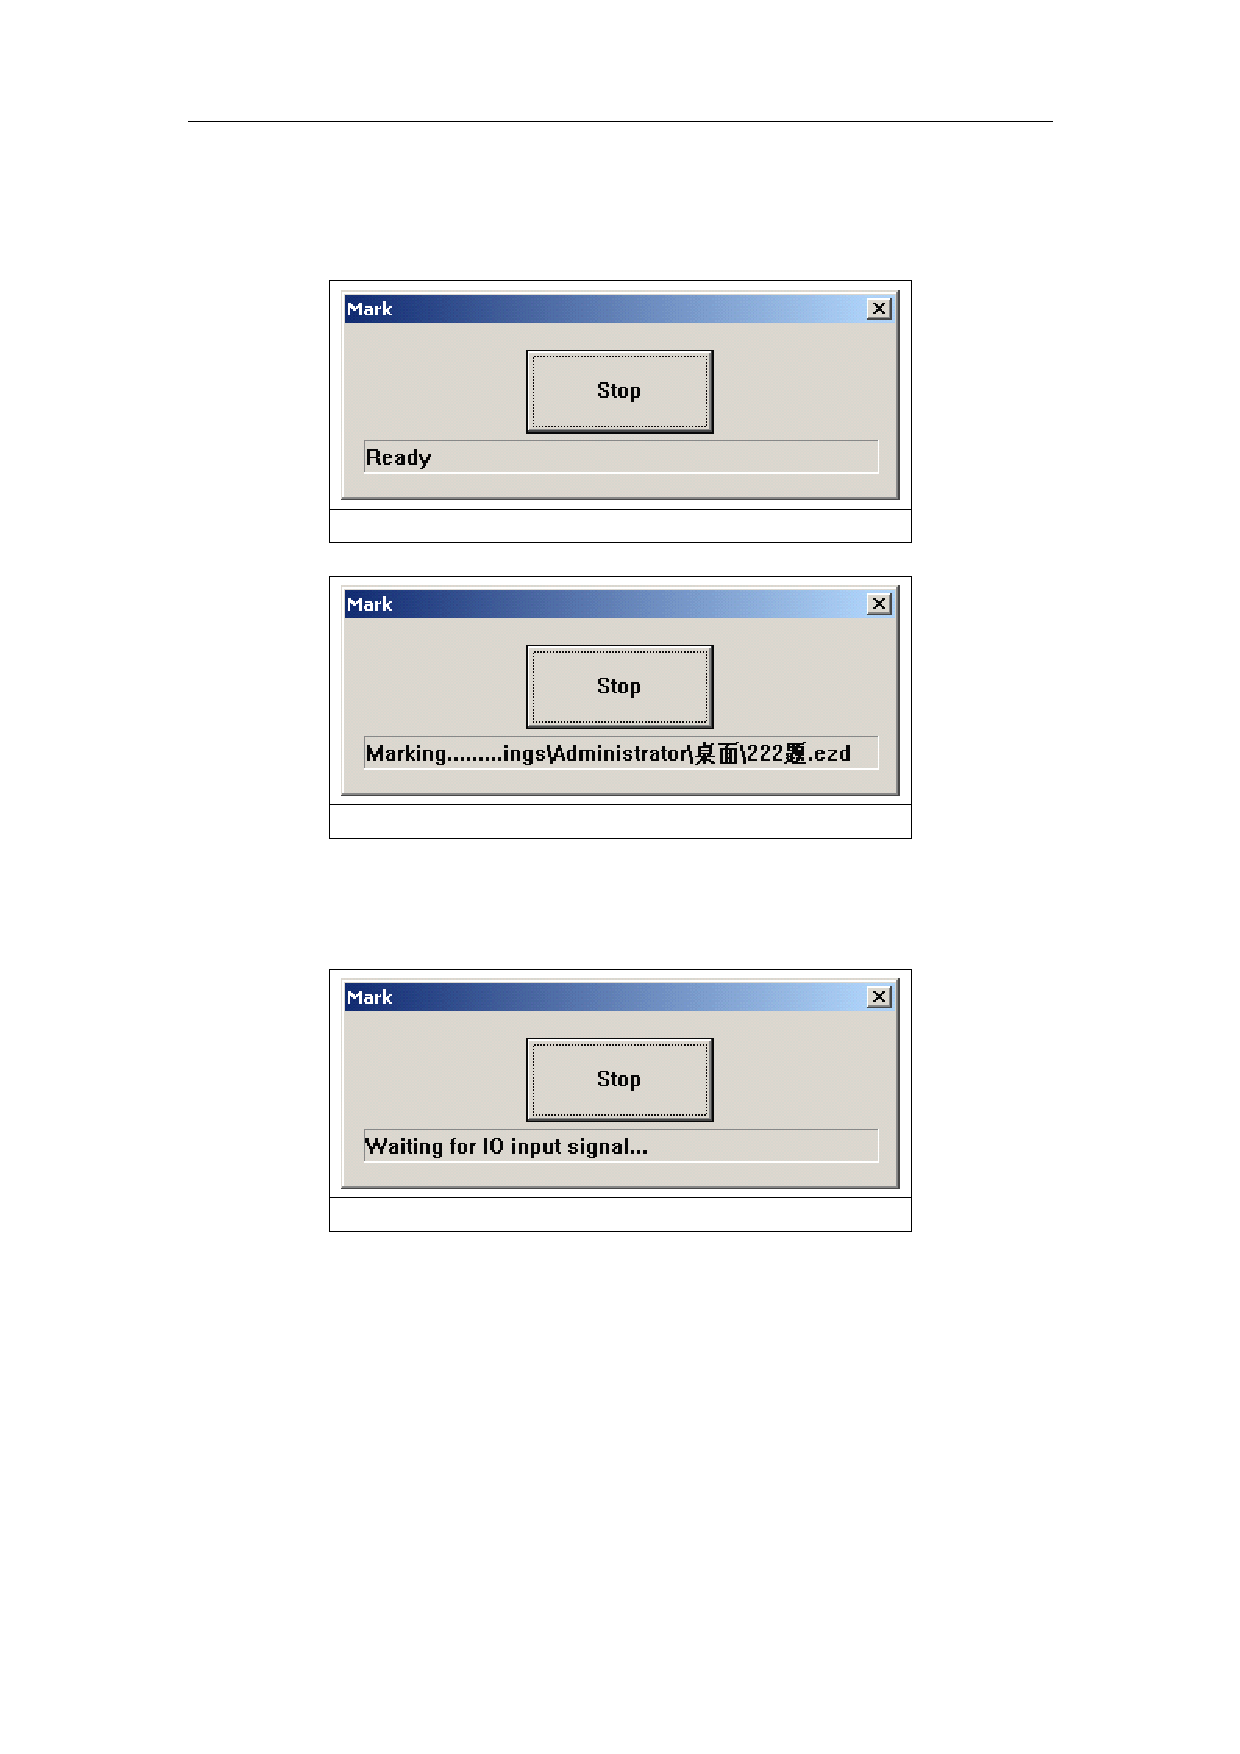
Generally speaking, software accepting signal is the level signal, and press mark button, the
dialog box pops up as Figure 8-39. When the signal accord with setting, shows the figure 8-40,
with the name of file in the following of box.
Figure 8-39
Figure 8-40
If must the accepting signals be pulse signals, should set IO port that doesn’t show in figure
8-38 in start mark IO. For example, port 0-3 show in figure 8-38, should set other port in start
mark IO, as port 6. Press mark , then pop up figure8-41.When the board accept the start mark IO
and setting IO control conditional at the same time, the files will be marked only one time.
Figure 8-41
8.11 ProjectMark
User can change the shape of the marking object in the software according to the shape of the
part, to make sure the marking result will not be distorted on the surface of the cylinder.
Part diameter:left keyboard click on it, will pop up and dialog to input diameter of the part.
Focus length: left keyboard click on it, will pop up and dialog to input focus length of the F-θ
lens.
Note :the 2 parameters effect the marking result directly
125
reserved
All rights
 LabelMark Marking Software Manual, v2.6")
 LabelMark Marking Software Manual, v2.6")
 LabelMark Marking Software Manual, v2.6")
 LabelMark Marking Software Manual, v2.6")
 LabelMark Marking Software Manual, v2.6")
 LabelMark Marking Software Manual, v2.6")
 LabelMark Marking Software Manual, v2.6")
 LabelMark Marking Software Manual, v2.6")
 LabelMark Marking Software Manual, v2.6")