
User Manual of Machine Vision Camera SDK Demo (VC6.0)
When Trigger Mode is selected, you can check the Trigger by Software checkbox.
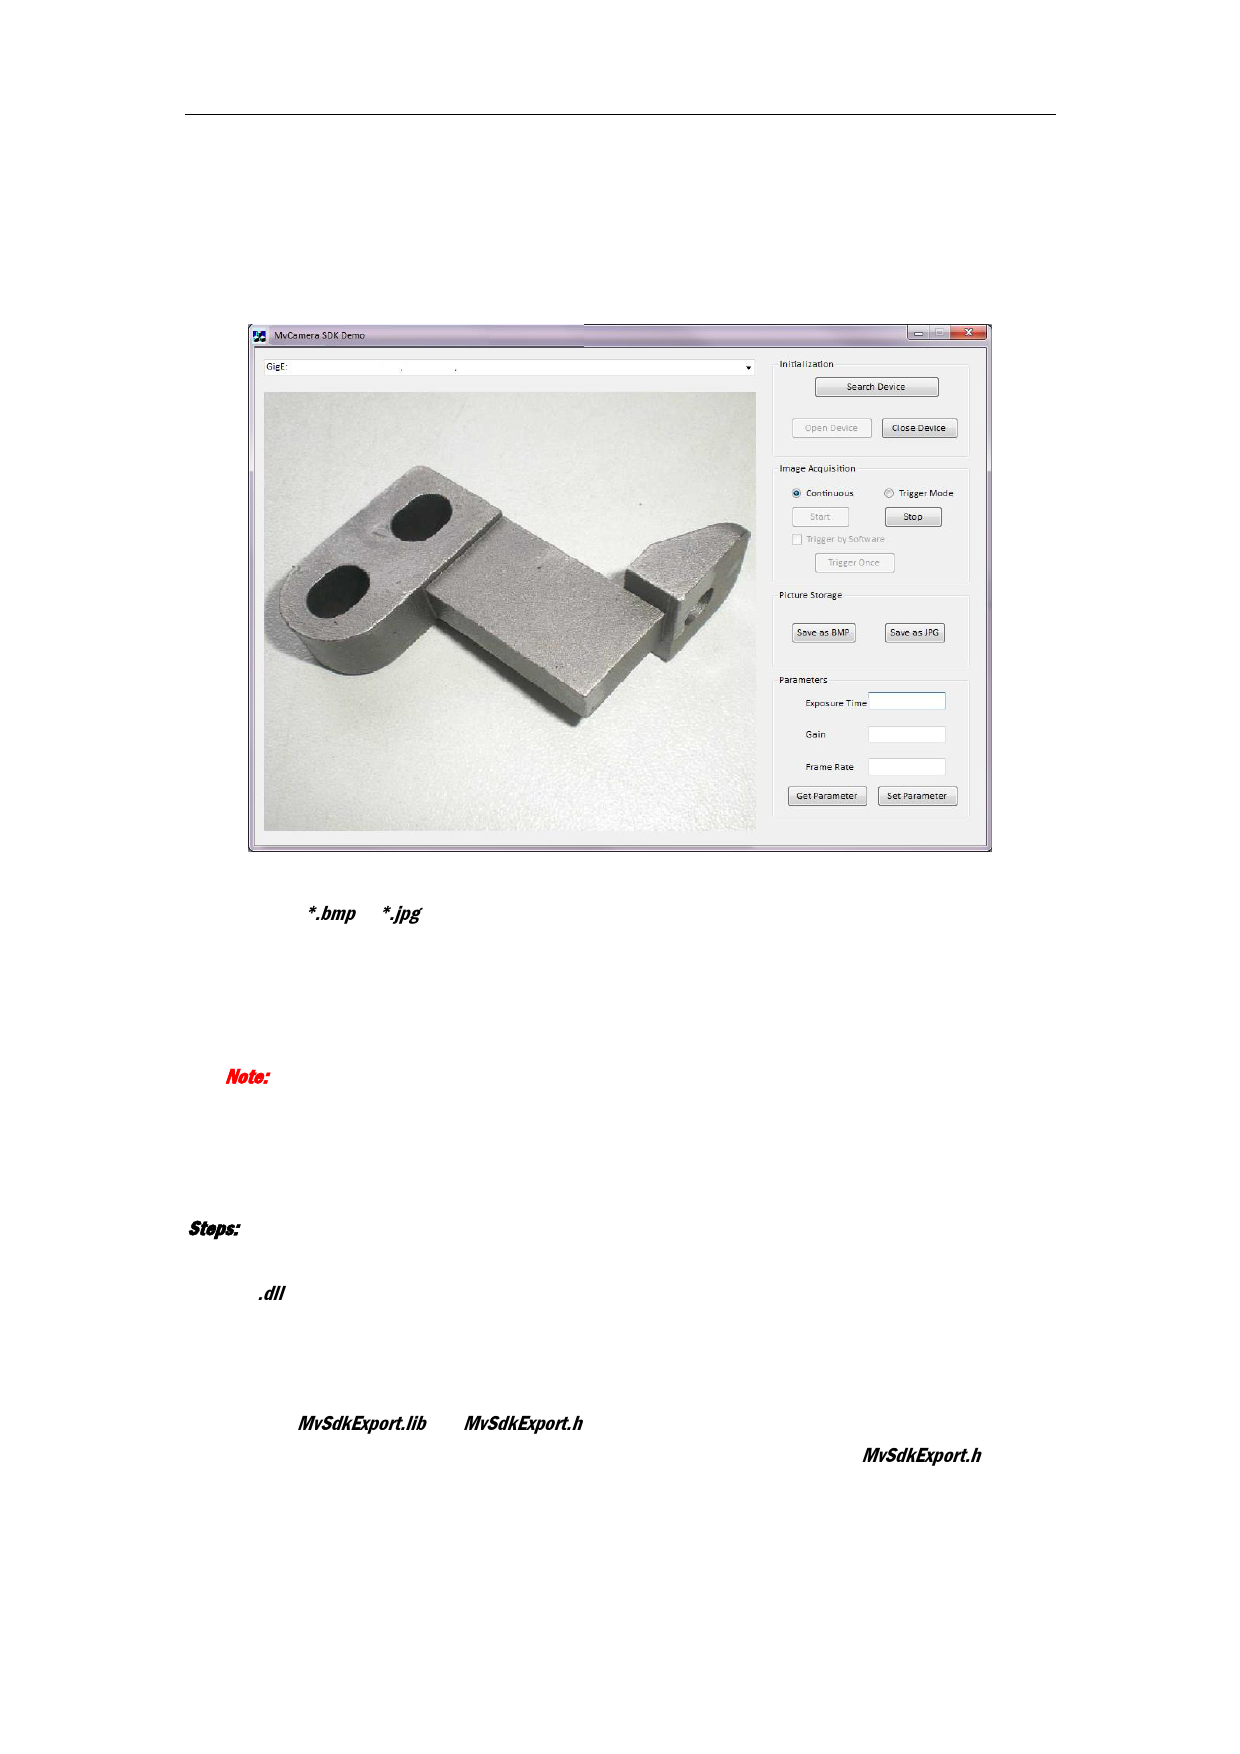
5. Click Start button in the Image Acquisition field to start image acquisition.
The real-time image will display on the left display window if the Continuous mode is selected.
You can also click Trigger Once button to realize software trigger for once if Trigger by Software checkbox
is checked in Trigger mode.
6. Click Save as BMP or Save as JPG button in the Picture Storage field to save the current image, which is
named by *.bmp or *.jpg, to the directory of .exe.
7. Set the value of exposure time, gain and frame rate in the Parameter field.
8. Click Set Parameter button to save the settings.
9. (Optional) You can click Get Parameter button in the Parameter field to refresh the value of exposure
time, gain and frame rate.
Note: If exception or error occurred during the procedure, the prompt dialog will pop up.
2.3 Programming Guideline
Steps:
1. Load DLL.
The .dll file of 32-bit and 64-bit will be put into the directory of environment variables after installing the
MVS.
2. Configure project.
1) Create VS project.
2) Add MvSdkExport.lib and MvSdkExport.h to the project.
3. Reference the library file and header file to call the camera operation function of MvSdkExport.h.
4
 User Manual of MVC SDK Demo (VC60)")
 User Manual of MVC SDK Demo (VC60)")
 User Manual of MVC SDK Demo (VC60)")
 User Manual of MVC SDK Demo (VC60)")
 User Manual of MVC SDK Demo (VC60)")
 User Manual of MVC SDK Demo (VC60)")
 User Manual of MVC SDK Demo (VC60)")
 User Manual of MVC SDK Demo (VC60)")
 User Manual of MVC SDK Demo (VC60)")
 User Manual of MVC SDK Demo (VC60)")
 User Manual of MVC SDK Demo (VC60)")
 User Manual of MVC SDK Demo (VC60)")
 User Manual of MVC SDK Demo (VC60)")
 User Manual of MVC SDK Demo (VC60)")