Virtual Camera is a tool designed for scenarios where constructing a
real setup of camera environment is not feasible. It can simulate cameras and help to
simplify tests during development stage.
-
Click to open the Virtual Camera window.
-
On the Virtual Camera window, select and add the camera models you want to
simulate.
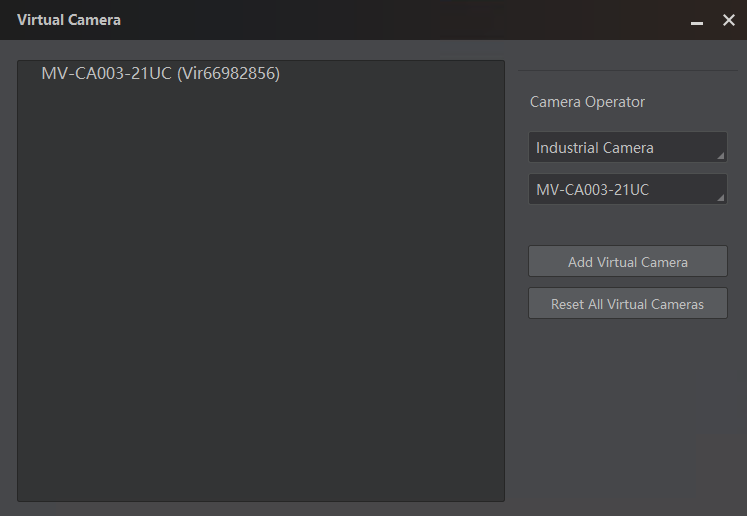 Figure 1 Virtual Camera
Note:
The supported virtual camera models are subject to the
displayed options.
The added virtual cameras will be displayed on the Device
List.
 Figure 2 Virtual Camera
List
Figure 2 Virtual Camera
List
Note:
If there is no virtual camera displayed, click  to refresh.
- Optional:
You can also add virtual cameras via GenTL. Right-click
GenTL and click Select cti
File. Select and open MvProducerVIR.cti
file to display virtual cameras.
-
Double-click a virtual camera to show the feature tree of the camera.
-
Select a pixel format
at
the Image Format Control part.
-
Go to
C:\Windows\Temp\VirtualCamera\Cameras,
and find the file folder named by the virtual camera No.
-
Open the file folder, and then put images in the file folder named Mono8 or
RGB24.
Note:
Make sure the resolution of the images is the same with the
resolution of the camera.
- Optional:
Perform further operations as needed on the Virtual Camera window.
-
Change Online Mode:
Right-click the virtual camera and click Change Online
Mode to switch its mode between online and
offline.
-
Delete a Virtual Camera:
Right-click the virtual camera you want to delete, and click
Delete
to delete it.
-
Reset All Virtual
Cameras: Click Reset All Virtual
Cameras to reset all added virtual cameras to
their
default settings.
Start acquisition of the camera to play the imported images.