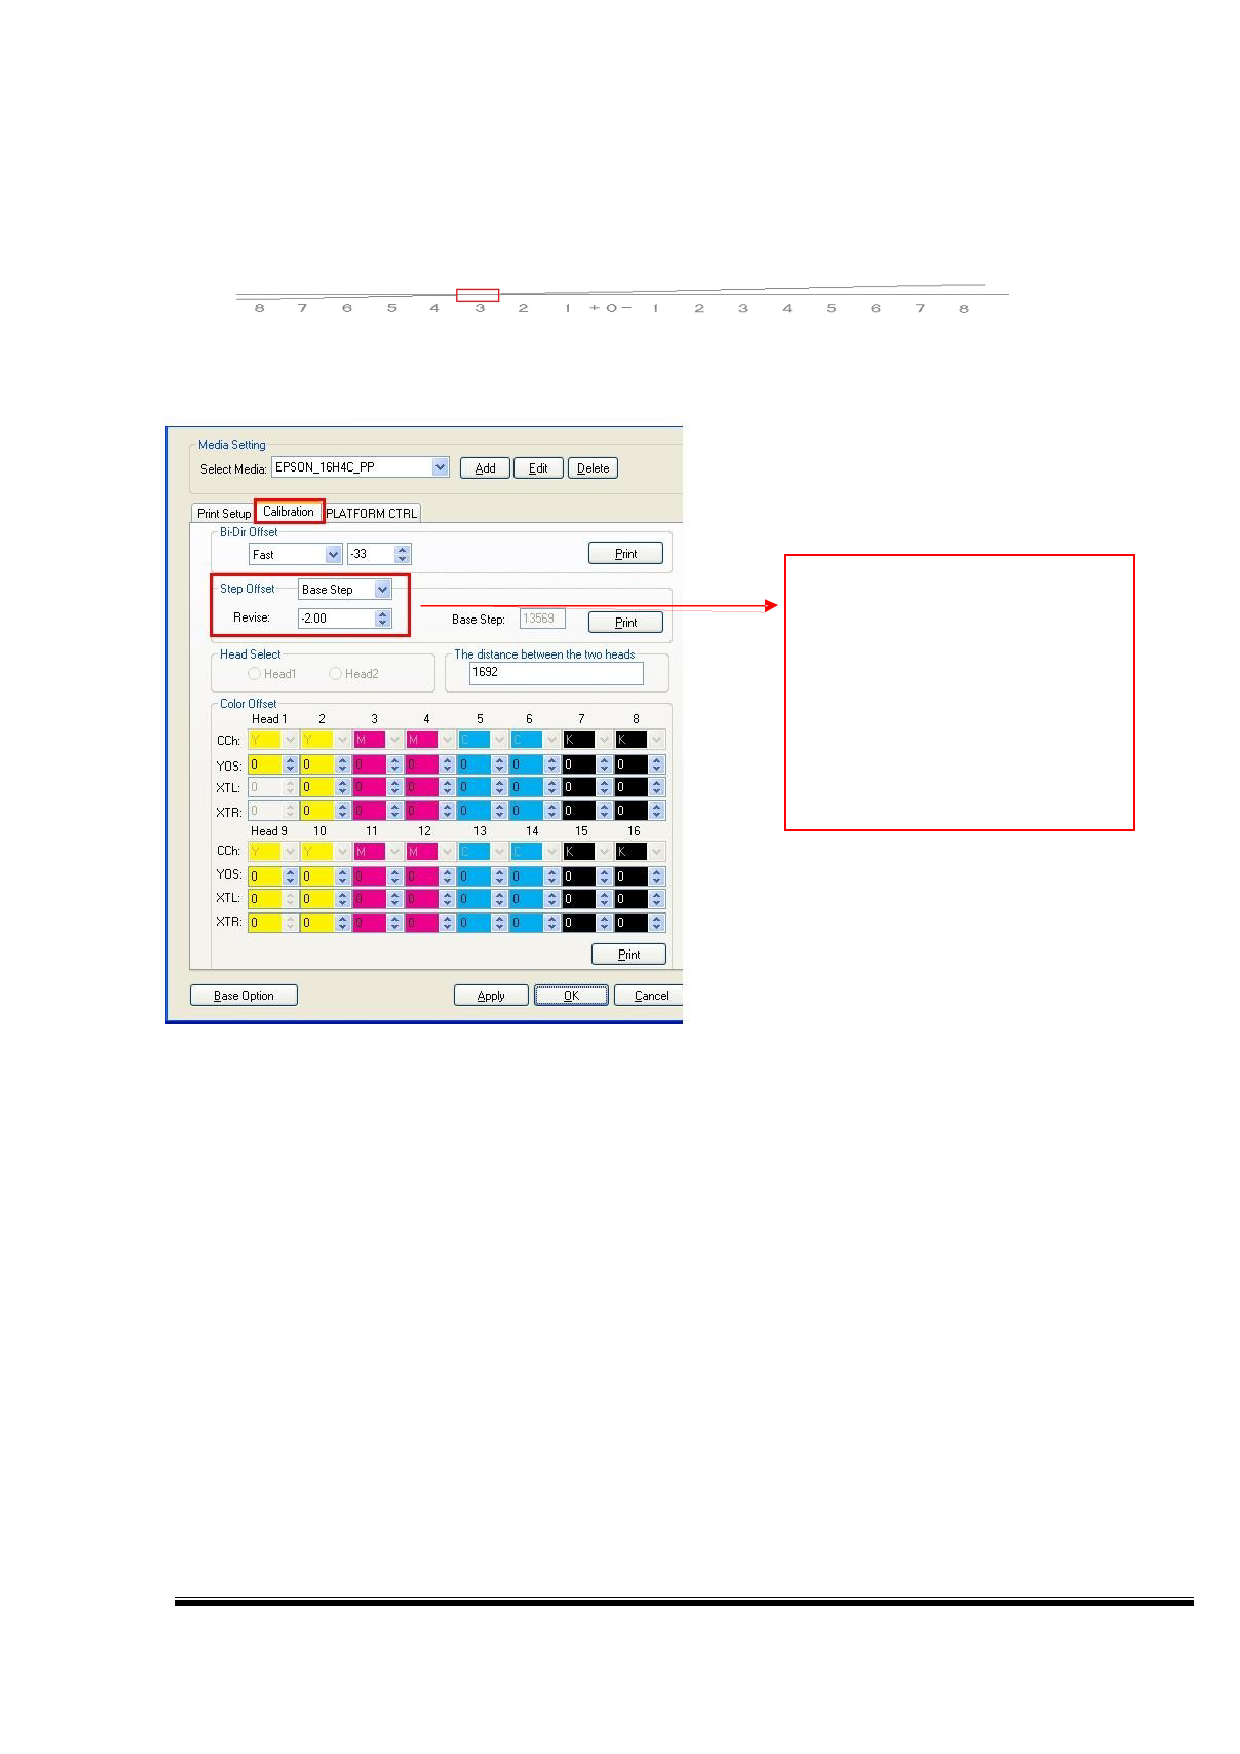
Overlapping on “0” is OK
As shown above, if there is no overlap at the position "0" , but overlap at position “3”, then
we should make correction in the software. Select the main interface toolbar ---- "Settings"
---- "bias correction”, as shown below.
Print a test chart to view which
value is overlapped, then the
original value based on
subtraction operation, the input
point after the "Apply" and then
print a test chart view, until the 0
position overlap so far.
When the black line overlap at the “0” position, proves the base step is accurate; if overlap
at the position “3”, we should plus 3 in the block behind the "Revise", and then click "Apply",
and print the test chart again until overlap at the “0” position. On the contrary, if it is
overlapped at the position “-5”, we should minus 5, and then click "Apply", and print the test
chart again until overlap at the “0” position.
③ Head Select: When using the a single head for printing, you should select which head to
use in the software.
④ The distance between the two heads: When print the head status, if there is a gap
between the left and right heads, you should adjust the distance between the two heads, the
original value plus or minus, until aligned.
⑤ Color offset: color offset of the printheads, divided into the left print color offset and right
print color offset , click “Print calibration graph” is shown below:
第 41 页 共 89 页

