- You are here:
- AM.CO.ZABuythisCNC Utilities Homepage
- EasyRoute-CNC-Router
- Component Manuals
- VICSION VS500 Inverter 说明书.pdf
- Page 11 of 88
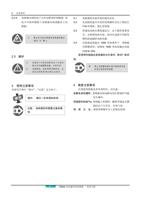
6 变频器的安装
安装:
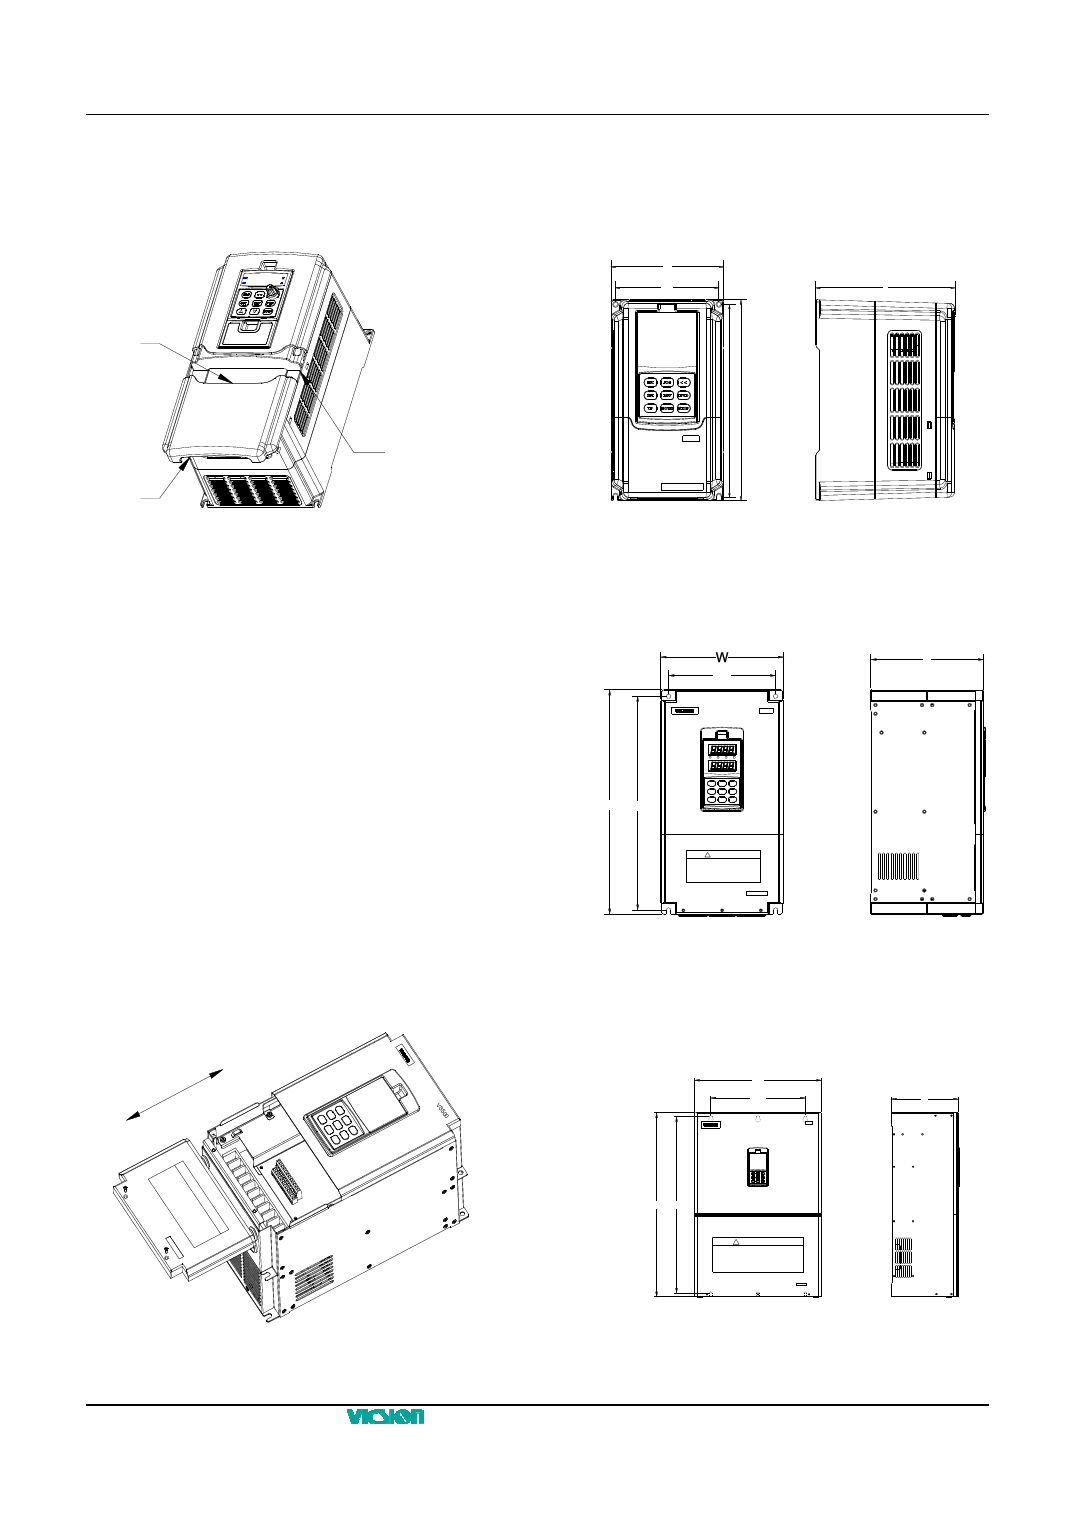
先将盖板倾斜 15 度左右,再将其顶部的固定片插入
壳体固定槽,用力压下盖板,至听见“咔”的一声,
即表示盖板已到位。
2.4 变频器的安装尺寸
2.4.1 变频器的安装尺寸Ⅰ
适用机型:VS500-4T0015~VS500-4T0075,
VS500-2T0015~VS500-2T0037,如图 2-4-A 所示。
W
W1
D
固定片
提手槽
卡扣
图 2-3-A 塑壳盖板的拆卸与安装
2.3.2 盖型盖板的拆卸与安装
适用机型:VS500-4T0110~VS500-4T1100,
VS500-2T0055~VS500-2T0550。
盖型盖板的拆卸与安装如图 2-3-B 所示。
拆卸:
1. 取下盖板底部的两个螺丝钉。
2. 将盖板沿图标方向外平移。
安装:
1. 将盖板平行于机箱放下,使盖板刚好卡在机箱两
侧。
2. 沿图标方向向前推盖板,使其顶部的固定片插入
壳体固定槽。
3. 上紧下盖板表面底部的两个螺丝钉。
H1 H
图 2-4-A 变频器安装尺寸
2.4.2 变频器的安装尺寸Ⅱ
适用机型:VS500-4T0110~VS500-4T0750,
VS500-2T0055~VS500-2T0370,如图 2-4-B 所示。
D
W1
VS500
H H1
! WARNING
1.Refer to the instruction manual before installation
and operation.
2.Do not connect AC power to output terminals UVW.
3.Do not remove any cover while applying power
and at least 10min. after disconnecting power.
4.Securely ground(earth) the equipment.
图 2-4-B 变频器的安装尺寸
2.4.3 变频器的安装尺寸III
适用机型:VS500-4T0900~VS500-4T2200,
VS500-2T0450~VS500-2T1100,如图 2-4-C 所示。
W
W1
D
VS500
H H1
! WARNING
1.Refer to the instruction manual before installation and
operation.
2.Do not connect AC power to output terminals UVW.
3.Do not remove any cover while applying power and
at least 10min. after disconnecting power.
4.Securely ground(earth) the equipment.
图 2-3-B 盖型盖板的拆卸与安装
图 2-4-C 变频器的安装尺寸
VS500 系列通用型变频器 使用手册

