can lead to failure.
STORAGE
If the electrospindle will be kept for a period of time, make sure it is not affected by the natural environment,
especially moisture, dust and other forms of damage to the air or storage environment.
Regularly check the general condition of the electrospindle to avoid performance degradation. Once a
month manual rotation of the electrospindle to ensure that the bearing can move freely.
Storage temperature: from -5 ℃ (23 ℉) to 55 ℃ (131 ℉)
Non condensing relative humidity: from 5% to 90%
LIFT THE ELECTROSPINDLE MOUNTED IN THE CRATE.
The electrospindle is packed in a wooden crates filled with polystyrene foam for shipment. The
electrospindle is in a plastic bag and coated with protective grease to prevent abrasion. Please use a piece
of clean cloth to wipe off the protective grease.
Note: the polystyrene foam and the plastic bag are all plastic and must be treated in accordance with the
plastic disposal method.
Do not lift the electrospindle by pulling the cooling fan cover. This cover may break and
the electrospindle will fall and harm the operator.
INSTALLATION
CHECK
Before carrying out any operations, CHECK:
That no part of the electrospindle has been damaged during transport and/or handling;
That connectors are not damaged.
PREPARATION OF THE AUXILIARY SYSTEMS OF THE PLANT
The preparatory work (e.g. providing electricity, air systems etc.) is the responsibility of the customer. The
electric power lead of the electrospindle must have the necessary transmission power. The connection to
the electricity mains supply must be carried out by qualified personnel. You are reminded that the customer
is responsible for all the electricity supply as far as the connectors of the electrospindle.
The customer is also reminded of the need to provide all the safety conditions necessary for the“earthing”
of the electrospindle.
The earthing system must conform to the standards in force in the country of installation and must be
inspected at regular intervals by qualified personnel.
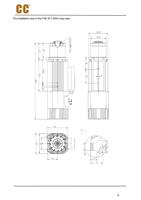
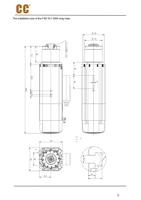
For installation layout and connection diagram, see below sections.
13

